


4
ELECTRICAL REQUIREMENTS
This grinder has an attached cordset and requires 2-wire, grounded service rated 120 volts ac, 15 amp,
single phase, 60 Hz for 120V models and 230 volts ac, 10 amp single phase, 50 Hz for 230V models..
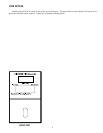
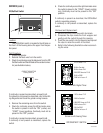
OPERATING CONTROLS
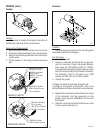
Off/On/Start Switch
OFF - (upper position) Switching to this position stops all operation of the grinder.
ON - (middle position) The switch will return to this position after a grind cycle has begun and
will remain in this position after grinding has ceased.
START - (lower, momentary position) Pressing the switch initiates a timed grind cycle.
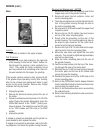
Hopper Selector Switch
Left - Switching to this position allows beans to be dispensed from
the left hopper.
Right - Switching to this position allows beans to be dispensed
from the right hopper.
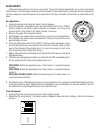
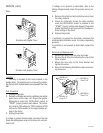
Batch Selector Switch (Optional)
Urn - Switching to this position allows the correct amount of beans
to be dispensed when grinding a large batch.
CARAFE - Switching to this position allows the correct amount of
beans to be dispensed when grinding a small batch.
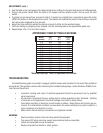
Dispense Timer
The dispense timer controls the amount of beans that will leave the hopper in a grind cycle. The timer can be
adjusted to dispense a different amount from each hopper. The scale is from 0.4 to 150.0 seconds. Refer to the
Adjustments section for timer setting chart (page 7).
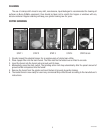
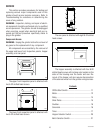
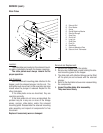
INITIAL SET-UP
1. Open the top lid. Clear all foreign objects and shipping material from the hopper
compartment and the entrance to the grind chamber.
2. Remove the lower front inspection panel.
3. Plug-in the grinder.
4. Select either the right or left hopper with the selector switch. Do not press
the start switch.
5. If grinder has an analog timer, proceed to step 6. If grinder has a digital
timer, momentarily press the center (DISPLAY) button on the dispense timer
panel. The readout will indicate the present timer setting in seconds and will
remain displayed for five minutes.
6. Adjust the timer setting to obtain the desired amount of coffee for the se-
lected hopper.
7. Repeat steps 4 thru 6 for the other hopper.
8. Fill the hopper compartments with whole bean coffee. (Capacity 6 pounds each). The grinder is now ready
for use.
P633
P596
10218 051603