9
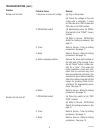
Probable Cause
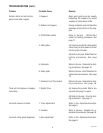
1. Hoppers
2. Bottoms of hoppers
3. Off/On/Start switch
4. Slide plates
5. Solenoids
6. Shear plate
7. Solenoid Limit Thermostat
1. Digital Timer
1. Timer adjustment
2. Snubber
1. Burr adjustment
Remedy
Begin each grind cycle by visually
inspecting the hoppers for ample
supplies of whole bean coffee.
Foreign materials must not block the
openings at the bottom of the hop-
pers.
Refer to
Service
- Off/On/Start
switch for testing procedures. See
page 11.
(A) Check to see that the slide plates
move freely to allow beans to travel
into the grind chamber.
(B) Refer to
Service
-Slide Plates for
testing procedures. See page
15.
Refer to
Service
- Solenoids for test-
ing procedures. See page 16.
Refer to
Service
- Grind Chamber for
replacement procedures. See page
13.
Refer to
Service
- Solenoids for test-
ing procedures. See page 16.
(A) Unplug the grinder. Wait a few
seconds and plug it in again.
(B) Refer to
Service
- Timer for test-
ing procedures. See page 17.
Refer to the
Adjustments
section.
See page 6.
Refer to
Service
- Snubber for re-
placement procedures. See page 16.
Refer to the
Adjustments
section.
See page 6.
TROUBLESHOOTING (cont.)
Problem
Grinder starts, but will not dis-
pense from either hopper.
Timer will not display or displays
incorrectly.
Incorrect amount of coffee.
Incorrect coffee grind dispensed.
10218 091599


