


6
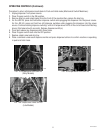
INITIAL FILL
CAUTION: The dispenser must be disconnected from the power source throughout the initial fill except when
specified in the instructions.
1. Remove drip tray assembly and splash panel from the dispenser. Replace the drip tray.
2. Connect the water source to the back of the dispenser.
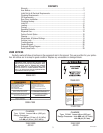
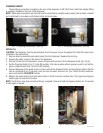
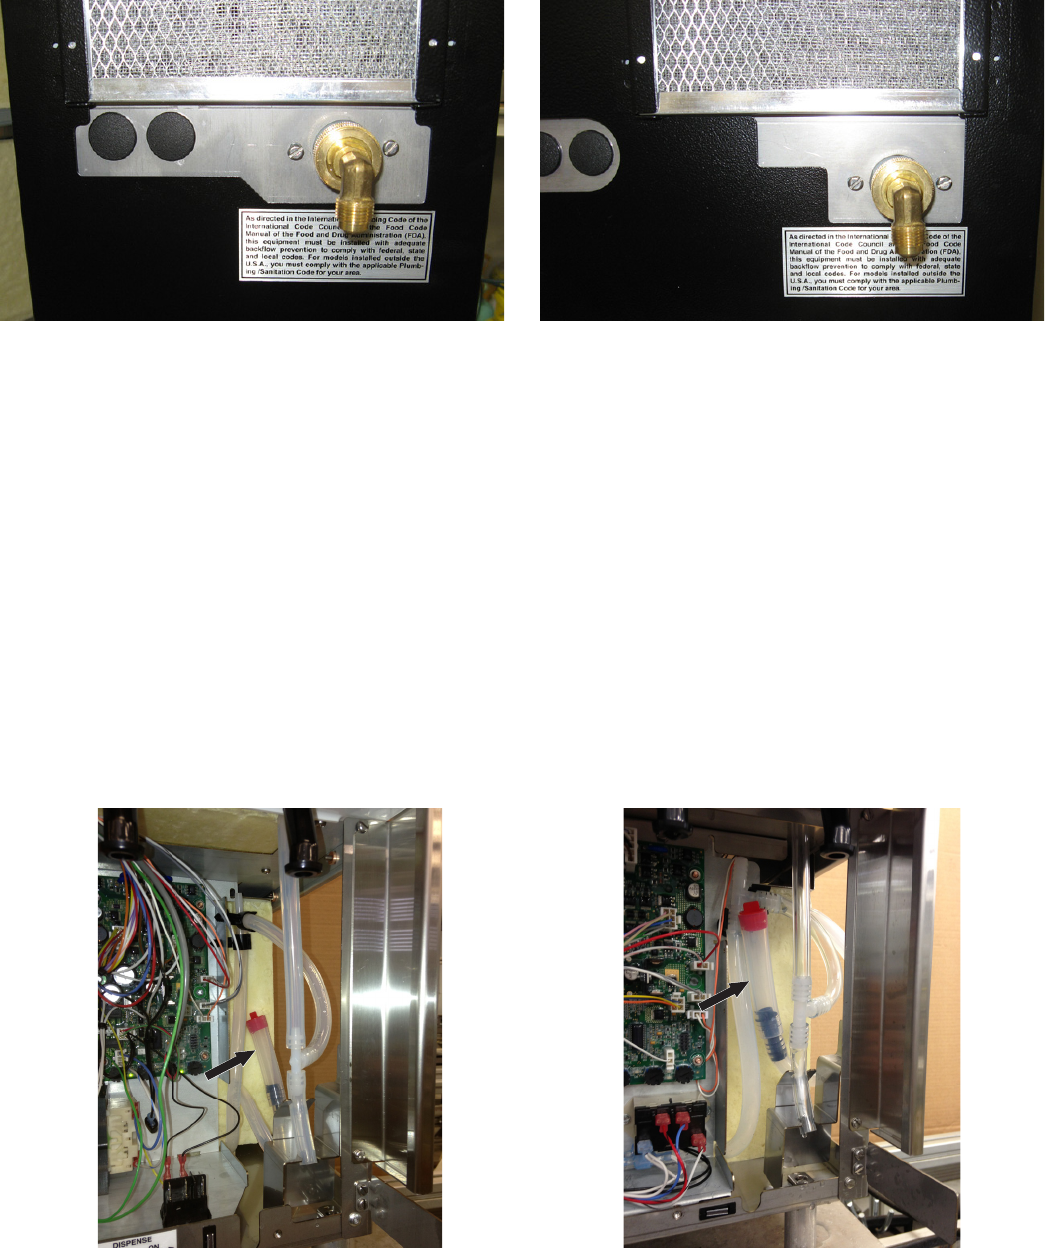
3. Pull the fill tube from the dispenser, remove the plug and connect it to the dispense nozzle (Fig. 5 & 6).
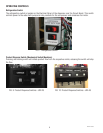
4. Set the Program Switch (Fig. 7) to the ON position. (On older models without program switch, set the Dis-
pense Lockout Switch (Fig. 13) to the OFF position)
5. Connect dispenser to the power source. Press and hold the dispense button for the dispense station that the
tube is connected to for 10 seconds, until you hear the water valve turn on. (For Portion Control machines,
press and hold the PLUS/STOP switch)
6. Monitor the water bath fill level until water starts to trickle from the overflow tube. Then press the dispense
button again to stop the fill process.
NOTE: The fill timer may time out before filling is complete. Press and hold the dispense button for 10 seconds
to start again if needed.
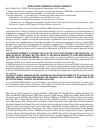
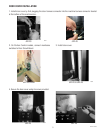
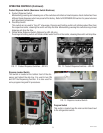
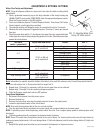
FIG 1 Plumbing Connections - JDF-2S
PLUMBING HOOKUP
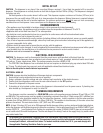
The plumbing connection is located on the rear of the dispenser. A 3/8" (9.52 mm) male flare adapter fitting
is supplied, installed on the rear of the dispenser.
NOTE - Water pipe connections and fixtures directly connected to a potable water supply shall be sized, installed
and maintained in accordance with federal, state and local codes.
P3580-1
FIG 3 Initial Fill Hose - JDF-2S
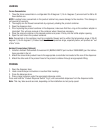
FIG 2 Plumbing Connections - JDF-4S
FIG 4 Initial Fill Hose - JDF-4S
P3841
44744.2 110813