


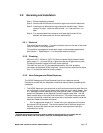
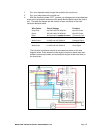
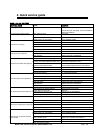


2.2.6. Installation Checklist
Dishmachine checked for concealed damage.
Hot water supply is 140° (60°C)
Incoming water supply line is ¾”.
Incoming water supply is 6 gpm minimum capable at 20 psi flow pressure.
Machine circuit breaker is properly sized.
Service voltage and phase type are correct to machine data plate.
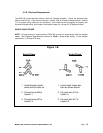
High leg of voltage is connected to L2 (three-phase).
Dishmachine is properly ventilated.
Floor drain plumbing is installed with air gap. MUST MEET LOCAL CODES.
Dishmachine is properly grounded.
Dishmachine is properly leveled.
Dishrack guides are adjusted to level of dishtable.
Machine circuit breaker is labeled
D/W
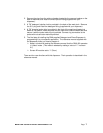
2.2.7. Machine Start-Up Procedures
1. Place the scrap baskets over the wash tanks.
2. Secure the wash & rinse arms and check the free-spin.
3. Open the control panel and select ‘normal” toggle switch position.
4. Adjust the rinse pressure to 20 PSI flow pressure using the regulator and the gauge
provided on machine.
a. Turn the power switch to the “Off” position.
b. Close doors and open the hand-operated fill valve until the water overflows into
the scrap trap.
c. Turn the power switch to “on” position. SEE NOTE FOR BOOSTER HEATER
BELOW.
d. While holding “flush” toggle switch, to activate the water solenoid, adjust the
pressure regulator until the gauge reads 20 PSI. NOTE: Booster heater is filled
during this procedure.
5. Connect the detergent and rinse dispenser to the power block supplied & labeled inside
the control panel (208-220) volt.
6. Remove the plug from the mixing chamber and install the rinse injection fitting.
7. A 7/8” chemical probe hole is provided in the wash tank behind wash tank heater cover.
8. A 7/8” detergent fitting hole is provided in the wash tank behind the machine.
9. Check the machine operating temperatures. Adjust if necessary.
a. After the machine has warmed up for five to ten minutes (5 – 10 min.), observe
the wash and rinse temperatures. The wash temperature must be 155°F
minimum. The rinse temperature must be 180°F minimum. If necessary, adjust
the temperatures by removing the panel in front of the respective heater and
turning the adjustment stem clockwise to increase.
MODEL CMA-180 INSTALLATION & OPERATION Rev. 2.04 Page
10