


Installing your Cooker Hood
6
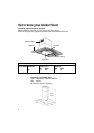
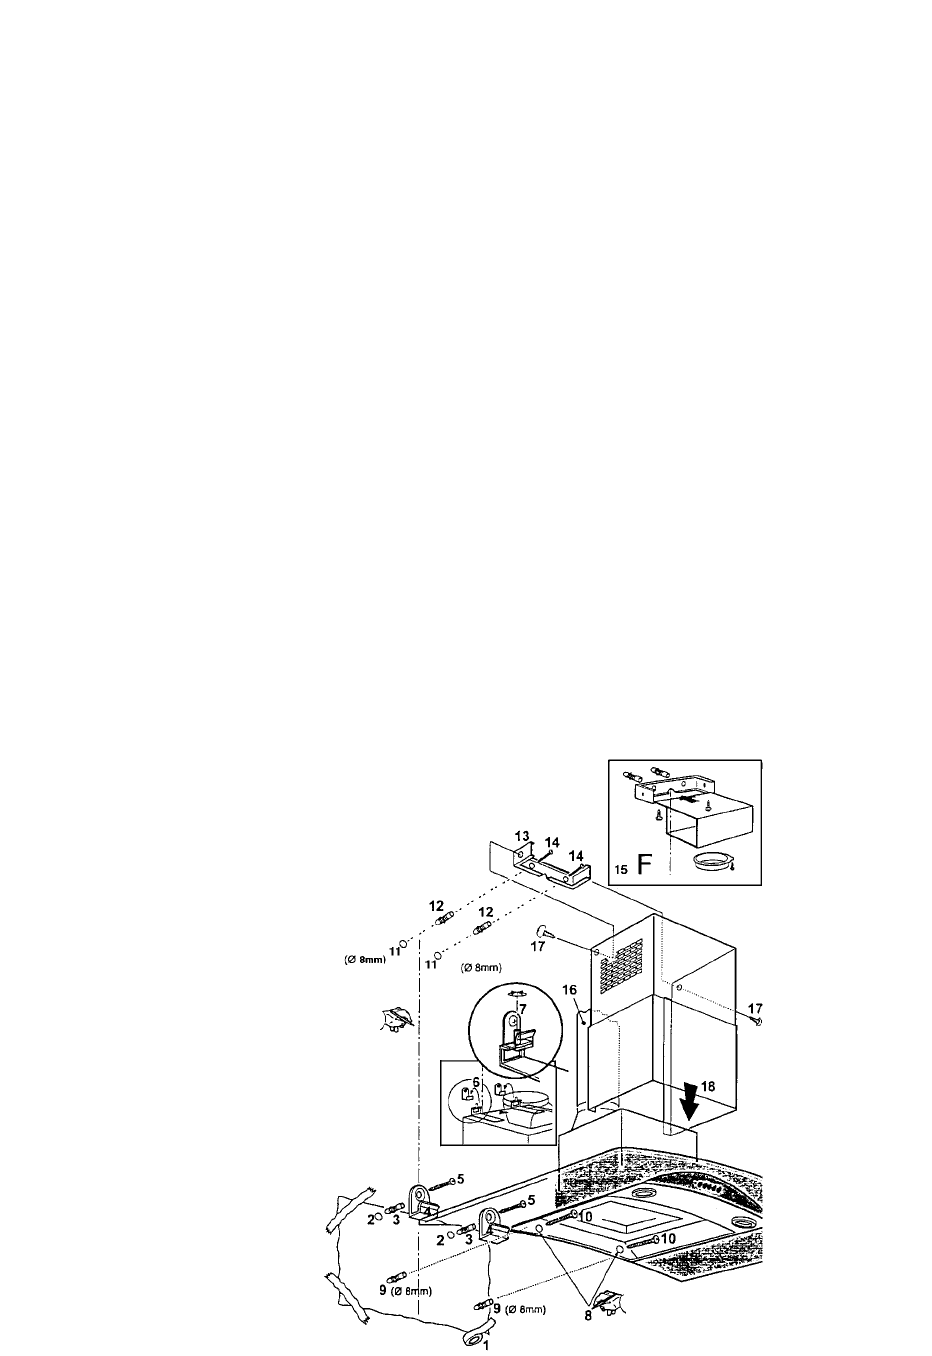
Wall Mounted Model
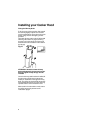
Lower Fixings
1. Draw a vertical line on the wall,from the
centre of the cooking appliance,up to the
ceiling. Check the line is vertical using a
spirit level.
2. Put the template provided on the wall
paying particular attention to positioning
distances (see page 5).
3. Drill two holes (Fig.6 2) and insert wall
plugs.
3. Fit two hooks in the drilled holes (Fig.6 4)
using screws (Fig.6 5).
Upper Fixing Bracket
1. Draw a horizontal line through the vertical
line,15mm from the ceiling. Check the line
is level using a spirit level.
2. Place the chimney support bracket
(Fig.6 13) over the line,ensuring the
bracket is level. Mark the positions for the
fixing screws (Fig.6 14).
3. Drill the two holes for the wall bracket,
insert the wall plugs and fit the bracket
using the screws provided.
If the hood is to be installed onto a hollow or
plasterboard wall,special fixings will be
required.
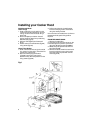
FIXING THE CANOPY HOOD:
1. Remove the metal filter.
2. Hang the rear of the hood canopy on the
hooks and adjust the position of the hood
using the adjusting screws (Fig.6 6 & 7).
3. Whilst the hood is positioned,mark the
two holes (Fig.6 9).
4. Remove the hood and drill the two holes.
Insert the wall plugs,return the hood to
the hooks and fix in place with the two
screws (Fig.6 10).
Fig.6