


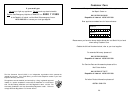
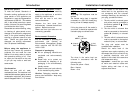


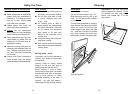


Data badge
Lower part of front frame and rear of
appliance.
Pressure setting
Cat I
2H (GB/IE) G20 @ 20mbar
Gas category
I
2H
Appliance class
Class 3
Ignition
Mains operated re-ignition generator
Oven light
25W
Electrical supply
220 - 240V ~ 50Hz, 44W
Grill
Nominal Rate Qn 2.4kW
Injector 1.12mm
Spark gap 3 - 4mm
Oven
Bray type burner, sheet steel body,
stainless steel flame strip
Nominal Rate Qn 2.5kW
Injector 1.25mm
Spark gap 3 - 4mm
Thermostat bypass 50
Oven injector - If the injector is
removed or replaced for any reason, it
is mandatory to apply Hylomar PL32
or Plasticol X10 sparingly to the thread
prior to (re) fitting.
Maximum heat input
∑Qn 2.5kW
Countries of destination
GB - Great Britain, IE - Ireland
28
Technical Data
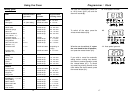
User Section . . . . . . . . . . . . . . . . . . . . . . . . . . . . . . . . . . . . . . 2 - 17
Introduction . . . . . . . . . . . . . . . . . . . . . . . . . . . . . . . . . . . . . . . . . . . . . . . . . 2
Be Safe - Not Sorry. . . . . . . . . . . . . . . . . . . . . . . . . . . . . . . . . . . . . . . . . . . . 5
Using the Grill . . . . . . . . . . . . . . . . . . . . . . . . . . . . . . . . . . . . . . . . . . . . . . . 6
Using the Oven . . . . . . . . . . . . . . . . . . . . . . . . . . . . . . . . . . . . . . . . . . . . . . 8
Oven furniture . . . . . . . . . . . . . . . . . . . . . . . . . . . . . . . . . . . . . . . . . . . . . . . 9
Cooking frozen & chilled foods . . . . . . . . . . . . . . . . . . . . . . . . . . . . . . . . . . 10
Slow cooking . . . . . . . . . . . . . . . . . . . . . . . . . . . . . . . . . . . . . . . . . . . . . . . 10
Traditional fruit cakes . . . . . . . . . . . . . . . . . . . . . . . . . . . . . . . . . . . . . . . . . 11
Roasting turkey. . . . . . . . . . . . . . . . . . . . . . . . . . . . . . . . . . . . . . . . . . . . . . 11
Baking guide . . . . . . . . . . . . . . . . . . . . . . . . . . . . . . . . . . . . . . . . . . . . . . . 12
Roasting guide . . . . . . . . . . . . . . . . . . . . . . . . . . . . . . . . . . . . . . . . . . . . . . 13
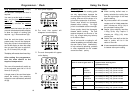
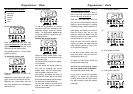
Programmer / Clock . . . . . . . . . . . . . . . . . . . . . . . . . . . . . . . . . . . . . . . . . . 14
Cleaning . . . . . . . . . . . . . . . . . . . . . . . . . . . . . . . . . . . . . . . . . . . . . . . . . . 19
Installation Instructions . . . . . . . . . . . . . . . . . . . . . . . . . . . . . 21 - 27
Regulations & Standards, Ventilation requirements . . . . . . . . . . . . . . . . . . . . . 21
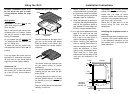
Step 1: Prepare installation . . . . . . . . . . . . . . . . . . . . . . . . . . . . . . . . . . . . . 22
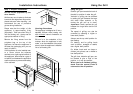
Step 2: Connect to gas supply . . . . . . . . . . . . . . . . . . . . . . . . . . . . . . . . . . . 24
Step 3: Connect to electricity supply . . . . . . . . . . . . . . . . . . . . . . . . . . . . . . . 25
Step 4: Check edging strip . . . . . . . . . . . . . . . . . . . . . . . . . . . . . . . . . . . . . 26
Step 5: Secure appliance into housing unit . . . . . . . . . . . . . . . . . . . . . . . . . . 26
Step 6: Commissioning . . . . . . . . . . . . . . . . . . . . . . . . . . . . . . . . . . . . . . . . 27
Technical Data . . . . . . . . . . . . . . . . . . . . . . . . . . . . . . . . . . . . . . . 28
Customer Care . . . . . . . . . . . . . . . . . . . . . . . . . . . . . . . . . . . . . . . 29
Please keep this handbook for future reference, or for anyone else
who may use this appliance.
1
Contents