14
Installation Instructions
Installation Checklist
WARNING
To ensure proper installation, the installer must complete
the checklist below to make sure that no part of the in-
stallation has been overlooked.
Is the oven mount on a level platform?
□
Is the oven wired and grounded according to these □
instructions and in accordance with all applicable elec-
trical codes? (See Pages 4 and 9-11.)
Is the oven secured into the cabinet with all the mount-
□
ing screws [four (4) on single oven models, six (6) on
double ovens.] See Page 12.
Is/are the oven door(s) properly installed according to
□
these instructions. (See page 13.)
Has proper operation been verified? □
Have any problems been noted on the warranty card □
or during the on-line activation? Has the warranty been
activated on-line or the warranty card been filled out
completely and mailed?
Verifying Proper Operation
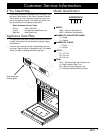
For stainless steel ovens, peel off the protective layer 1.
of plastic that covers the stainless steel surfaces.
Slide the oven racks onto the supports inside the oven 2.
chamber(s) according to the use and care manual.
Turn on power to the oven at the circuit breaker or fuse 3.
box.
Set the clock according to the use and care manual.4.
Press the 5. BAKE key on the control panel. The default
bake temperature should appear on the display.
Press 6. START. After approximately three (3) minutes,
the lower heating element should glow red through the
glass.
Press 7. CANCEL/SECURE.
Press the 8. BROIL key on the control panel. The default
broil temperature should appear on the display.
Press 9. START. After approximately three (3) minutes,
the upper heating element should glow red. On some
ovens the element is behind the glass panel on the
ceiling of the oven.
If the oven does not operate properly, follow these 10.
troubleshooting steps:
Verify that power is being supplied to the oven.•
If power is being properly supplied, turn off power at •
the circuit breaker or fuse box an check the electrical
connections.
Turn on power and repeat the above heating test.•
If the appliance still does not work, contact an autho-•
rized Dacor service company. If you are unable to
locate a service representative, please contact the
Dacor Customer Service Team at (800) 793-0093, or
visit us on the web at www.Dacor.com.
Do not attempt to repair the appliance yourself. If you •
need service, be sure to have the model and serial
numbers available when you call. See page 3.
NOTE
For double ovens, test oven operation for both the upper
and lower ovens.


