


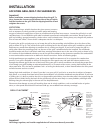

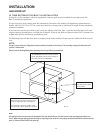
10
grill
exhaust
3" (to non-combustible
construction / minimum
lid clearance)
12" (to combustible
construction)
10"
22"
25-1/2"
1-1/2"
2"
13-3/4"
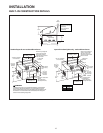
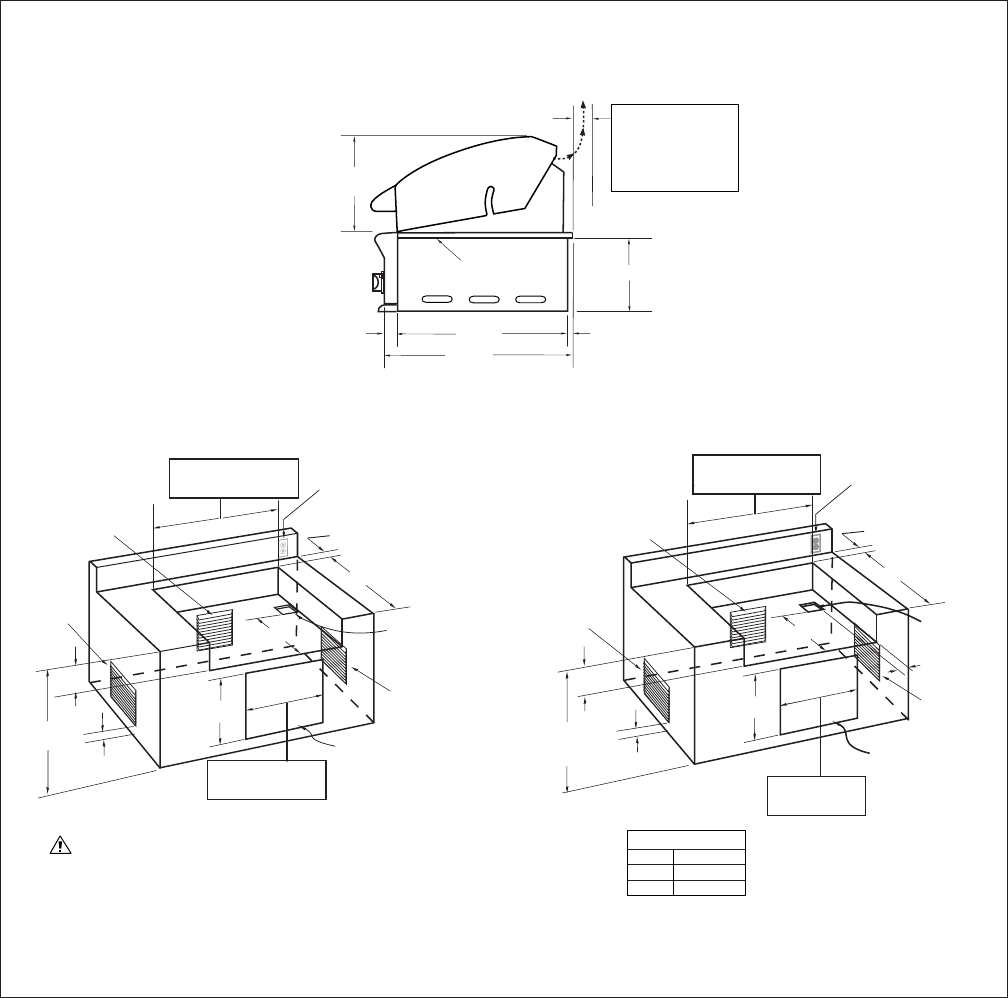
Standard layout for non-combustible enclosure:
NOTE: If using a backguard
apron or rear wall, locate
electrical service on the
right hand side for rotisserie
motor connection
48" Models = 45-3/4"
36" Models = 34-1/2"
Bottom of
support flange
3" Min. for Lid
Clearance
3" Min. for Lid
Clearance
48" Models = 46"
36" Models = 34"
48" Models = 51-5/8"
36" Models = 40-1/2"
48" Models = 46"
36" Models = 34"
23-3/4"
3-1/2"
18-1/4"
20"
11-1/8"
35-1/2"
Max.
opening for access
doors/drawers
(see Fig. 06 & 07 for
ordering information)
4" x 4" opening
for gas supply
line
opening for access doors/
drawers
(see Fig. 06 & 07 for
ordering information)
4" x 4" opening
for gas supply
line
22-3/4"
18-1/2"
20"
10-1/8"
35-1/2"
Max.
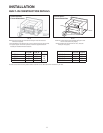
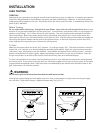
Layout for insulated jacket only - combustible enclosure:
NOTE: If using a backguard
apron or rear wall, locate
electrical service on the
right hand side for rotisserie
motor connection
10 in.
2
min.
ventilation
left hand
side
10 in.
2
min.
ventilation
on the right
hand side
10 in.
2
Min. ventilation
on the back side
1" Min.
10 in.
2
min.
ventilation
left hand
side
10 in.
2
min.
ventilation
on the right
hand side
10 in.
2
min. ventilation
on the back side
1" Min.
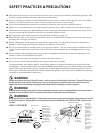
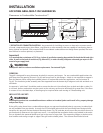
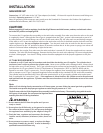
WARNING!
If installing the grill into a non-combustible enclosure, all combustible
construction must still be outside the 12 inch clearance zone. If your
island is made of stucco over the top of wooden studs, the wood can not
be inside the 12 inch clearance zone to combustible, even though the
stucco is what is touching the grill area.
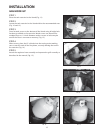
INSULATED JACKET
Size Part No.
36 70167
48 70172
INSTALLATION
BUILTIN CONSTRUCTION DETAILS
FIG. 05