Installation I ns tructions
6
MOUNTING INSTALLATION
The lower rear corners of the cabinet need to provide proper support to the back of the Warming
Drawer and the anti-tip mounting clips. A 120 volt AC outlet should be located no further than
36 inches from the back center of the Warming Drawer. Illustrations suggest one possible bottom sup-
port, but the consumer is not limited to this idea for mounting configuration.
STEP 1
The bottom rear section of the cabinet should be made of solid plywood or 2x4 and needs to be
installed to hold the anti-tip mounting clips and support the weight of Warming Drawer, which is
90 lbs.
STEP 2
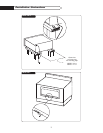
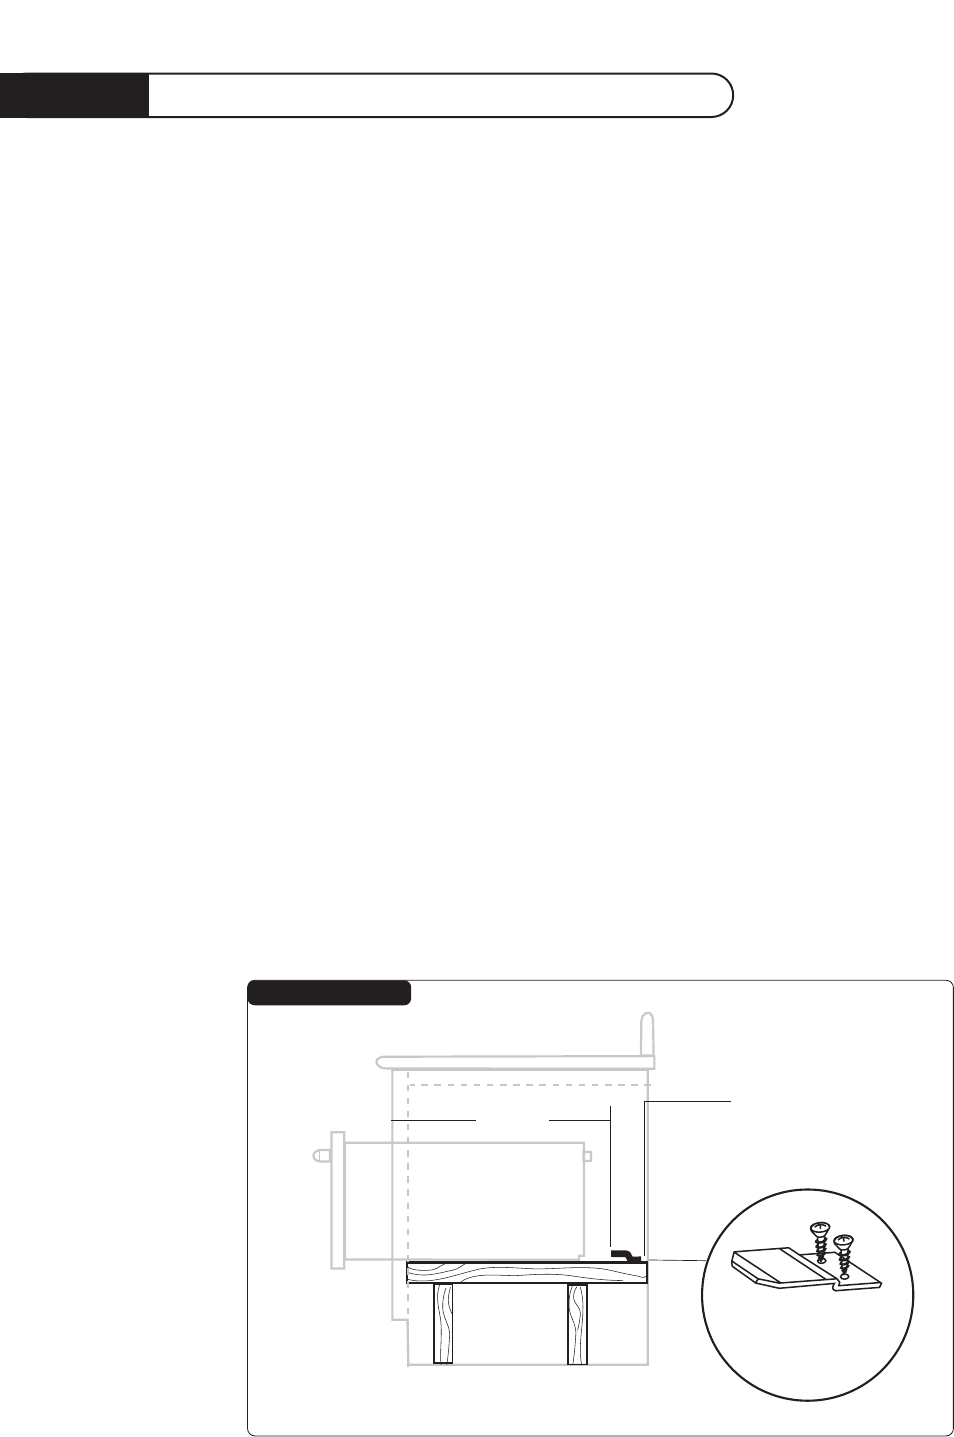
Use the screws provided to attach the mounting clips which must be installed for anti-tip safety to the
bottom support at the back. See placement dimensions in figure below.
STEP 3
The Warming Drawer has slots on the back side where it will slide onto the anti-tip mounting clips.
Plug power cord into AC outlet. See page 7.
STEP 4
Screw the front face screw into the center hole of the front face of the warming drawer to finish the
installation. See page 7.
NOTE: Bottom support made of plywood or other solid wood construction capable of supporting the
weight of the warming drawer.
Slide drawer
on to Anti-Tip
mounting clips
mounting clips
21
5/16"
FIG.04 STEPS 1 & 2


