


INSTALLATION INSTRUCTIONS
62.9680.01_UL Page 9
6. WATER CONNECTIONS
6.1 DRINKING WATER CONNECTION
• Before connecting the appliance, flush the water pipes and
fittings and clean out any dirt.
• The appliance is designed for connection to fixed lines.
• Metal installation pipes may not protrude more than 3.9“
(10 cm) from the floor or the wall.
• The maximum water pipe pressure must not exceed 87 psi
(600 kPa).
• A mechanical filter, a shutoff valve and a non-return valve
should be built into the customer fresh water feed pipe.
• In general, all national and local water regulations must be
observed.
• The appliance is to be connected to the sanitation system
in accordance with the valid installation connection plans
and diagrams.
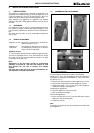
6.1.1 FREE-STANDING INSTALLATION
The water connections come up from the floor.
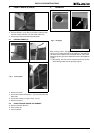
D Make corresponding openings in the base of the frame to
lead the hoses through.
D Remove front panel (B) (see Chapter 3. on page 7).
D Dismantle the storage space or hot cabinet if necessary.
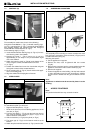
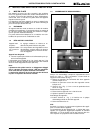
D Connect the flexible hoses (5), with a G ½" inside thread,
with or without fitting a stop valve, to the customer-supplied
water pipes protruding from the floor.
6.1.2 FITTING AGAINST A WALL
The water connections come up from the floor or out of the
wall. For floor connection (see Chapter 6.1.1 on page 9).
D Pull the flexible hoses (5) out of the open rear wall and con-
nect to the customer-provided water pipes protruding from
the wall with a G ½" inside thread, with or without fitting a
stop valve.
D Position the appliance against the wall.
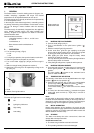
6.2 WASTE WATER
The appliance outlet pipe must be taken through a sufficiently
large waste water opening.
Note
Ensure accurate measurement of the waste water collecting
point and the exact positioning of the appliance.