


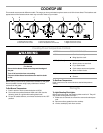


6
4. Using a match, light both burner pilot lights.
5. Slowly lower the cooktop until it snaps into place.
6. Push in and turn each surface burner control knob to the “HI”
position. The flame should light within 4 seconds.
7. If surface burners do not ignite, repeat steps 3 to 6.
8. Replace cooktop grates.
To Light Oven Pilot Light:
1. Make sure all controls are off and the oven is cool.
2. Open the oven door to remove oven racks and the oven
bottom tray.
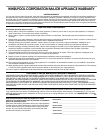
3. Remove the fasteners holding the flame spreader. Lift and
pull out the flame spreader.
4. Locate the pilot light on the left-hand side of the oven burner.
5. Push in oven control knob and hold, then ignite the oven pilot
light with a match.
6. Hold the oven control knob in for 10 seconds to make sure
the pilot will remain lit.
7. If the oven pilot light turns off after releasing the knob, repeat
steps 5 and 6.
8. Replace the flame spreader, oven bottom tray, and racks.
NOTE: The pilot light will stay lit after turning off the oven. The
oven burner should turn on the next time a temperature is
selected on the oven control knob. If the oven burner does not
turn on, repeat previous steps for lighting oven pilot light.
Surface Burners
IMPORTANT: Do not obstruct the flow of combustion and
ventilation air around the burner grate edges.
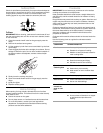
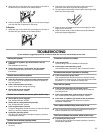
Burner ports: Check burner flames occasionally for proper size
and shape as shown below. A good flame is blue in color, not
yellow. Keep this area free of soil and do not allow spills, food,
cleaning agents or any other material to enter the burner ports.
To Clean:
IMPORTANT: Before cleaning, make sure all controls are off and
the oven and cooktop are cool. Do not use oven cleaners, bleach
or rust removers.
1. Close the manual shutoff valve for the gas supply near the
range.
2. Remove the surface burner grates.
3. Lift the cooktop by both front corners and hold it by the front
center edge.
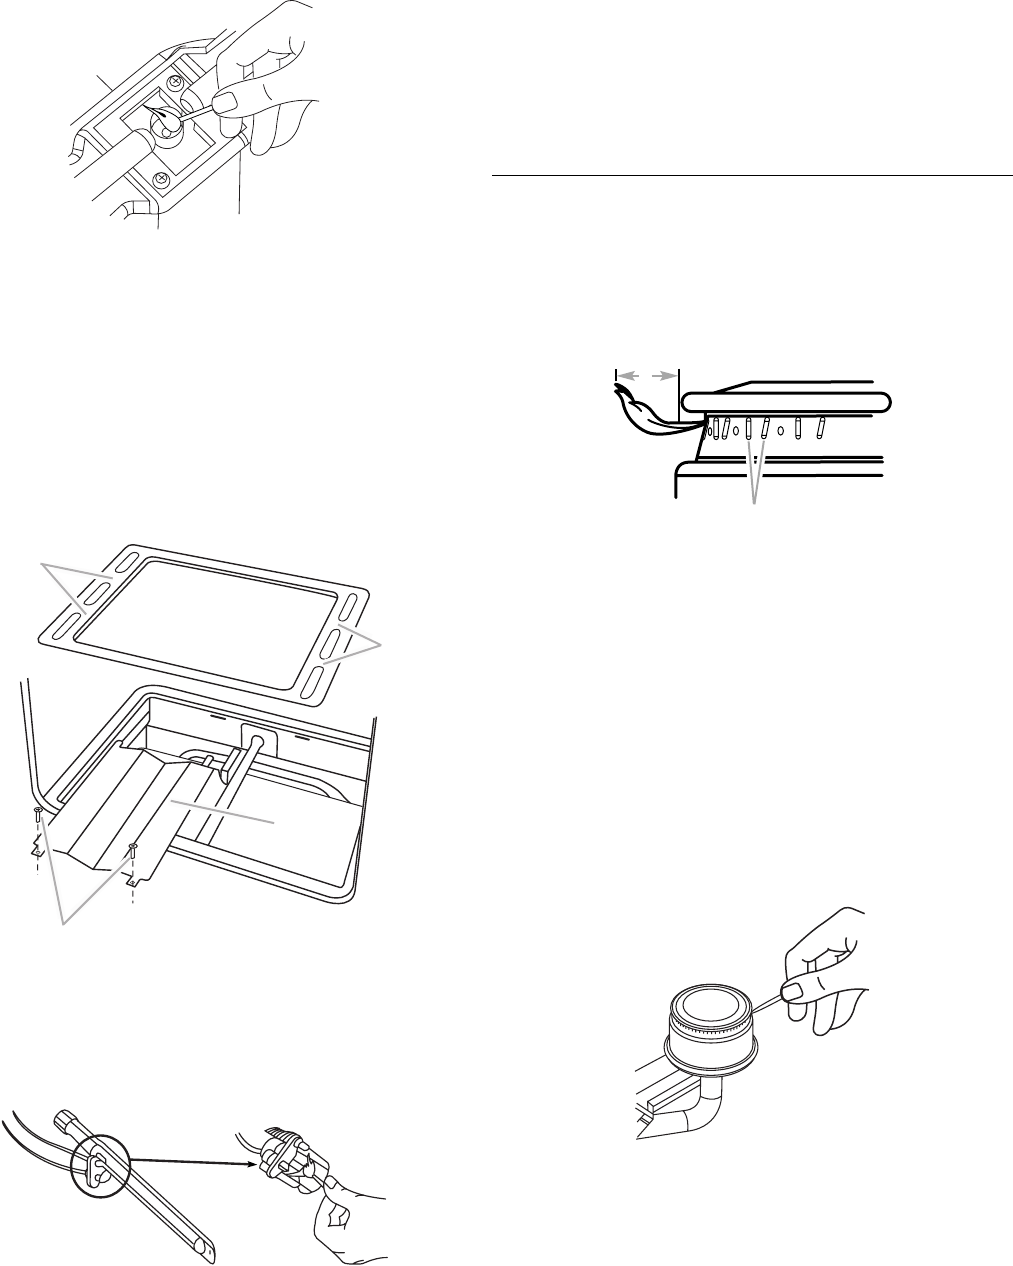
4. Clean clogged burner ports with a straight pin as shown. Do
not enlarge or distort the port. Do not use a wooden
toothpick. If the burner needs to be adjusted, contact a
trained repair specialist.
5. Slowly lower the cooktop into place.
6. Open the manual shutoff valve for the gas supply near the
range.
7. Ignite pilot lights.
8. Replace surface grates.
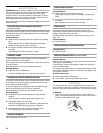
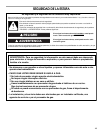
A. Oven bottom tray
B.Fasteners
C.Flame spreader
A
A
B
C
A. 1-1½" (25-38 mm)
B.Burner ports
B
A