OPERATING INSTRUCTIONS
Slicing & Shredding Blades
CAUTION: Make sure that the unit is
unplugged from the power source and
the speed control dial is in the “OFF”
position before inserting or removing
attachments.
1. Place the blade of your choice on
the blade holder. Inserting the longer
tab on the side of the blade first.
(Fig. 17)
2. Press the other end of the blade until
it clicks into place. (Fig. 18)
3. Fit the processor bowl and spindle
as detailed on the page 4.
4. Using the finger holes in the blade
holder, fit it over the spindle and
press firmly into place as indicated.
(Fig. 19)
WARNING: USE EXTREME
CAUTION WHEN HANDLING
BLADES. BLADES ARE SHARP.
5. Fit the lid and click into place as
described in the Setting Up section
(page 4).
6. Plug in the processor.
7. WARNING: USE THE FOOD
PUSHER TO ADD FOOD INTO
THE PROCESSOR BOWL
THROUGH THE FEEDER TUBE.
Do not overload the food processor bowl.
In one operation, you can process a
maximum of 6 cups (1500 ml) of food.
7
Fig. 17
Fig. 19
Fig. 18
French Fry Blade Assembly
CAUTION: Make sure that the unit is
unplugged from the power source and
the speed control dial is in the “OFF”
position before inserting or removing
attachments.
Note: The French Fry Blade is already
assembled to the blade holder. Do not
try to remove it. (Fig. 20)
1. Fit the processor bowl and spindle
as detailed previously.
2. Using the finger holes in the french fry
blade holder, fit it over the spindle and
press firmly into place as indicated.
(Fig. 21)
WARNING: USE EXTREME
CAUTION WHEN HANDLING
BLADES. BLADES ARE SHARP.
4. Fit the lid and click into place as
indicated in Setting Up section
(page 4).
5. Plug in the processor.
6. WARNING: USE THE FOOD
PUSHER TO ADD FOOD INTO THE
PROCESSOR BOWL THROUGH
THE FEEDER TUBE.
Do not overload the bowl. In one
operation, you can process a
maximum 6 cups (1500 ml) of food.
Fig. 20
Fig. 21
FINE
SLICING
THICK
SLICING
FINE
SHREDDING
COARSE
SHREDDING
For fine slicing: - Recommended speed
level is High
(Cucumbers, raw
potatoes, lettuce,
carrots)
For coarse slicing: - Recommended speed
level is High
(Cabbage, carrots,
onions)
For fine shredding:- Recommended speed
level is High
(Carrots, cucumbers,
cabbage)
For coarse shredding:- Recommended speed
level is High
(Lettuce, carrots,
apples)
OPERATING INSTRUCTIONS
Whipping Attachment
CAUTION: Make sure that the unit is
unplugged from the power source and
the speed control dial is in the “OFF”
position before inserting or removing
attachments.
1. Fit the processor bowl and spindle as
described previously on page 4.
2. Fit the whipping attachment over the
spindle and press firmly into place.
(Fig. 22)
3. Place the ingredients into the bowl.
4. Fit the lid and click into place as
described in the “Setting Up” section
(page 4).
5. Plug in the food processor.
6. Turn the food processor on selecting
high speed.
7. Recommended speed for whipping
is high.
8. Remove the whipping attachment from
the bowl before removing the whipped
ingredients.
FOR SAFETY, ALWAYS LEAVE THE
PUSHER IN PLACE WHILE OPERATING
THE PROCESSOR.
Fig. 22
Juice Extractor (Cont.)
3. Fit the juice extractor
lid over the extractor
and rotate counter
clockwise ensuring
that the lid tab has
clicked into place
4. Plug in processor.
5. Turn speed control to minimum
(use only on
minimum speed).
6. Use the juice
extractor pusher
to add fruit into
the food tube.
(Fig. 25)
7. If the juice extractor becomes
clogged during use, turn the
processor off and remove the
juice extractor. The excess pulp
can now easily be removed
using the spatula.
Be sure to switch the appliance
to the “OFF” position after each
use. Make sure the motor stops
completely and you unplug the
unit before disassembling.
FOR SAFETY, ALWAYS USE
THE PUSHER WHEN
PUTTING FRUIT INTO THE
FEEDER TUBE - NEVER FEED
BY HAND.
Do not put your fingers or other
objects into the juicer opening
while it is operation. If food
becomes lodged in the opening,
use food pusher or another
piece of fruit or vegetable to
push it down. When this
method of removing food lodged
in the opening is not possible,
turn the appliance off, unplug
the unit and disassemble juicer
to remove the remaining food.
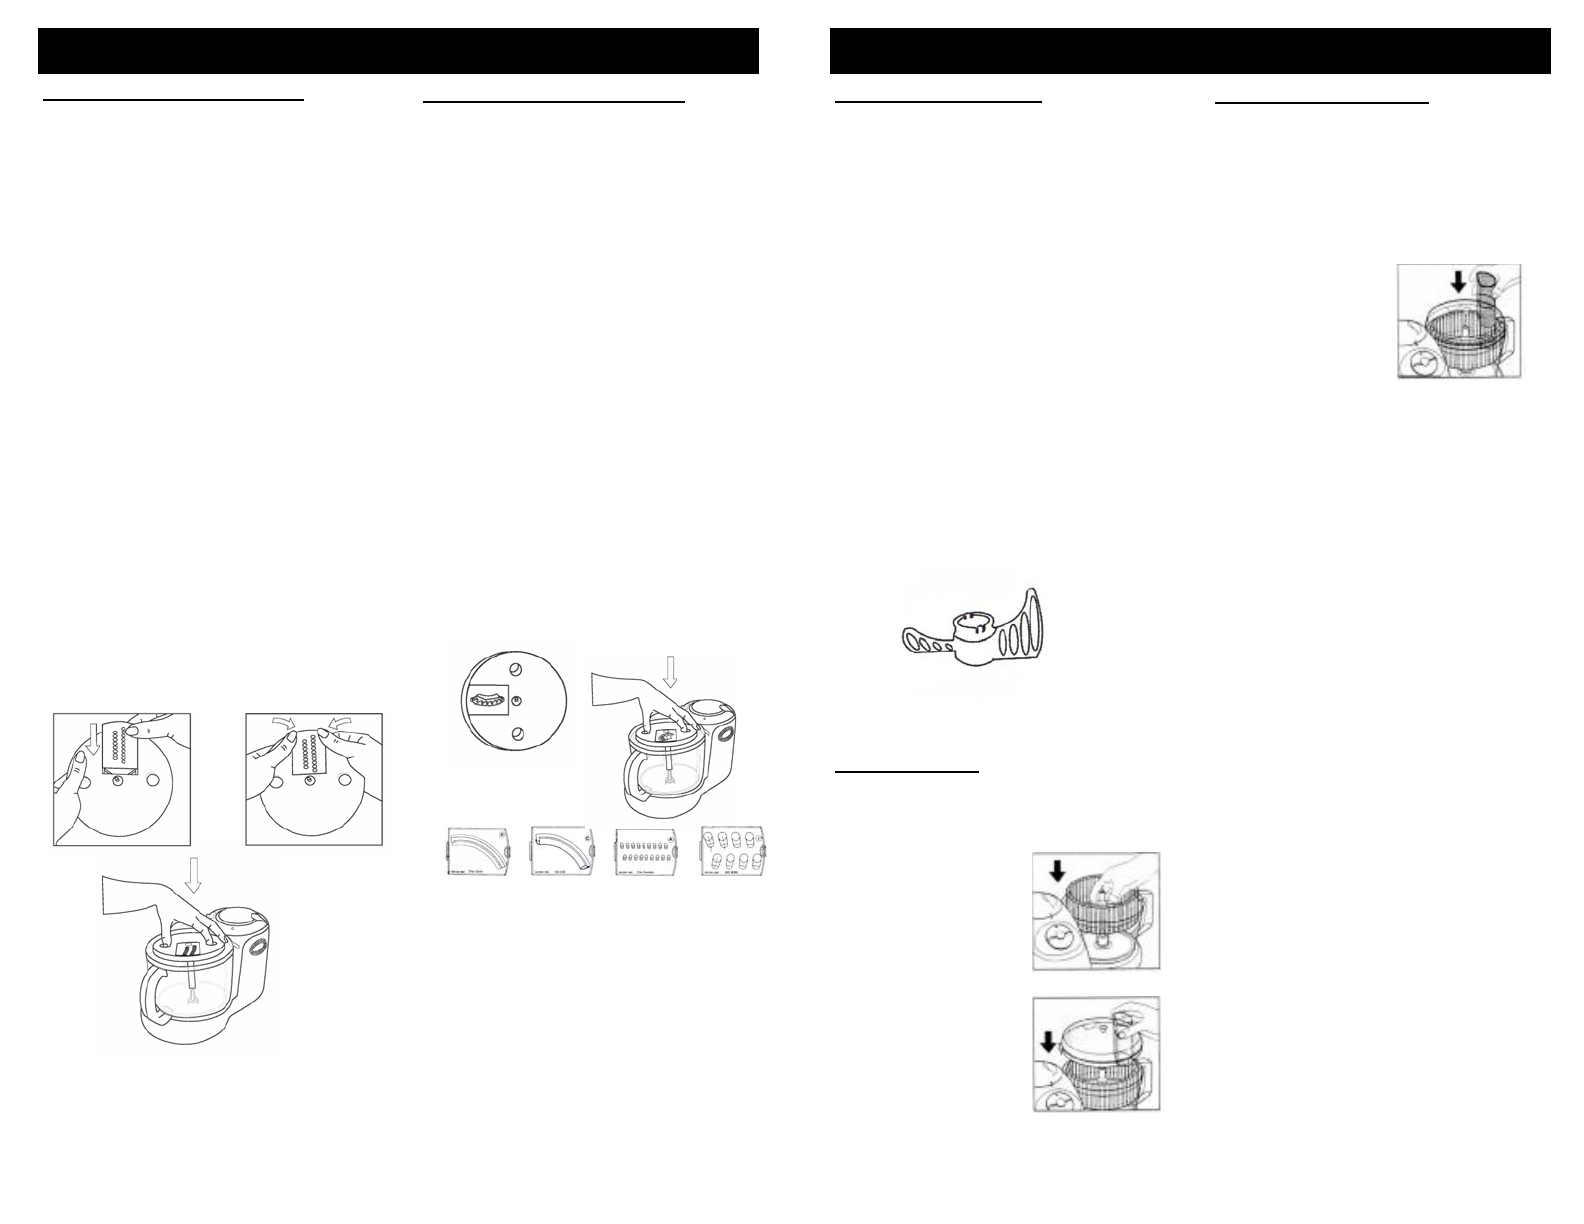
Juice Extractor
CAUTION: Make sure that the unit
is unplugged from the power
source and the speed control dial
is in the “OFF” position before
inserting or removing
attachments.
1. Fit the processor
bowl as detailed
previously
(page 4). (Fig. 23)
2. Fit the juice
extractor/filter into
the processor bowl.
(Fig. 24)
Fig. 23
Fig. 24
Fig. 25
8
Note: When whipping thin liquids such as
skim milk, use only 3 oz. of liquid at a time.


