Using Solid Fat
Warning: Do not put solid shortening in
the oil container or the frying basket.
• If using solid vegetable shortening, melt
it first in a separate pan and then very
carefully pour the melted fat into the oil
container.
• Previously used solid vegetable
shortening which has curdled and
hardened in the oil container should be
removed from the oil container and
melted in a separate pan before
reusing.
Warning: If you try to melt the solidified
fat in the oil container, there is a risk of
warm melted fat suddenly sputtering from
below through the still solid top layer of
fat. Therefore use only the following
procedure:
• Make sure the fat is at room
temperature. If the fat is very cold,
there is a greater risk of splashing.
• Using a fork, carefully make some holes
in the fat. Make sure the lid is securely
closed while the fat is melting. Press
the temperature select button two (2)
times to select the second temperature
setting of 325° F. The unit will
display “_ _” to indicate a constant boil.
Press power button to turn unit off when
fat has melted.
OPERATING INSTRUCTIONS
• Lift up the control panel with heating
element.
• Insert the “guide edges" on the
control panel into the “guide rails"
mounted on the metal body.
• Slide the “guide edges" down till the
end.
Important Notice: The automatic
safety switch ensures that the unit will
not operate unless the control panel has
been inserted into the “guide rails" on
the metal body correctly.
Guide Rails
Back of Main Body
Installing the “Control Panel With
the Heating Element” Into its Place
Heating
Element
Guide
Edges
Safety
Switch
Control Panel
Using the Electronic Deep Fryer
Warning: Never plug in the deep fryer
before filling with oil to specified level.
Always make sure control panel is
securely in place in the body and the
heating element is inside the oil in the
container before plugging in.
Important: Ensure the control panel is
fitted correctly to the main unit otherwise
the unit will not function. This is not a
defect. This product is fitted with a safety
switch to prevent the unit from turning on
accidentally.
Pre-Heating
4
Warning: Never plug in the deep fryer
before filling with oil. (See "Filling"
instructions.) Always unplug the
appliance when not in use.
• Make sure the oil level in the oil
container is between the "minimum“
and "maximum" lines inside the oil
container.
• The frying basket should not be
immersed in the oil during the pre-
heating.
• Replace the lid cover.
• Plug the appliance into a 120-volt
outlet. The LED display will flash “OF”.
• Press the power button. The unit will
default to a continuous boil displayed
on the LED display as “_ _”. The 275°
indicator light will flash until the fryer
has reached the pre-set temperature.
Then the light will stop flashing and
stay lit.
OPERATING INSTRUCTIONS
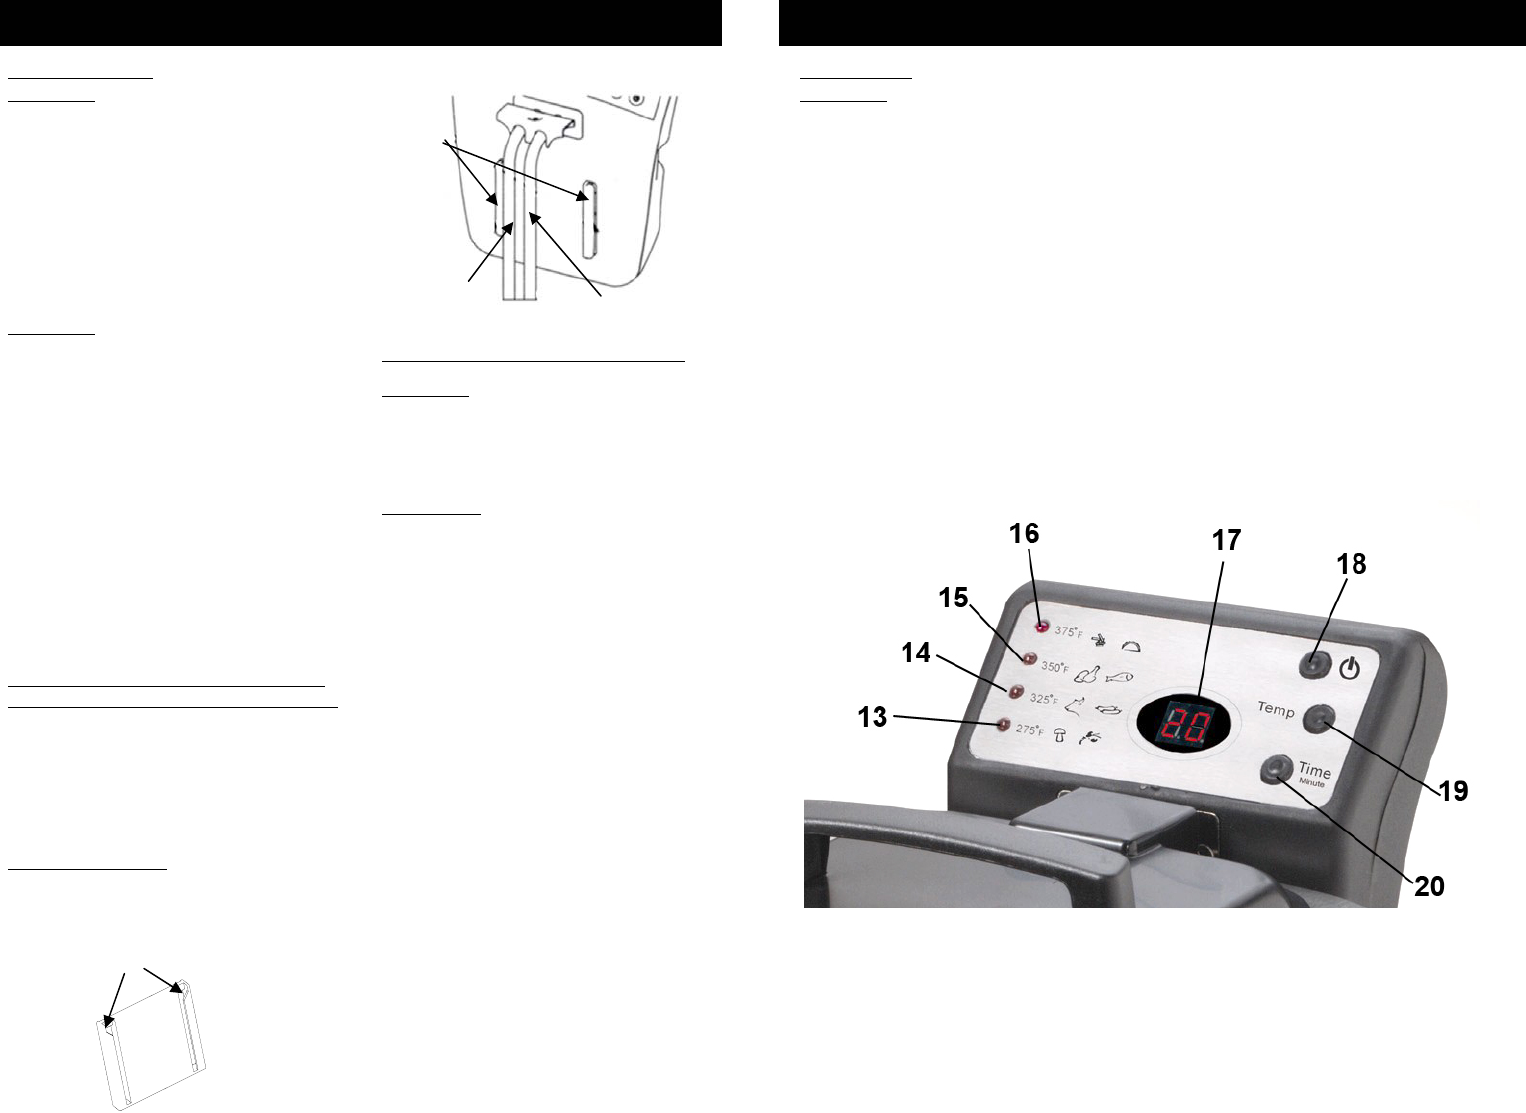
• Set the required temperature. The
deep fryer has four (4) pre-set
temperatures. They are 275 °F, 325°F,
350° and 375°F. Each time you press
the temperature select button the
appropriate indicator light will flash.
(Fig. 3) The light will stop flashing and
stay lit when the temperature selected
has been reached.
• Timer: The MAX timer time is 30
minutes. If you want to add time or
decrease time, please press timer
select button. The time will change in
one (1) minute increments up to a
maximum of 30 minutes. The timer will
begin count down from selected time
as soon as a time has been set.
NOTE: It is recommended that you allow
the oil to reach the desired temperature
before you set a desired time.
• If you press the timer button to pass 30
minutes you will see “_ _”, this
indicates that it is in constant boil with
no time set to turn the unit off.
13. 275° F Indicator Light
14. 325° F Indicator Light
15. 350° F Indicator Light
16. 375° F Indicator Light
17. LED Display
18. Power Button
19. Temperature Select Button
20. Timer Select Button
Fig. 3
5


