


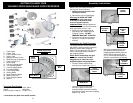
Using the Lower Chopping Blade
Only
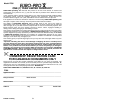
• Place the food processor bowl
securely on the main body. (Fig. 1)
• Once the food processor bowl is
securely in place, remove the
protective blade cover from the
lower chopping blade and carefully
place the lower chopping blade onto
the shaft the food processor bowl.
(Fig. 4)
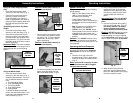
Assembling the French Fry Blade
Holder
• Place the food processor bowl
securely on the main body. (Fig. 1)
• Once the food processor bowl is
securely in place, insert the french
fry blade holder into the shaft of the
food processor. (Fig. 5) Ensure that
the blade holder is securely in place
before continuing.
Important Note: The french fry blade
cannot be removed. If wanting to use a
different blade refer to the following
section.
Assembly Instructions
Using the Blade Holder
• Place the food processor bowl
securely on the main body. (Fig. 1)
• Select the desired blade. There are
five (5) different blades to choose
from:
1. Thin Shredding Blade
2. Thick Shredding Blade
3. Thin Slicing Blade
4. Thick Slicing Blade
5. Grating Blade
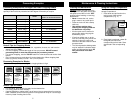
• To attach the blade to the blade
holder, take the blade holder in one
hand and insert the blade tab first
into the opening. (Fig. 6)
FRENCH
FRY BLADE
HOLDER
FOOD PROCESSOR SHAFT
Fig. 5
5
BLADE
BLADE
TAB
Fig. 6
PRESS
ON THE
BASE OF
THE
BLADE
TO SNAP
IT INTO
PLACE
Fig. 7
• Once in place, use thumb to press
on the base of the blade to snap it
into place. (Fig. 7) Ensure that the
blade holder is securely in place
before continuing.
Caution: Handle blade carefully to
avoid cuts and injuries.
• To remove the blade from the blade
holder, push the blade from the
back of the blade holder. (Fig. 8)
BACK OF
BLADE
HOLDER
PRESS
DOWN ON
BACK OF
BLADE
Fig. 8
Caution: Handle blade carefully to
avoid cuts and injuries.
Speed Control Dial
The speed control dial has the following
speed settings:
• Off: Turn the speed control dial to
“Off” in order to stop the food
processor from operating.
• 1 to 9: Speed levels may be
increased from 1 to 9. The speed can
be adjusted while the food processor
is in use.
• Max: Highest level of speed that the
food processor can operate at.
• PULSE: Use of the “PULSE” button
allows greater control over the texture
of the food being processed. Use
"PULSE" when the unit is in the "Off"
position.
Caution: The "PULSE" function is only
intended to be used for short periods of
time. Damage to the unit may occur if not
used properly.
Operating the Food Processor
Once having assembled the food
processor according to the “Assembly
Instructions” the unit is now ready for
use.
1. Place the lid on top of the food
processor bowl. Once in place twist it
to the left so that it is locked securely.
(Fig. 9)
Note: Until the lid is securely in place,
ensure that the unit is NOT plugged
into an electrical outlet.
Operating Instructions
TWIST THE LID TO THE LEFT
TO LOCK INTO PLACE
Fig. 9
2. Plug in the processor and turn the
speed control dial to the desired
speed level. If the processor does
not come on check that the lid are
correctly fitted and locked into
place.
Important Note: The unit will NOT
operate without the lid locked into
place.
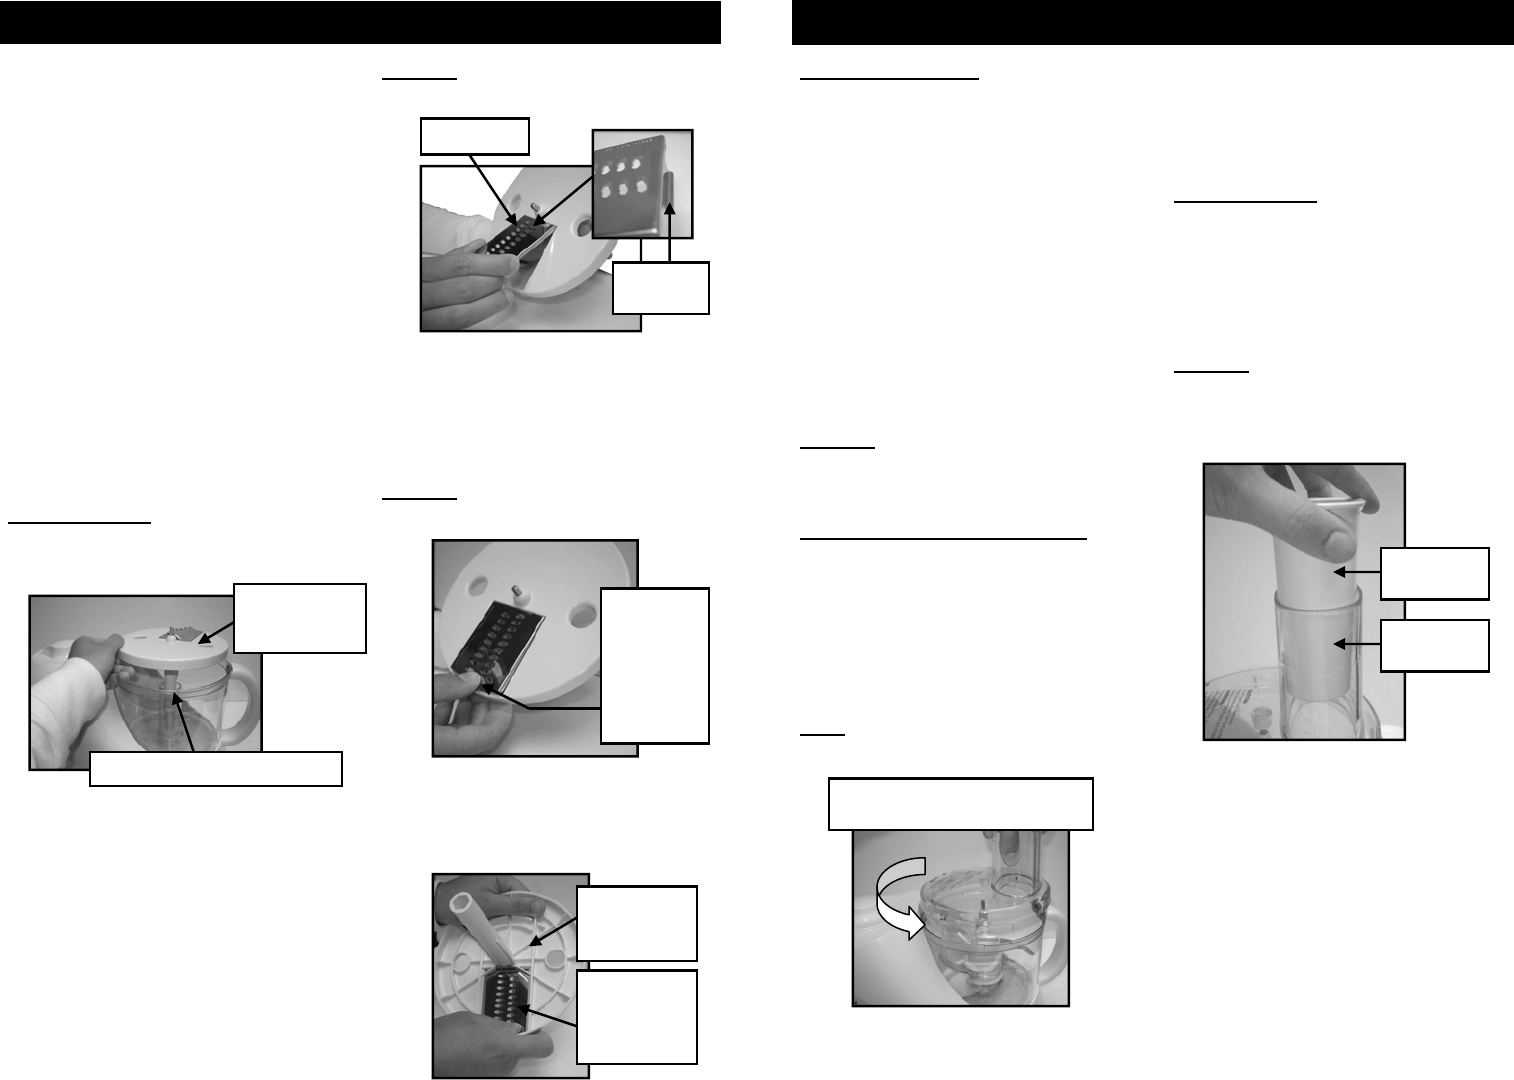
3. Use the food pusher when putting
food into the feeder tube. (Fig. 10)
For safety reasons it is always
better to use the food pusher,
and to NEVER feed food by hand.
Caution: DO NOT operate the unit for
intervals longer than 20 seconds. If
longer chopping or mixing is required,
run for 20 seconds, allow motor to stop
and run again for another 20 seconds.
FOOD
PUSHER
FEEDER
TUBE
Fig. 10
4. When finished using the food
processor, turn the speed control
dial to the “Off” position and unplug
it from the electrical outlet.
6