


Version 02/02 - Page 4
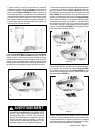
TOOLS NEEDED FOR INSTALLATION
• Saber Saw or Jig Saw
• Drill
• 1 1/4" Wood Drill Bit
• Pliers
• Phillips Screwdriver
• Flat Blade Screwdriver
• Wire Stripper or Utility Knife
• Metal Snips
• Measuring Tape or Ruler
• Level
• Pencil
• Caulking Gun
• Duct Tape
• Crescent Wrench or Socket Set
• Allen Wrench Set
PARTS SUPPLIED FOR INSTALLATION
• 1 Hardware Package
• 1 Literature Package
PARTS NEEDED FOR INSTALLATION
• 2 Conduit Connectors
• Power Supply Cable
• 1 Wall or Roof Cap
• All Metal Ductwork
WARNING
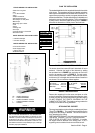
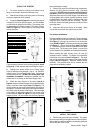
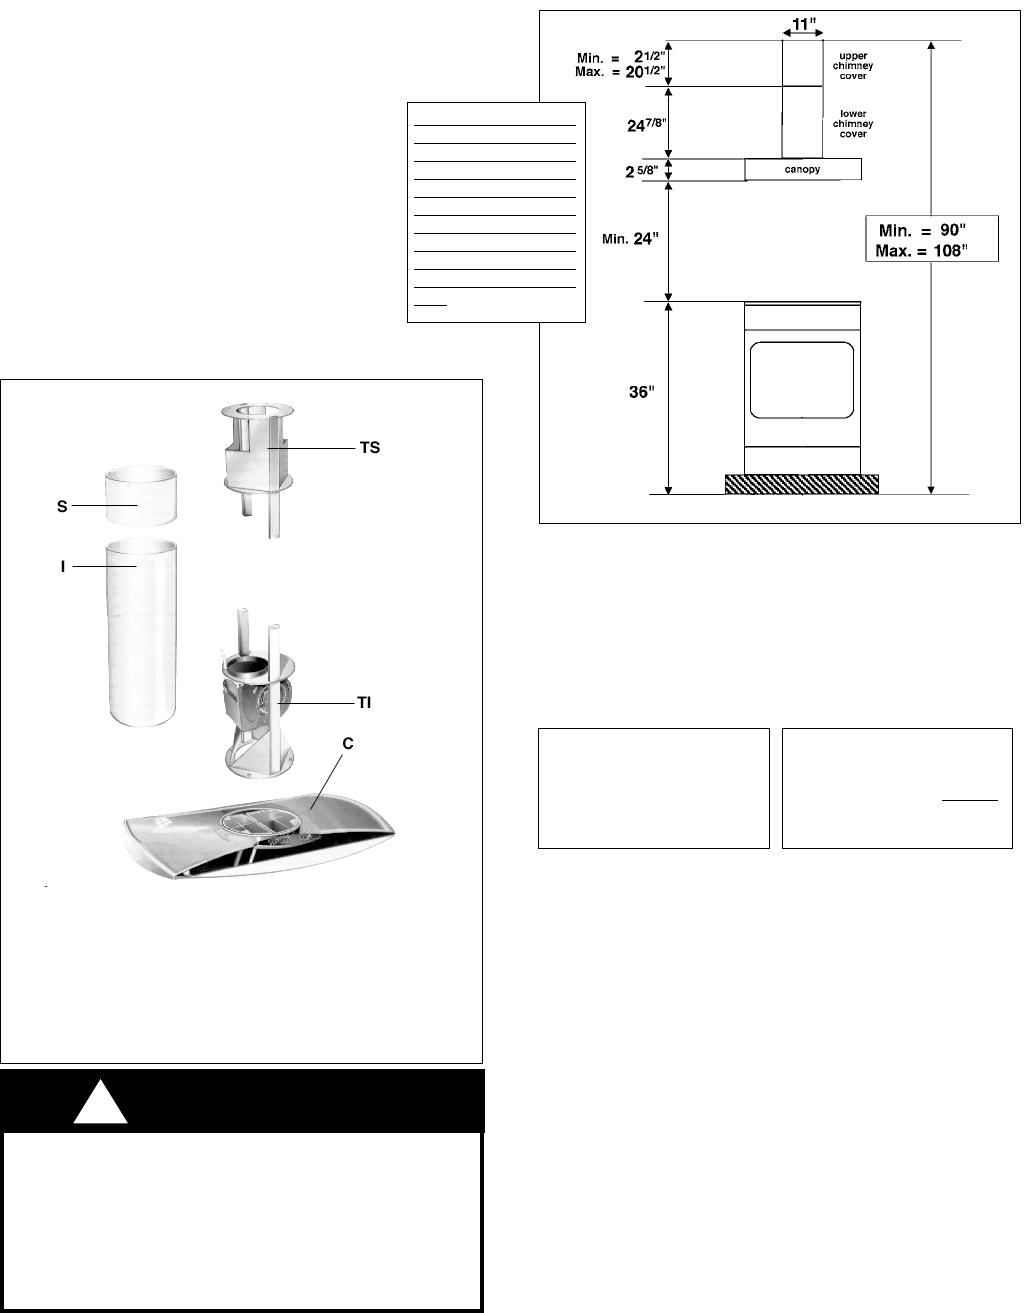
TS - UPPER SUPPORT
TI - LOWER SUPPORT
S - UPPER CHIMNEY COVER
I - LOWER CHIMNEY COVER
C - CANOPY
FIGURE 1
DUE TO THE SIZE AND WEIGHT OF THIS RANGEHOOD,
THE SUPPORT MUST BE FIRMLY ATTACHED TO THE
CEILING. For plaster or sheet rock ceilings, the support must
be attached to the joists. If this is not possible, a support
structure must be built behind the plaster or sheet rock. The
manufacturer assumes no responsibility for injury or damage
caused by improper installations.
FIGURE 2
CALCULATE THE DUCTRUN LENGTH
The ductrun should not exceed 35 feet if ducted with 6" round
ductwork. Calculate the length of the ductwork by adding
the equivalent feet in FIGURE 3 for each piece of duct in the
system An example is given in FIGURE 4. For best results,
use no more than three 90° elbows. Make sure that there is
a minimum of 24" of straight duct between elbows if more than
one is used. Do not install two elbows together.
9 Feet Straight Duct
2 - 90˚ Elbows
Wall Cap
Total System
PLAN THE INSTALLATION
The standard installation for this rangehood is ducted to the outside
of the house. This rangehood can also be installed as ductless
which requires a ductless kit from the dealer which consists of: an
upper chimney cover with a vent hole, vent grate, ductless diverter
and two charcoal filters. The Axia Isola chimney is adjustable and
designed to meet varying ceiling heights. This is accomplished
by using more or less of the upper chimney cover. FIGURE 2
illustrates the dimensions of each piece of the Axia Isola.
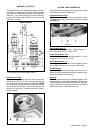
9.0 feet
10.0 feet
0.0 feet
19.0 feet
FIGURE 4
7.0 feet
5.0 feet
12.0 feet
0.0 feet
45˚ Elbow
90˚ Elbow
90˚ Flat Elbow
Wall Cap
FIGURE 3
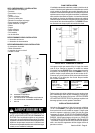
UNPACK THE RANGEHOOD
Remove the rangehood from the carton and place on a flat
surface for assembly. Before discarding the packaging, check
to make sure that no mounting hardware or parts are missing
DO NOT REMOVE THE PLASTIC COVERING ON THE
CHIMNEYS AT THIS TIME! This plastic covering protects the
chimney from scratches during installation.
ATTACHING THE SUPPORT
The rangehood attaches to the ceiling by a metal support (Items
TS and TI in FIGURE 1). This support must be attached to the
ceiling before the canopy is attached. This structure must be
firmly attached to the ceiling.
FOR CONCRETE CEILINGS - Use inserts and screws provided.
FOR WOOD CEILINGS - Use four 4" long wood screws.
FOR PLASTER OR SHEET ROCK CEILINGS - If possible,
the support must be attached to the ceiling joists. If not, a
supporting structure behind the sheet rock must be built.
IMPORTANT NOTE:
F O R D U C T L E S S
INSTALLATIONS, THE
MINIMUM HEIGHT OF
THE UPPER CHIMNEY IS
GREATER DUE TO THE
SPACE NEEDED FOR
A VENT GRATE THAT
MUST BE EXPOSED
WHERE THE AIR BLOWS
OUT.
!