


Version 02/02 - Page 6
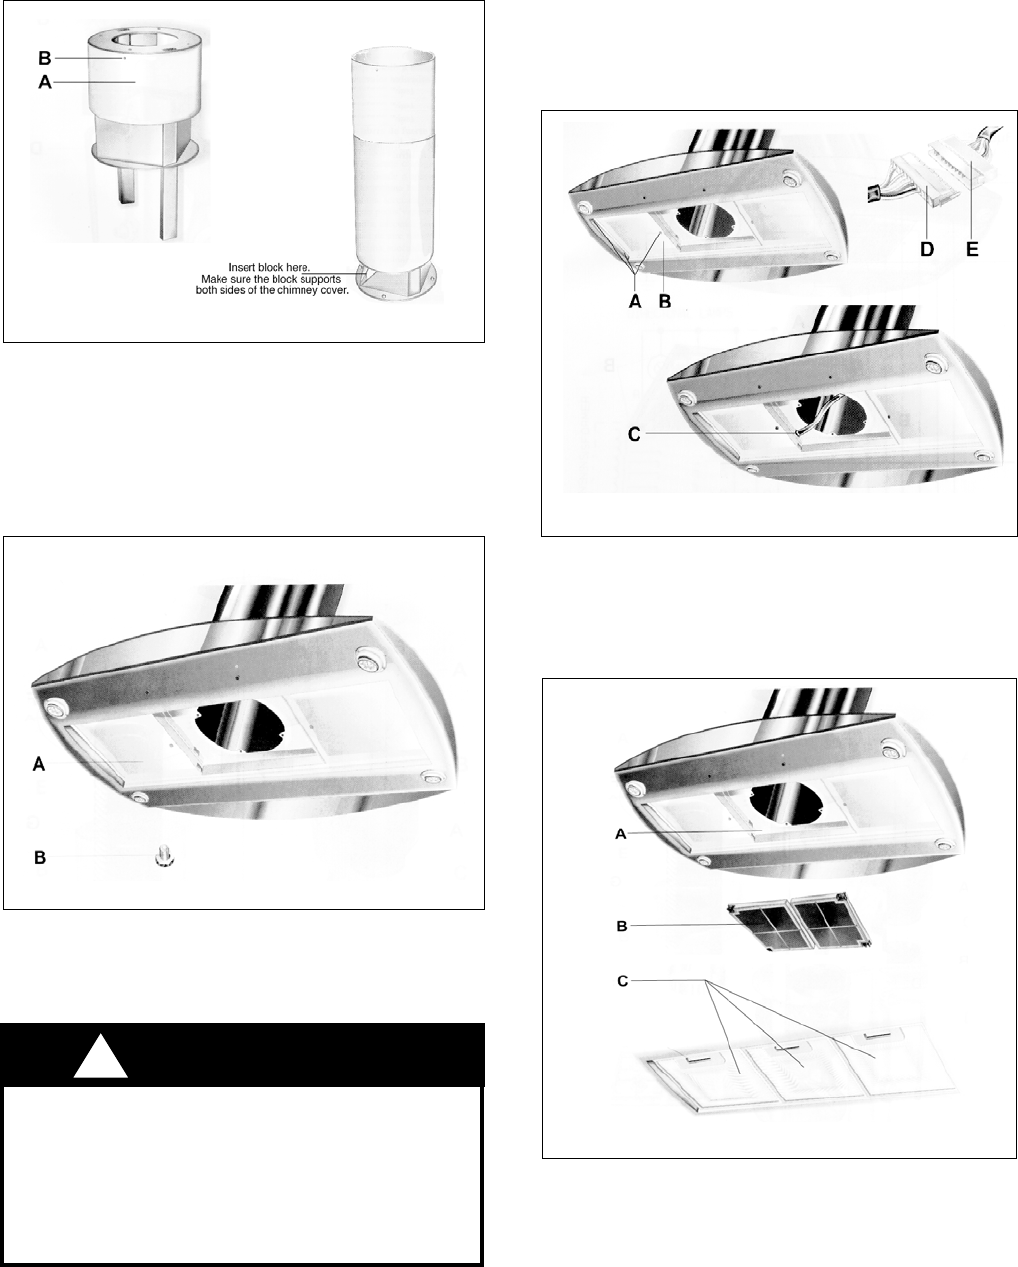
FIGURE 11
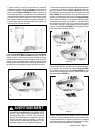
FIGURE 9
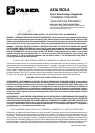
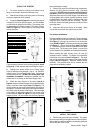
2. Before installing the canopy, the Upper and Lower
Chimney Covers must be installed. The Upper Chimney
Cover (Item A in Figure 8) attaches using two screws provided
(Item B in Figure 8). Install the Upper Chimney Cover. The
Lower Chimney Cover rests on the top of the Canopy once it
is installed. Install the Lower Chimney Cover. Use the wood
block to hold the Lower Chimney while installing the canopy
by inserting the wood block between the inside of the support
and the Lower Chimney Cover.
FIGURE 8
FIGURE 10
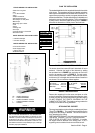
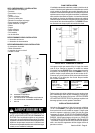
5. Install the grease filters. If your installation is ductless,
then you must install the charcoal filters before installing the
grease filters. The two charcoal filters (Item B in Figure 11)
fit into the opening in the canopy (Item A in Figure 11). Once
the Charcoal Filters are in place, then install the Grease Filters
(Item C in Figure 11).
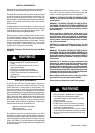
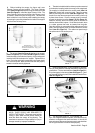
3. The canopy (Item A in Figure 9) attaches to the support
(Item C in Figure 9) by four bolts (Item B in Figure 9) located
inside the canopy next to the duct opening. Lift the canopy and
insert the bolts into the slots on the support. Tighten the four
bolts. Due to the weight of the rangehood, two people should
lift it to avoid injuries. Make sure that the bolts are properly
seated in the slots and fully tightened.
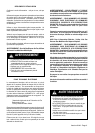
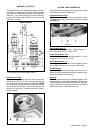
4. The electrical cable inside the chimney must be connected
to the electrical coupling inside the canopy of the rangehood.
The coupling is located behind the access panel (Item A in
Figure 10) marked with a warning label. Open the access
panel by removing three screws (Item B in Figure 10). Be
careful not to drop the access panel as it is held in place only
by these three screws. Once the access panel is removed,
connect the electrical coupling (Items C & D in Figure 10).
Inside the chimney, there is a circular guide for the cable to
hold the electical cable in place. On the electrical cable, there
is a rubber grommet that must be inserted into the guide.
Once the coupling is connected and the cable secured in the
guide, then the coupling must be hidden behind the access
panel (Item E in Figure 10). The cable must pass through
the square notch in the access panel.
6. Turn the power supply on. Turn on blower and
light. If the rangehood does not operate, check that the circuit
breaker is not tripped or the house fuse blown. If the unit still
does not operate, disconnect the power supply and check that
the wiring connections have been made properly.
WARNING
DUE TO THE SIZE AND WEIGHT OF THIS RANGE-
HOOD, THREE PEOPLE ARE REQUIRED TO
INSTALL THE CANOPY. Two people must hold the
canopy in place while the third person installs the
bolts that attach the canopy to the chimney. The
manufacturer assumes no responsibility for injury or
damage caused by improper installations.
!