3
4
5
6
7
7
8
8
1
30 mm
2
1
2
1
13
17
14
15
15
16
9
12
11
11
10
A
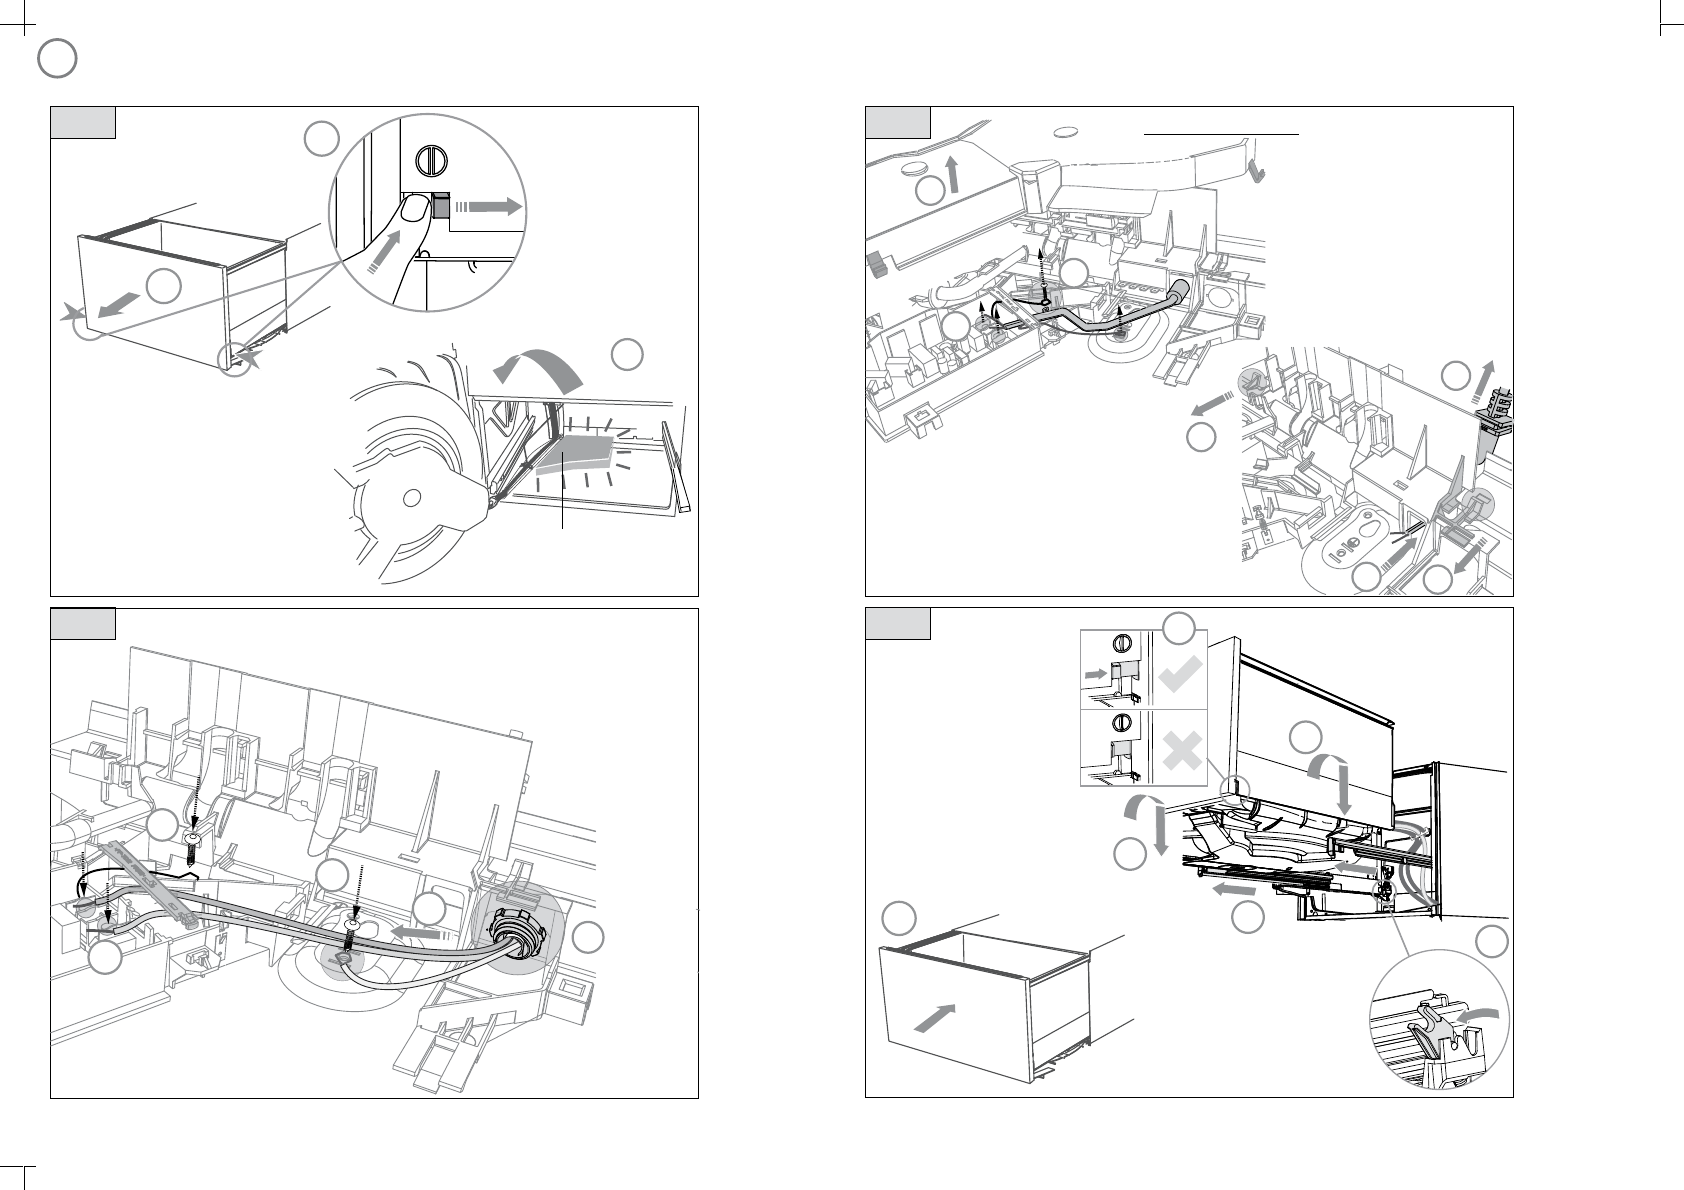
Ensure the drawer is removed
and then rotated counter-
clockwise to prevent kinked
hoses.
Before refitting the drawer,
ensure the hoses are not
twisted and the latches at
the rear of each drawer
runner are facing forward.
Ensure the drawer clips
on both sides are reset.
Ensure the drawer is
now rotated
clockwise back.
Remove knock-out for cable
clamp. Fit suitable cable clamp
for the conduit and terminate
the wiring as shown.
CD
Remove Power supply
B
OPTIONALLY HARD WIRING THE PRODUCT
6
1 ⁄”
(
30 mm)
Access cover
Remove the
access cover
Use copper
conductors only.
(2,2) -1- 599754C DD24S TALL installA2 USCA.indd 15/4/09 2:34:15 PM
(2,2) -1- 599754C DD24S TALL installA2 USCA.indd 15/4/09 2:34:15 PM


