8
Installation instructions
Handle removal
Handles are installed at the factory.
Tools needed:
4 mm Allen wrench
To remove:
Remove cap-screw from handle mounting post using 4 mm Allen wrench.
Repeat the procedure on all posts to remove the handle.
To replace:
Align handle with the mounting posts.
Fully tighten all cap-screws to secure handle in place.
Levelling
Caution!
To protect personal property and refrigerator from damage, observe the following:
Protect vinyl or other flooring with cardboard, rugs or other protective material.
Do not use power tools when performing levelling procedure.
To enhance the appearance and maintain performance, the refrigerator should be level.
Note:
Complete any required door reversal, panel
installation and/or a water supply connection
before levelling.
Some models only have front levelling adjustment
screws (
a
).
Tools needed:
9.5 mm hex head driver
Carpenter’s level
1
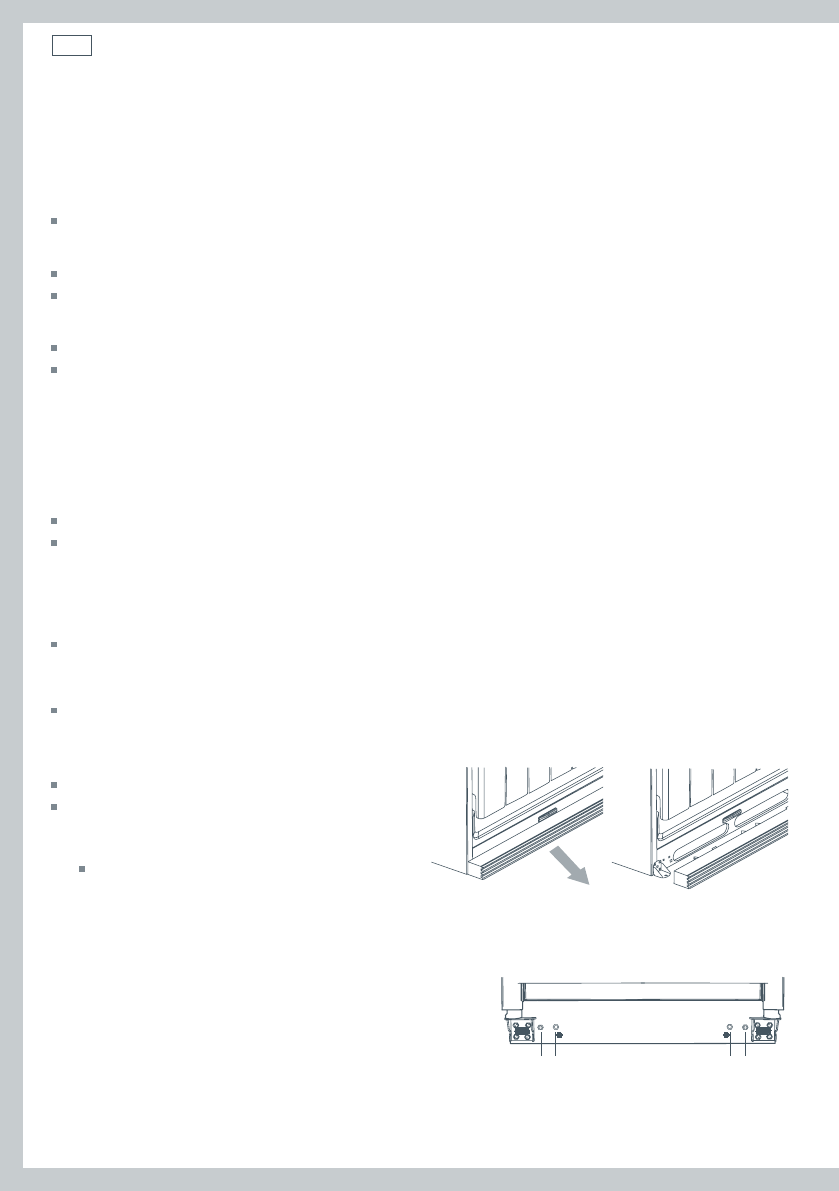
Remove toe grille.
Grasp firmly and pull outward to unclip.
2
Using hex head driver, turn front adjustment
screws (
a
) clockwise to raise and counterclockwise
to lower the front of the refrigerator.
3
Select models also have rear adjustment screws (
b
).
Using the hex head driver, turn each of these
adjustment screws (
b
) to raise or lower the rear of the
refrigerator.
Step 1
a b b a
Steps 2, 3
Fig.5 Levelling the refrigerator


