


4-4
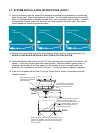
4.4 ADJUSTING BURNERS (cont.)
NOTE: In KFC co-branded locations, boil out is NOT ALLOWED. Use KFC approved
procedure.
4.4.1 Boil Out Procedure (Non-KFC Co-Branded Locations Only)
1. Turn off the fryer and drain the shortening from the fryer in accordance with filtering instructions.
2. Remove the Sensor Probe Guard (Figure 1, Page 4-1) and place it in the bottom of the fryer
during boil-out.
3. Remove the frypot drain plug and install the drain extension prior to boil-out. Ensure the drain
valve is closed prior to adding water and boil-out cleaner to frypot. NEVER DRAIN WATER OR
BOIL-OUT SOLUTION INTO THE FILTER SYSTEM. IRREPAIRABLE DAMAGE WILL
RESULT.
4. Scrape carbon buildup from the fryer walls and around the thermostat probes. Use care when
cleaning the probes to avoid damaging them. Do not scrape the bottom of the fryer. (For initial
boil out, this step is not required.)
5. Pour recommended amount of degreaser or cleaner into the fryer and add hot water to the
upper OIL LEVEL line scribed in the back of the fryer.
6. Turn the fryer on. Switch the Thermatron controller to Boil-Out Mode (located in cabinet with
power and reset switch) and continue. The burners should cycle off just as the boil-out solution
comes to a boil.
7. Monitor the boil-out procedure constantly. If excessive foam starts to rise in the frypot, reduce
the heat. DO NOT LEAVE THE FRYER UNATTENDED DURING THE BOIL-OUT
PROCEDURE.
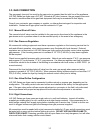
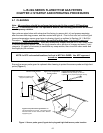
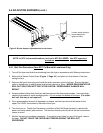
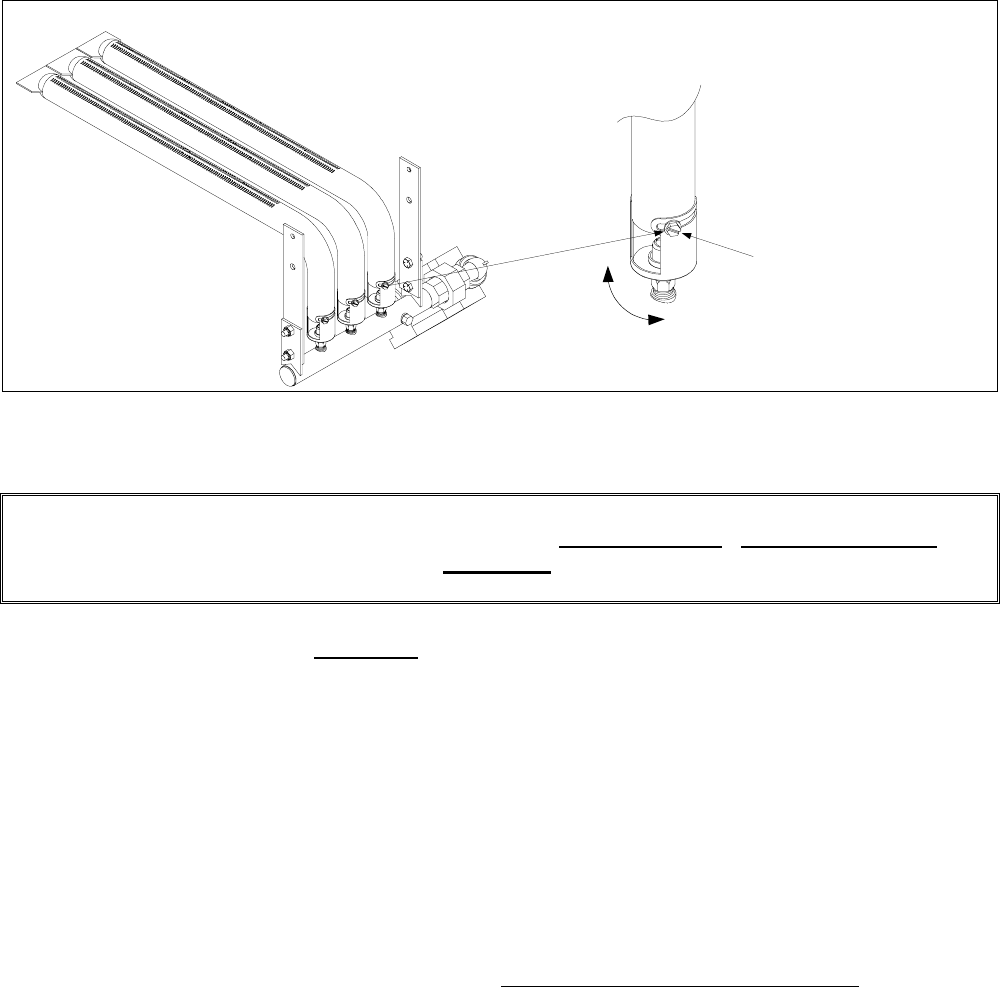
Figure 2: Burner damper adjustment on burner tubes.
Loosen screw to adjust
burner damper for
optimum flame.