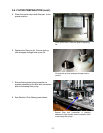
4-5
4.4.1 Boil Out Procedure (cont.)
8. Continue the boil-out procedure for 20 minutes. Brush the sides and bottom of the frypot with
an approved brush to remove deposits. Add hot water if needed to maintain the proper liquid
level in the fryer.
9. Turn the fryer off and drain the boil-out solution into an appropriate container and discard. DO
NOT DRAIN BOIL-OUT SOLUTION INTO THE FILTER SYSTEM. IRREPARABLE DAMAGE
WILL OCCUR AND ALL APPLICABLE WARRANTIES WILL BE VOIDED.
10. Refill the frypot with clean water. Add 16 ounces of white vinegar, turn fryer on and bring
solution to a simmer. Brush the sides and bottom of the frypot to remove boil-out residue. Turn
the fryer off and drain the solution as discussed in Step 9. Rinse the frypot three additional
times with clean water. Brush the sides and bottom to remove vinegar residue.
11. After the final rinse, dry the frypot thoroughly with paper towels, ensuring all traces of water are
removed. DO NOT USE CLOTH TOWELS TO DRY FRYPOT. Inspect the high-limit and
sensor probes for proper adjustment, and replace the sensor probe guard.
12. Immediately coat the frypot with shortening to prevent the frypot from rusting.
13. Close the drain valve, remove the drain extension and replace the frypot drain plug. Refill the
fryer with shortening from the filtration system or see Section 4.5 for filling the vat with
shortening.
4.5 FILLING THE VAT WITH SHORTENING
DANGER
NEVER MELT A SOLID BLOCK OF SHORTENING BY SETTING IT WHOLE IN THE
FRYPOT. FRYPOT DAMAGE CAN OCCUR AND THE CHANCE OF FLASH-POINT
FIRE INCREASES.
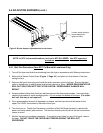
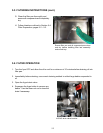
1. Cut the block of shortening into small pieces and pack into the frypot bottom. Do not set a
whole block of shortening into the frypot. ENSURE THE BOTTOM OF THE FRYPOT IS
COMPLETELY COVERED WITH SHORTENING BEFORE TURNING UNIT ON. Continue
packing the frypot to the lower OIL LEVEL line scribed into the back of the frypot.
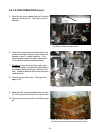
2. Turn the Thermatron controller to the desired temperature after the frypot is properly filled with
shortening. The burners will cycle in melt cycle mode until approximately 145°F (63°C), and
then remain on until setpoint temperature is attained. The “green” indicator light (heat indicator)
will cycle on and off at setpoint temperature.


