1-10
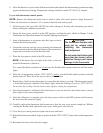
6. Unscrew the high-limit thermostat from the fryer and remove it.
7. Attach the appropriate terminals (instructions furnished in the replacement kit) to the thermostat
leads.
8. Apply Loctite™ PST56765 thread sealant or equivalent to the threads of the replacement high-limit
thermostat.
9. Reverse Steps 1-6 to install the replacement high-limit.
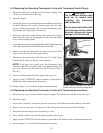
1.4.7 Replacing the Heat Mode Indicator Light in Fryers with Thermostat Controls
1. Disconnect the fryer from the electrical power supply.
2. Remove the thermostat knob and control panel as instructed in Section 1.4.2 or 1.4.3, as appropriate.
3. Carefully press the light out from the back of the control panel.
4. Disconnect one wire at a time and reconnect it to the replacement light (before disconnecting the
next wire). Continue until all wires are transferred.
5. Carefully press the light back into the control panel.
6. Reinstall the thermostat knob and control panel by reversing Step 2.
7. Reconnect the fryer to the electrical power supply.
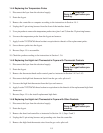
1.4.8 Replacing the Power or Melt Cycle Switch in Fryers with Thermostat Controls
1. Disconnect the fryer from the electrical power supply.
2. Remove the thermostat knob and control panel as instructed in Section 1.4.2.
3. Using a fl at-head screwdriver, disconnect the chrome bezel from the tabs on the switch and press the
switch out from the front.
4. Carefully press the new switch into the chrome bezel, making sure the tabs on the switch engage the
slots in the bezel.
5. Disconnect one wire at a time and reconnect it to the replacement switch (before disconnecting the
next wire). Continue until all wires are transferred.
6. Reinstall the thermostat knob and control panel by reversing Step 2.
7. Reconnect the fryer to the electrical power supply.


