


1-7
2. Disconnect the fryer from the electrical power supply.
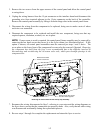
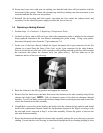
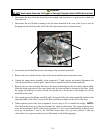
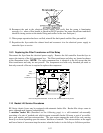
3. Remove the two screws securing the cover of the contactor box. The contactor boxes above the
filter pan are accessed by sliding under the fryer. They are located to the left and right above the
guide rails (see photo below). The contactor boxes of non-filter units or frypots not over the
filter pan are accessed by opening the fryer door directly under the affected frypot.
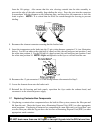
4. The contactors and relays are held on by threaded pin studs so that only removal of the nut is
required to replace the component.
5. After performing necessary service, reverse steps 1-4 to return the fryer to operation.
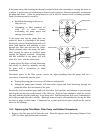
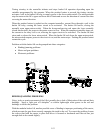
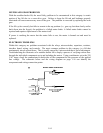
Left and right views of mechanical contactor box components.
1.8 Replacing a Frypot
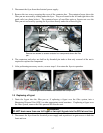
1. Drain the frypot into the filter pan or, if replacing a frypot over the filter system, into a
Shortening Disposal Unit (SDU) or other appropriate metal container. If replacing a frypot over
the filter system, remove the filter pan and lid from the unit.
DANGER
DO NOT drain more than one full frypot or two split frypots into the SDU at one time.
2. Disconnect the fryer from the electrical power supply and reposition it to gain access to both the
front and rear.
Remove two screws to access contactor box components above the filter
pan
.