


SUPER MARATHON SERIES GAS FRYERS
CHAPTER 4: FRYER OPERATIONS
4-2
4.1.1 Pilot Lighting Procedures, Standing Pilot Only
Initial Pilot Lighting: All Dean fryers are tested, adjusted and calibrated to sea level conditions
before leaving the factory. Adjustments to assure proper operation of pilot may be necessary on
installation to meet local conditions, low gas pressure, differences in altitude and variations in gas
characteristics. These adjustments correct possible problems caused by rough handling or vibration
during shipment, and are to be performed only by qualified service personnel. These adjustments
are the responsibility of the customer and/or the dealer and are not covered by the Dean warranty.
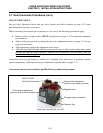
The inlet pipe at the lower rear of the fryer brings incoming gas to the pilot safety control valve, then
to the pilot and main burners. The pilot is located high in the cabinet center, at the base of the
frypot.
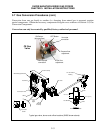
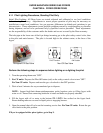
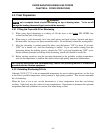
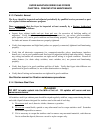
Honeywell CE Gas Valve
OFF
ON
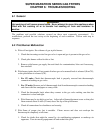
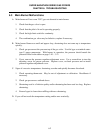
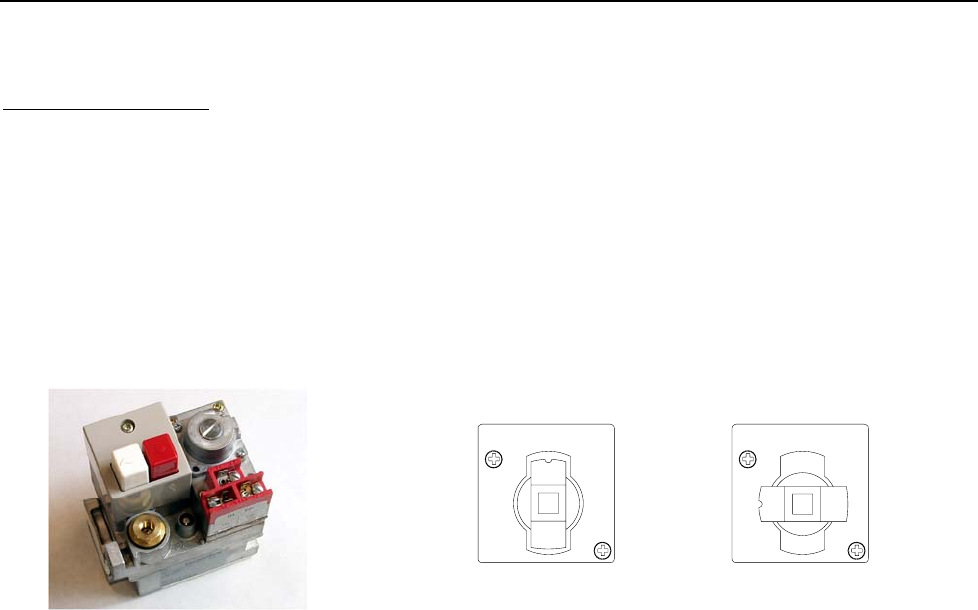
PILOT
OFF
ON
PILOT
PILOT Position ON Position
Non-CE Gas Valve
Perform the following steps in sequence before lighting or re-lighting the pilot:
1. Turn the operating thermostat "OFF".
2. For CE units: Depress the Pilot Off button (red) on the safety control valve to turn "OFF".
For Non-CE units: Depress and turn the gas valve knob to the OFF position.
3. Wait at least 5 minutes for any accumulated gas to disperse.
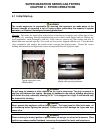
NOTE: Inspect high-limit thermostat/temperature probe locations prior to filling frypot with
water or oil. Ensure that connecting hardware is intact and bulbs are properly attached.
4. Fill the frypot with oil or water to the bottom OIL LEVEL line scribed on the frypot back.
Ensure heating tubes are covered in liquid prior to engaging burners.
5. Open the manual shut-off valve on the incoming service line. For Non-CE units: Rotate the gas
valve knob to the pilot position.
If fryer is equipped with a piezo ignitor, go to Step 9.