


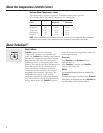

14
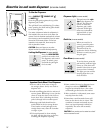
About crisper removal.
Not all features are on all models.
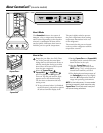
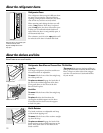
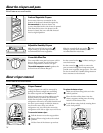
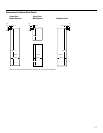
About the crispers and pans.
Not all features are on all models.
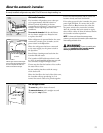
Fruit and Vegetable Crispers
Excess water that may accumulate in the
bottom of the drawers should be wiped dry.
On some models the bottom drawer has
a cover that slides back as the drawer is opened.
This allows full access to the drawer. As the
drawer is closed, the cover will slide forward
into its original position.
Adjustable Humidity Crispers
Slide the control all the way to the
(high) setting to provide high humidity
recommended for most vegetables.
Slide the control all the way to the (low)
setting to provide lower humidity levels
recommended for most fruits.
Convertible Meat Pan
The convertible meat pan has its own cold air
duct to allow a stream of cold air from the
freezer compartment to flow to the pan.
The variable temperature control regulates the
air flow from the Climate Keeper.
™
Set the control to the (coldest) setting to
store fresh meats.
Set the control to (cold) to convert the
pan to normal refrigerator temperature and
provide extra vegetable storage space. The cold
air duct is turned off. Variable settings between
these extremes can be selected.
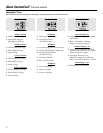
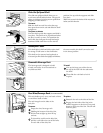
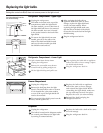
Crisper Removal
The top crispers can easily be removed by
pulling the drawer straight out and lifting
the drawer up and over the stop location.
If the door prevents you from taking out the
drawers, first try to remove the door bins.
If this does not offer enough clearance, the
refrigerator will need to be rolled forward until
the door opens enough to slide the drawers
out. In some cases, when you roll the
refrigerator out, you will need to move the
refrigerator to the left or right as you roll it out.
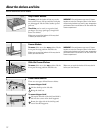
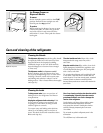
To remove the bottom crisper:
Pull the drawer out to the stop position.
Rotate all four swing locks to the unlock
position.
Lift the front of the drawer up and out.
To replace the bottom crisper:
Make sure all four swing locks are in the
unlock position.
Place the sides of the drawer into the
drawer supports, making sure the swing
locks fit on the drawer slots.
Lock all four swing locks by rotating them
to the lock position.