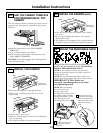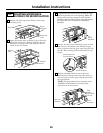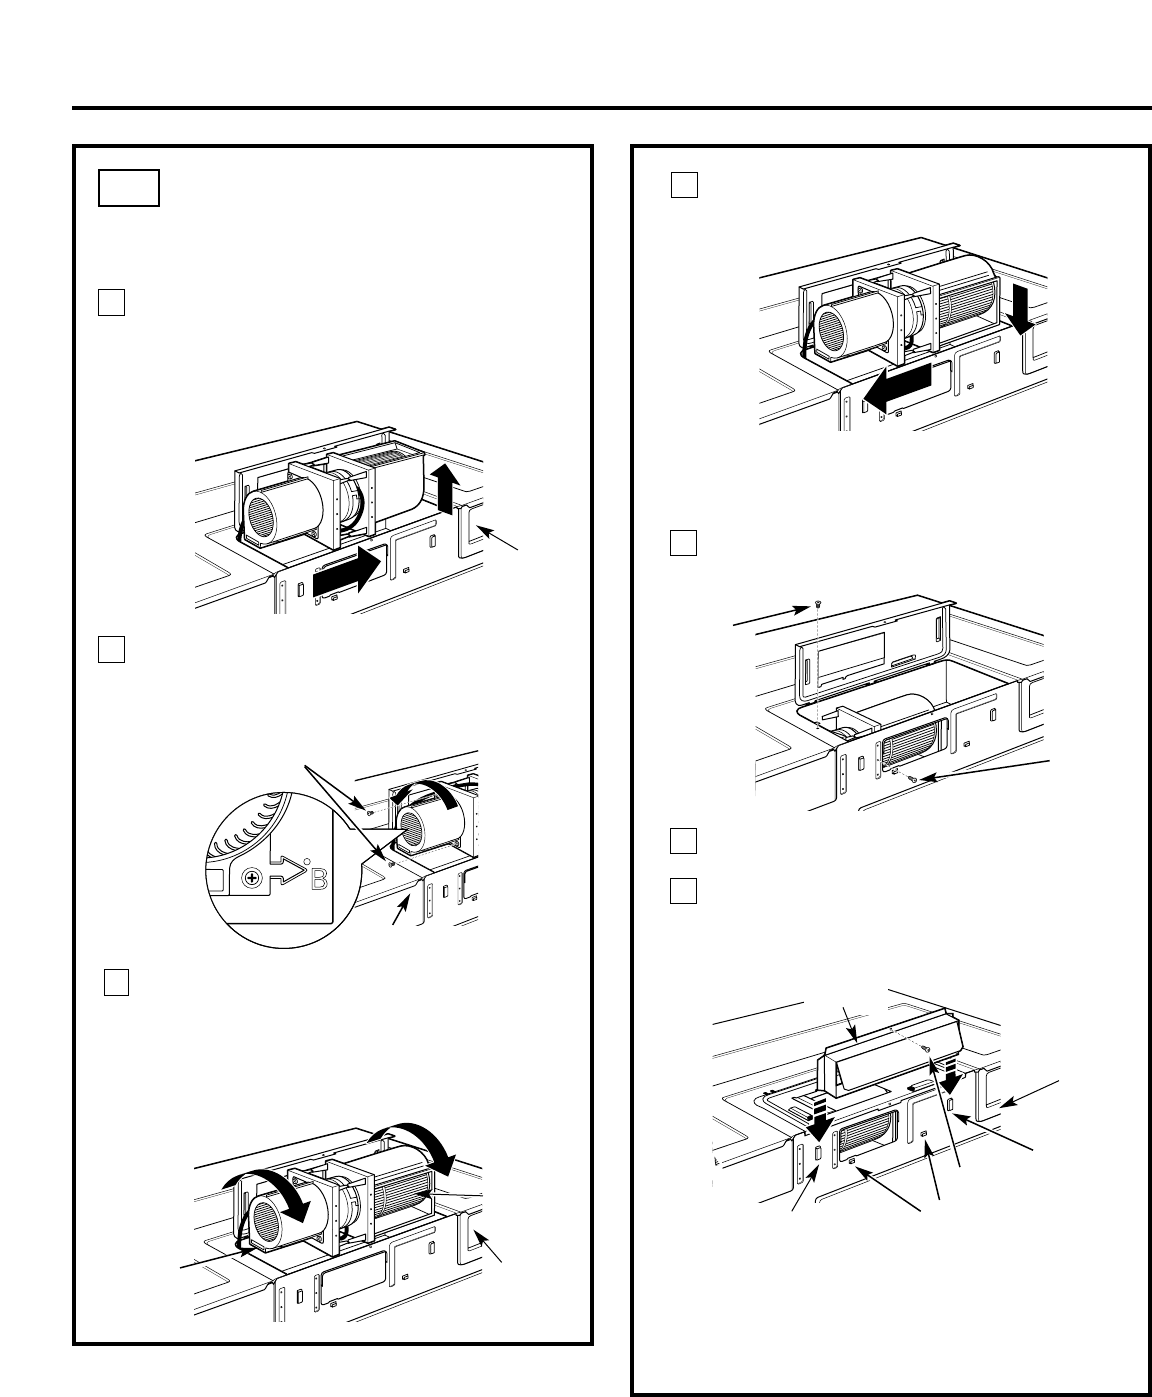
Close the blower cover.
7
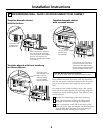
Secure the blower unit to the microwave with
the two screws removed in Step 2.
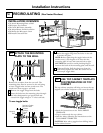
6
Roll the assembled blower unit so that the
black-colored exhaust outlet faces the back of
the microwave and the gray-colored inlet sleeve
faces downward. NOTE: The gray-colored sleeve
opening must ALWAYS face downward to ensure
proper operation of the microwave.
5
4
3
ADAPTING MICROWAVE
BLOWER FOR OUTSIDE
BACK EXHAUST (cont.)
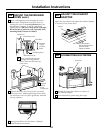
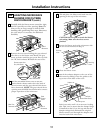
B4.
Carefully slide the blower motor toward the right,
and lift it partially out of the opening. Note: The
blower wires are long enough to allow flexible
handling while performing these steps. Disconnect
the wires only if it is necessary for additional
flexibility.
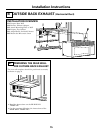
Remove the two screws holding the gray-colored
inlet sleeve to the blower unit. Rotate the gray
sleeve as shown until the gray arrow lines up with
the “B”, back exhaust. Reinstall the two screws.
Back of
Microwave
Tilt and place the blower unit back into the
opening in the top of the microwave.
Back of
Microwave
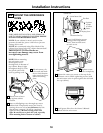
8
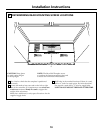
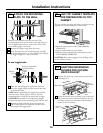
Attach the exhaust adaptor to the rear of the
microwave by sliding it into the guides at the
top center of the back of the oven.
9
Installation Instructions
Push in securely until it is in the lower locking
tabs. Take care to assure that the damper hinge
is installed so that it is at the top and that the
damper swings freely. Reinstall the original
blower motor screw through the adaptor and
into the back of the microwave.
Guide
Guide
Adaptor
Locking Tabs
Back of
Microwave
Remove screws from
Gray Inlet Sleeve
CAUTION: Do not pull or stretch the blower
unit wiring. Make sure the wires are not
pinched.
Retaining
screw
17
Retaining
screw
Blower Motor Screw
Black
Exhaust
Outlet
Must Face
Downward
Back of Microwave


