


2
Recirculating ........................................ 19–22
Attach Mounting Plate to Wall ............19
Preparation of Top Cabinet ................19
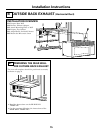
Adapting Microwave Blower
for Recirculation ..........................20, 21
Mount the Microwave Oven ..........21, 22
Installing the
Charcoal Filter Accessory ....................22
Before You Use Your Microwave .......................... 23
CONTENTS
General information
Important Safety Instructions .................................. 3
Electrical Requirements .......................................... 3
Hood Exhaust ...................................................... 4, 5
Damage—Shipment/Installation.............................. 6
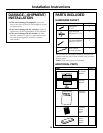
Parts Included.......................................................... 6
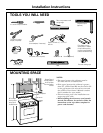
Tools You Will Need ................................................ 7
Mounting Space ...................................................... 7
Step-by-step installation guide
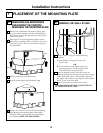
Placement of Mounting Plate ............................ 8–10
Removing the Mounting Plate ...................... 8
Finding the Wall Studs .................................. 8
Determining Wall Plate Location .................. 9
Determining Rear Mounting Screw Locations .. 10
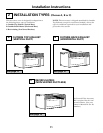
Installation Types.............................................. 11–22
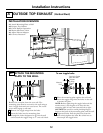
Outside Top Exhaust ............................ 12–14
Attach Mounting Plate to Wall ............12
Preparation of Top Cabinet ................13
Install the Damper ..............................13
Mount the Microwave Oven ..........13, 14
Adjust the Exhaust Adaptor ................14
Connecting Ductwork..........................14
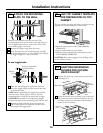
Outside Back Exhaust............................ 15–18
Preparing Rear Wall for
Outside Back Exhaust..........................15
Remove Exhaust Adaptor ......................15
Attach Mounting Plate to Wall ............16
Preparation of Top Cabinet ................16
Adapting Microwave Blower
for Outside Back Exhaust................16, 17
Mount the Microwave Oven ................18
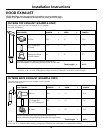
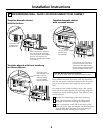
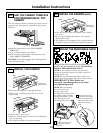
A
B
C
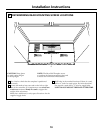
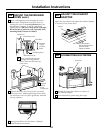
Installation Instructions