Introduction to Your Oven
1-41
.e@
@@
“,1I fl 14
/
.4-
W
---
——2-:. -.<
\*
d
.-
@
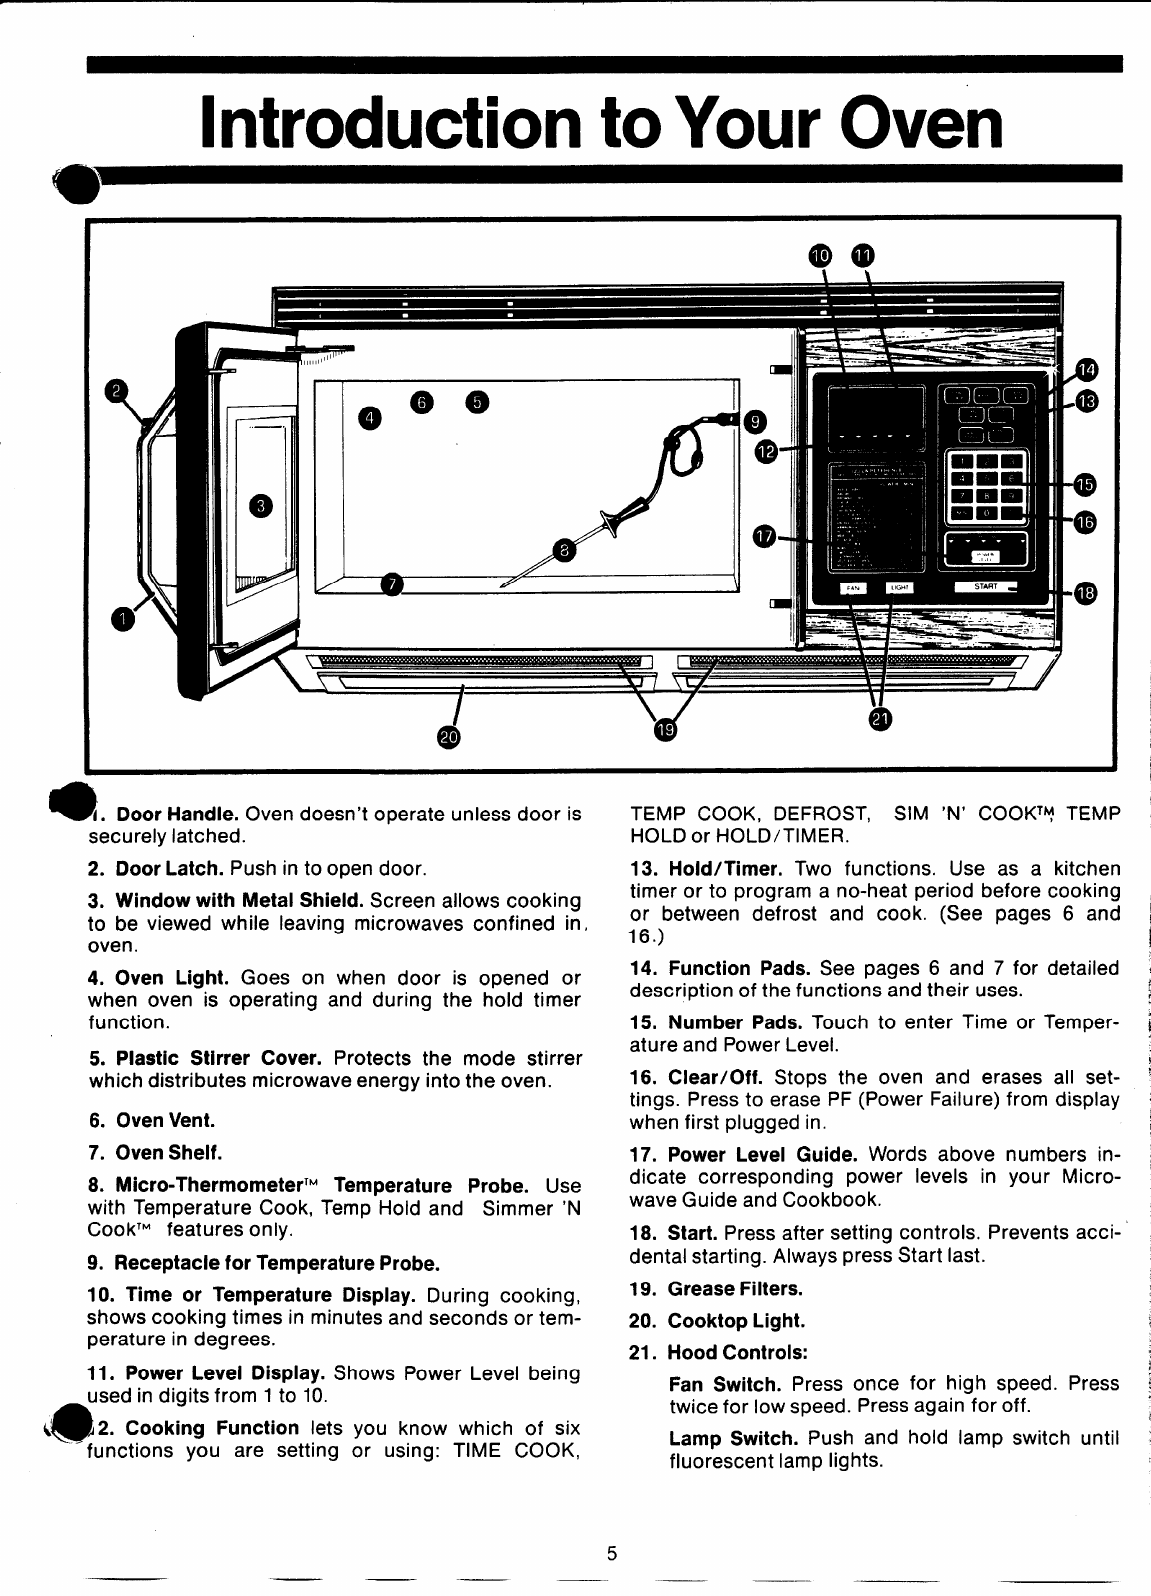
9 (. Door Handle. Oven doesn’t operate unless door is
TEMP COOK, DEFROST, SIM ‘N’ COOKTV TEMP
securely latched.
HOLD or HOLD/TIMER.
2. Door Latch. Push in to open door. 13. Hold/Timer. Two functions. Use as a kitchen
3. Window with Metal Shield. Screen allows cooking
timer or to program a no-heat period before cooking
to be viewed while leaving microwaves confined in,
or between defrost and cook. (See pages 6 and
oven.
16.)
4. Oven Light. Goes on when door is opened or
14. Function Pads. See pages 6 and 7 for detailed
description of the functions and their uses.
when oven is operating and during the hold timer
,
function. 15. Number Pads. Touch to enter Time or Temper-
I
5. Plastic Stirrer Cover. Protects the mode stirrer
ature and Power Level.
which distributes microwave energy into the oven.
6. Oven Vent.
7. Oven Sheif.
8. Micro-ThermometerTM Temperature Probe. Use
with Temperature Cook, Temp Hold and Simmer ‘N
CookTM features only.
9. Receptacle for Temperature Probe.
10. Time or Temperature Dispiay. During cooking,
shows cooking times in minutes and seconds or tem-
perature in degrees.
11. Power Levei Dispiay. Shows Power Level being
used in diaits from 1 to 10.
@
“
(
2. Cooking Function lets you know which of six
‘functions you are setting or using: TIME COOK,
16. Ciear/Off. Stops the oven and erases all set-
tings. Press to erase PF (Power Failure) from display
when first plugged in.
17. Power Levei Guide. Words above numbers in-
dicate corresponding power levels in your Micro-
wave Guide and Cookbook.
18. Start. Press after setting controls. Prevents acci-
dental starting. Always press Start last.
19.
20.
21.
Grease Fiiters.
Cooktop Light.
Hood Controis:
Fan Switch. Press once for high speed. Press
twice for low speed. Press again for off.
Lamp Switch. Push and hold lamp switch until
fluorescent lamp lights.
5
—


