Installation
Reverse Osmosis Filtration System
Instructions
Models PNRQ21LBN and PNRQ21LRB
Questions? Call 800.GE.CARES (800.432.2737)
BEFORE BEGINNING INSTALLATION
Read these instructions completely
and carefully.
•
IMPORTANT — Save these
instructions for local inspector’s use.
•
IMPORTANT — Observe all
governing codes and ordinances.
• Note to Installer – Be sure to leave these
instructions with the Consumer.
• Note to Consumer – Keep these
instructions for future reference.
• Proper installation is the responsibility
of the installer.
• Product failure due to improper installation
is not covered under the Warranty.
• A shutoff valve must be available or added
near the installation point.
TOOLS AND MATERIALS
REQUIRED FOR INSTALLATION
• Electric drill and 1-1/4″ Drill Bit (type as
required) if mounting is needed for faucet
• Two (2) Adjustable Wrenches
• 1/16″ Drill Bit (optional for pilot holes)
• Tape Measure
• Phillips and Flat Blade Screwdrivers
• Utility Knife
• If your main water line is a rigid pipe,
you will require a compression fitting
and possibly other plumbing hardware
to complete the installation.
CAUTION: To avoid damaging the
sink, consult a qualified plumber or installer
for drilling procedures. Special drill bits may
be needed for porcelain or stainless steel.
CONTENTS INCLUDED
WITH PRODUCT
• Reverse Osmosis Assembly and Tubing
• Product Literature (Owner’s Manual and
Installation Instructions)
• Performance Data Sheet
• Feed Water Adapter and Supply Valve
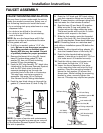
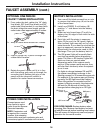
• Faucet Assembly with Electronic Base
Monitor and Tubing
• Storage Tank
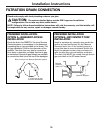
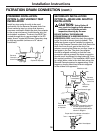
• Drain Line Adapter
6
WARNING: Read entire manual. Failure to follow all guides and rules could cause
personal injury or property damage.
• Check with your state and/or local public works department for plumbing codes. You must
follow their guides as you install the Water Filtration system.
NOTE: Failure to comply with these installation instructions will void the product warranty, and
the installer will be responsible for any service, repair or damages caused thereby.


