


18
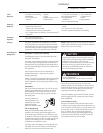
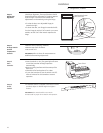
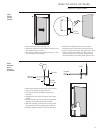
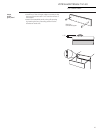
Step 13
Start
Icemaker
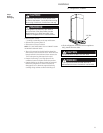
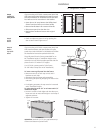
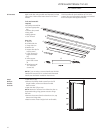
• A standard toekick is supplied. Install with 2 screws
provided, adjust to desired height and tighten
screws.
IMPORTANT: The vented toekick must remain
unobstructed for proper air circulation and operation.
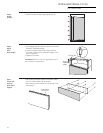
Step 14
Install
Toekick
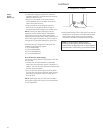
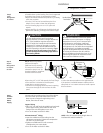
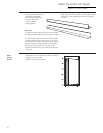
Step 12
Arrange Interior
and Set
Temperature
Controls
• Remove internal packing materials.
• Remove tape from all shelves.
• Set control at “5”.
IMPORTANT: Allow 24 hours for temperatures to
stabilize before making adjustments.
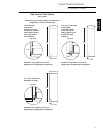
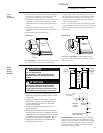
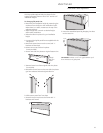
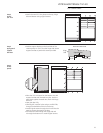
Step 11
Adjust Door
Alignment
Check door alignment. The top of the door should
be parallel with the grille panel. If the door appears
to be too high or too low on the handle side,
adjustments can be made by turning the hinge.
• To raise the door, turn adjustable hinge pin
towards the right.
• To lower the door, turn hinge pin towards the left.
Turn the hinge pin with a 5/16″ wrench or, on some
models, use the 3/16″ Allen wrench taped to the
hinge.
Door Should be Parallel
With Grille Panel
Bushing
Door Hinge
Case Hinge
5/16" Wrench
Raise
Pin Shoulder
• Start the switch to I (on). The green light will come
on and the icemaker will begin operation
automatically.
• Be sure nothing interferes with the sweep of the
feeler arm.
• Discard the first few batches of ice cubes.
• To turn the icemaker off, set the switch to O (off).
Allow 45 minutes for the icemaker to resume
operation.
Power Switch
Green Power Light
Feeler Arm
Installation
36″ Refrigerators, Freezers