


NOTE: Before cleaning, all product should be drained from the freezing cylinder, pres-
sure vented, and either the valves set closed or product removed from the machine.
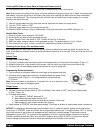
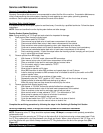
1) Disassemble the dispensing valve by first removing the dispensing valve pin
(Figure 12)
2) Push up on the dispensing valve plunger and pull out the dispensing handle.
The plunger assembly complete with spring and "O" Rings can then be removed
as a unit.
3) Remove knobs and carefully remove the freezer dispensing valve assembly.
4) Remove the O-Rings from the plunger assembly and back of the dispensing
valve body.
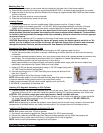
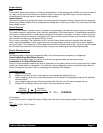
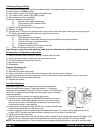
NOTE: The best way to remove an O-Ring is to first wipe off all of the lubricant using a clean
paper towel. Pinch the O-Ring upward with a dry towel between your index finger and thumb.
When a loop is formed in the O-Ring, roll it out of the groove with your other thumb. Always
remove the O-Ring farthest from the end of the plunger first. (Figure 13)
5) Carefully inspect the O-Rings for wear, nicks or cracking and replace if necessary.
6) Carefully pull out the auger assembly taking care to avoid damaging the rear seal
assembly at the back of the freezing cylinder.
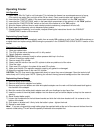
7) Remove stationary portion of the shaft seal assembly (silicon carbide ring and rubber
boot) from the back end of the freezer cylinder. This is accomplished by reaching into
the cylinder and pulling the seal out with your index finger. (Figure 14)
8) Slide the rotary seal off of the auger shaft. (Figure 15) Inspect both seal compo-
nents carefully for nicks or cracks. Replace seal if defective. NOTE: To prevent
leakage both surfaces of the seal must be smooth with no chips or cracks.
9) Wash all components in a detergent solution, sanitize and allow to air dry.
DO NOT WASH COMPONENTS IN A DISHWASHER.
10) Wet the inner rubber lip of the rotary portion of the seal and the back end of the
auger shaft with water. Slide rotary portion of assembly onto the auger shaft, RUBBER
FIRST, with the smooth sealing surface facing toward the back of the auger.
11) Insert the stationary portion of the seal into the grooved rubber boot with the
polished surface facing out (forward), away from the rubber boot. Lubricate the
grooved rubber exterior portion of the boot with silicone lube and insert it straight
back into recess at the back of the freezing cylinder, RUBBER FIRST.
NOTE: On the circular portion of the seal, make sure that the groove is toward the
rubber (back of freezer).
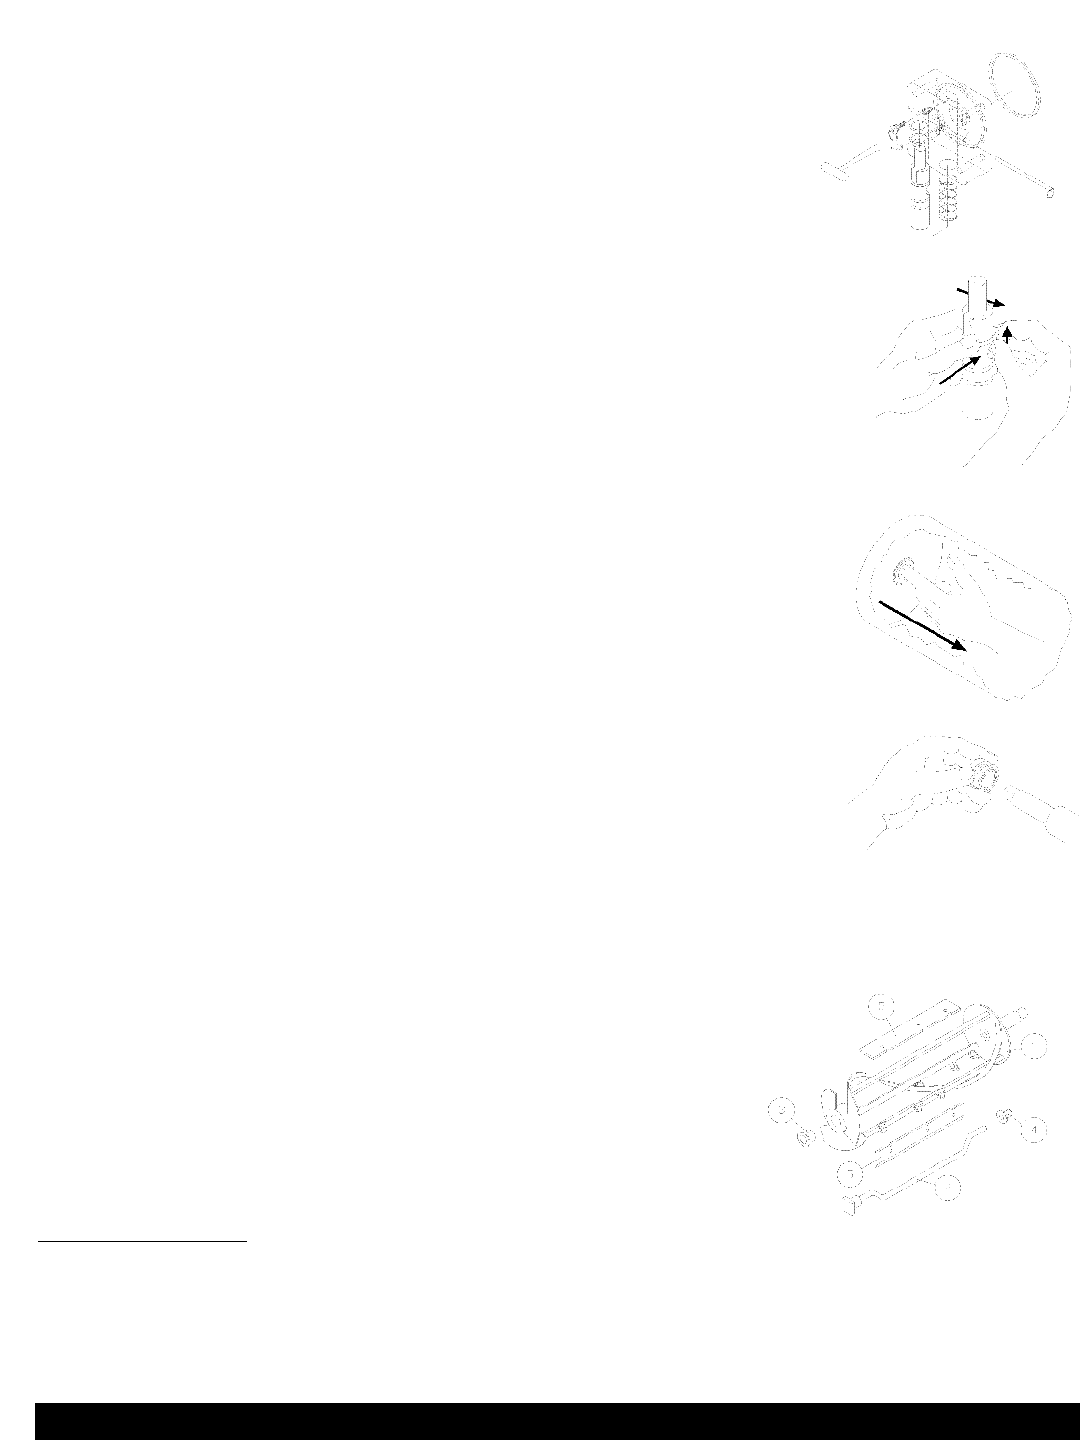
12) Reassemble the dasher assembly, as shown in Fig.16. Insert the larger front and
smaller rear white plastic bearings into dasher, then slip in the stator rod. Carefully
and slowly guide the auger into the freezing cylinder taking care not to
damage the seal assembly. Turn auger shaft until it engages the square drive coupling.
13) Reassemble the dispensing valve assembly. (Fig. 12) Be sure to lubricate o-rings and relief vent
before assembling.
Figure 12
Figure 13
Figure 14
Cleaning
Figure 15
14) Thoroughly wash and sanitize all components. Inspect and lubricate
all surfaces of the large O-Ring and refit it into the rear of the valve
assembly. Install the valve assembly on the front studs and tighten knobs
until they are finger tight. Do not use tools to tighten knobs.
IMPORTANT: Failure to lubricate the large "O" Ring can result in product
leakage.
15) Reinstall the O-Rings on the plunger assembly and lubricate the O-Rings
and plunger. Reassemble the valve and replace the retainer pin.
Daily Cleaning of Unit
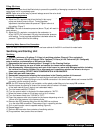
The exterior of the unit should be cleaned as needed, at the end of the operating day or during defrost cycle.
Remember to empty and clean the drip tray and drip tray bracket.
CAUTION: Course rags, abrasive cleaners, and excessive force can damage and/or destroy the surfaces of
this unit.
Crathco Beverage Freezers
Page 9
Figure 16