


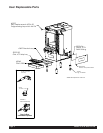

Page 8 Model LCD-2R and LCD-2A
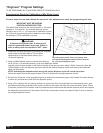
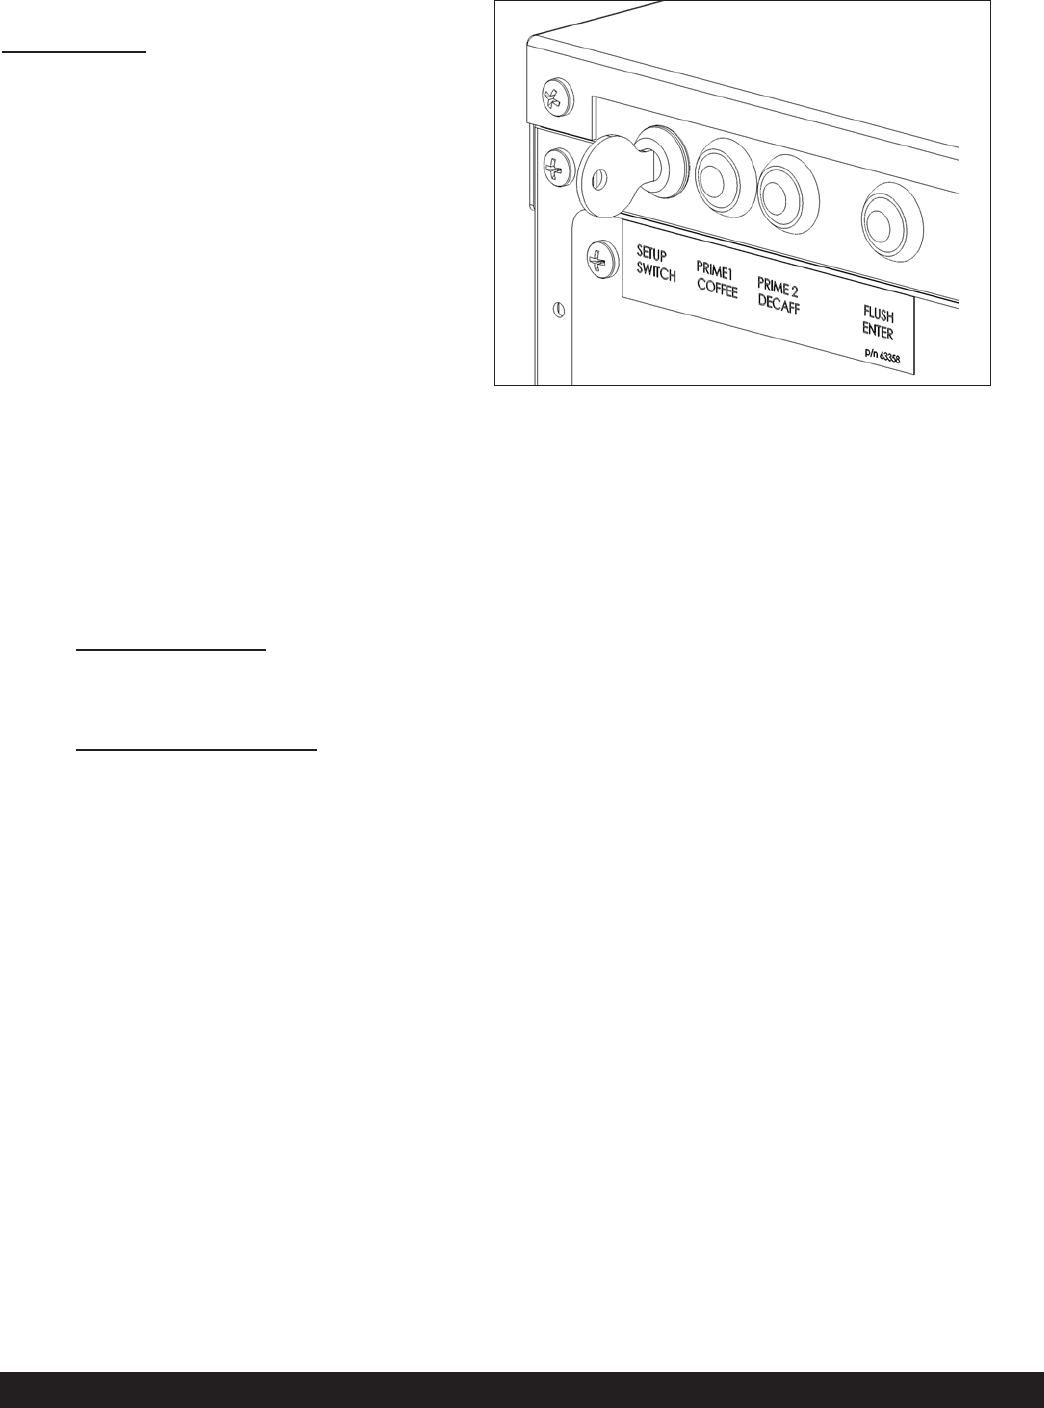
Open the door and insert Setup key into keyswitch
above cooler compartment. Turn key ¼ turn clock-
wise, the display on front of door will say ‘Setup
Mode, Press Enter’.
The two ‘Prime’ buttons and the Flush button now
become the programming buttons:
Prime 1 = UP, Prime 2 = DOWN, Flush = ENTER
Press the Enter button (flush). The user now has
access to the following options:
Coffee ratio: The user can adjust the strength of
the regular coffee by using the up and down but-
tons, located to the left of the keyswitch. Once the
required ratio is chosen, press Enter.
Decaf Ratio: The user can also set the Decaf ratio, same procedure as
above.
Portion Control: The up and down keys toggle between Enabled and Disabled. When disabled all selections made
by the taps will be continuous until the tap is released. When enabled the taps will give a pre-determined dispense
volume. If portion control is enabled the next screen will ask you to pull the tap of the selection to set – once chosen
you then set the portion size – this can be set one of two ways:
Dispense into vessel:
Place vessel to be filled underneath nozzle and press and hold tap – the machine will
dispense water into the vessel and the display will start counting up in 10ths of a second (50 = 5 seconds).
Once the correct level is reached, release the tap. If the level is correct then note the number on the display,
if incorrect then discard the water from the vessel and start again.
Use Up and Down buttons:
If by past experience the number for the desired volume is known, then the
volume can be set by pressing and holding the up and down buttons to set the count number.
Once the portion for the selection is set, you can set another by pulling the relevant tap, or press enter to set the
Override portions. You will now be asked to set the Override portion – this is the portion dispensed if the tap is
pressed 10 seconds after pressing the hidden ‘Portion override’ switch that is located underneath the door. Set this
volume in the same manner described above. Once set, press Enter.
Defrost? [No]: If ‘Yes’ is selected then the cooler will defrost any ice build-up. The product is best moved to a
suitable refrigerator during the defrost and the machine door left open to aid with a swift defrost. Cleaning the inside
of the cooler with a warm cloth aids the process too. The machine will automatically start to chill again 15 minutes
after defrost has been activated.
Selections when heating[Disabled]: When disabled the machine will not dispense if the boiler temperature is lower
than the chosen lockout temperature.
Temp Display: There are three options, Fahrenheit, Celsius and Off. Once chosen, press enter.
Now the display will be back to the start menu and will say ‘Setup Mode, Press Enter’. You can either press enter to
scroll back through the options, or you can turn the keyswitch ¼ turn counter clockwise to come out of Setup mode.
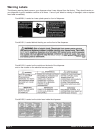
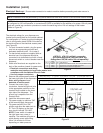
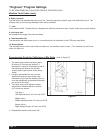
User Programming Instructions
refer to Figure C
Setup Mode
Figure C