


English
6
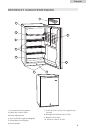
FEATURES AND USE
General Featur
es
Adjustable temperature dial:
Your refrigerator will automatically maintain the temperature level you select. The temperature control
dial has 7 settings plus off. 1 is the warmest. 7 is the coldest. Turning the dial to OFF stops cooling in
both the refrigeration and freezer sections. At first, set the dial to 4 and allow 24 hours to pass before
adjusting the temperature to your needs.
Note:
If the refrigerator has been placed in a horizontal or tilted position for any period of time
wait 24 hours before plugging the unit in.
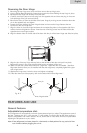
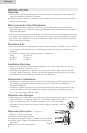
Reversing the Door Hinge
1. Removing the top hinge cover screw and then remove the top hinge cover.
2
. Using a Philips Head Screwdriver, loosen and remove the screws holding the top hinge in place.
3
. Remove the top hinge and carefully lift off the door.
4. Carefully remove the top screw hole plug from the opposite side and insert the plug in the screw
h
ole openings of the just removed screws.
5
. Remove the door pin from the bracket of the lower hinge by turning counter clockwise. Move the
pin to the opposite hole and tighten.
6
. Loosen the screws holding the lower hinge bracket and remove the hinge. Remove the two
screws from the non-hinge side.
7
. Align the holes in the lower hinge bracket to the corresponding holes in the opposite side of the
c
abinet. Insert and tighten the screws. Insert the two remaining screws into the holes of the side
opposite the current hinge location.
8. Align the bottom hole on the left side of the door with the pin of the lower hinge and slide into place.
9. Align the pin of the top hinge with top hole on the left side of the door and push into place.
Replace the screws in the upper hinge bracket but do not tighten all the way.
10. Make sure the door closes easily but forms a tight seal. Adjust the door as needed. (See Door
Alignment Section) Once you are satisfied with the door alignment, completely tighten the upper
door hinge screws.
11. Replace the hinge cover, insert the screw and tighten completely.
12. If the door does not close properly, refer to the section titled “Door Alignment.”
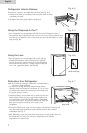
door pin
lower hinge bracket
fig. # 2
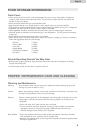
fig. # 3