


– 11 –
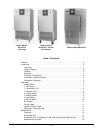
HOLDING FREEZER
TEMPERATURE: -6
The setting for the air temperature in freezer hold mode is shown.
Air temperature will be maintained between the holding temperature
and holding temperature plus differential.
For Example: Holding Freezer Temperature = –6°F. Differential = 6 F°.
Temperature will fluctuate between –6°F and 0°F.
egnaRerutarepmeT.pmeTrezeerFgnidloHteserP
edoMdloHrezeerFF°02otF°23–F°6–
Enter a value within the range. Press [YES] to continue.
This applies only when operating in a Chill mode. When ON, the
blasting air temperature is raised to 28°F during the last third of a
timed (manual) chill cycle or when all three probes are within 5 F°
of the target temperature during an automatic chill cycle.
seulaVelbatpeccAfoegnaReulaVteserP
2ro1ffO=2
Select [1] or [2]. Press [YES] or [NO] to return to the main menu.
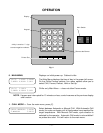
PRINT MODE —
Press the [PRINT] key. This mode can be accessed at any time without interrupting
the ongoing chill cycle.
Select between printing a report including all chill data since 12:00
midnight or only the previous chill cycle.
Press [0] to report all probes. Or, press [1], [2], or [3] to report only
the selected probe. The display returns to whatever menu was
displayed before the [PRINT] key was pressed.
NOTE: Do not pull paper through printer slot.
PRINTER PAPER
Printer paper is available from Hobart — order part number 282051.
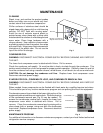
LOADING PRINTER PAPER
CAUTION: Do not touch exposed electrical parts, bare wires or circuit boards. This could cause
electrostatic discharge and could damage the controller.
Do not pull paper through printer. Use the Line Feed Switch to advance any remaining paper through
the printer. Compress the coil spring on the left end of the roll to release the core from the holders on
each side. Follow instructions inside control box for loading printer paper. Once loaded, it may take
a minute or more for paper to advance through the printer slot.
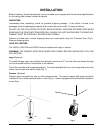
SETTING THE TIME AND DATE —
Open the control box door. Press both the Service Switch (see
Fig. 5) and the [9] key (on front keypad) at the same time.
The service menu will appear. Press [3] to select Clock.
Enter the new hours, minutes, seconds: HH-MM-SS (6 digits).
Press [0] for AM or [1] for PM. Press [YES].
Enter the new month, day and year: MM-DD-YYYY (8 digits).
Press [YES]. Press [NO] two times to exit to the main menu.
SURF PROTECTION: OFF
1=ON 2=OFF
SELECT PRINT MODE
1=24 HR 2=LAST CHILL
SELECT PROBE NUMBER
1->3 OR 0 FOR ALL
1=INPUTS 2=OUTPUTS
3=CLOCK 4=PRINTER
ENTER NEW TIME
XM HH:MM:SS
ENTER NEW TIME
0=AM, 1=PM XX:XX:XX
ENTER NEW DATE
MM/DD 05/20/2000