


– 7 –
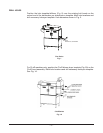
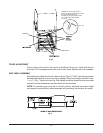
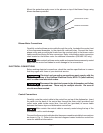
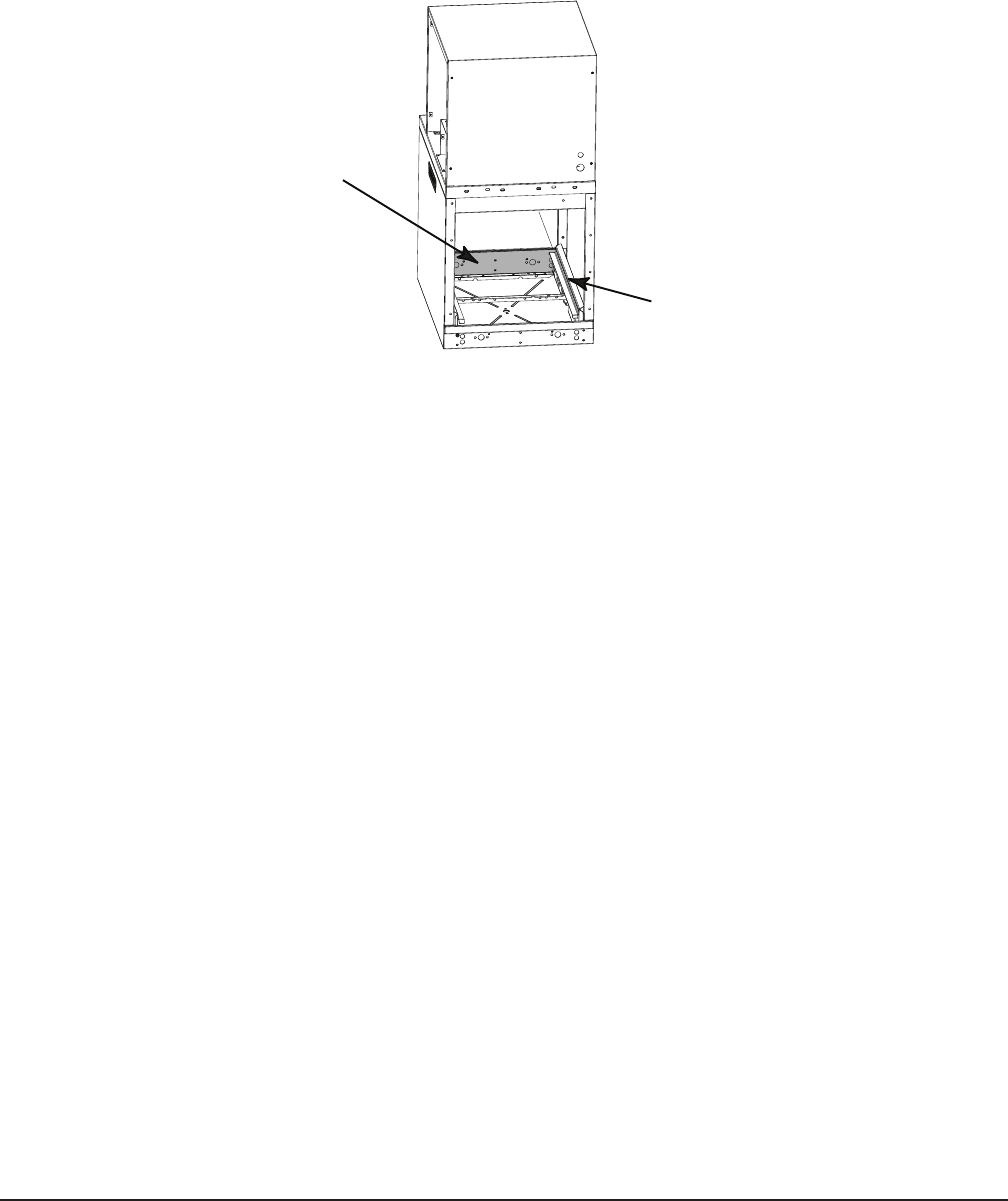
INSTALL TEMPLATE/STIFFENER
Remove knockouts from template/stiffener. Align the holes and attach the template/
stiffener to inside bottom of blower-dryer with 1/4-20 bolts and nuts provided.
Assemble remaining bolts and nuts through chamber. Tighten all bolts and nuts.
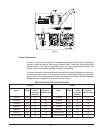
Fig. 4
ASSEMBLE
TEMPLATE/STIFFENER
TO INSIDE LOAD END
OF BLOWER-DRYER
(SEE FIG. 2)
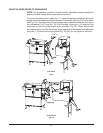
RACK GUIDE
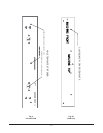
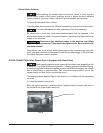
MOUNT ADJUSTABLE LEGS
Mount the adjustable legs (Fig. 3) to the last set of studs in the base of the blower-
dryer using the 5/16" nuts and lock washers already attached.
ADJUST BLOWER-DRYER FEET FOR FIRM MOUNTING
Turn the adjustable feet inward or outward, as necessary, until blower-dryer is
rmlymounted.
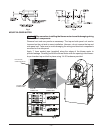
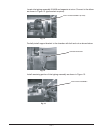
ADJUST AIR DEFLECTOR
Raisetheairdeectortightagainstthechamberandsecureinplacebytightening
the 5/16" bolt. See Fig. 5.
INSTALL CONNECTING RODS
Preassemble (1) elastic nut on each side of both rods, approximately 1.00" onto
the threads (Fig. 5). Route the connecting rods through the tank end. Assemble
the rods through the cross members of both cradles and add the second elastic
nut. Do not completely tighten the elastic nuts. A small gap of 0.15"- 0.020"
will allow better cradle alignment. Assure spacing between the last dog on the
parentmachineandtherstdogontheblowerdryerisequaldistanceinthefront
and rear of conveyor.