


– 3 –
ASSEMBLY
Some components can be removed to allow the cabinet
to pass through short or narrow doorways.
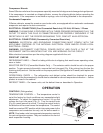
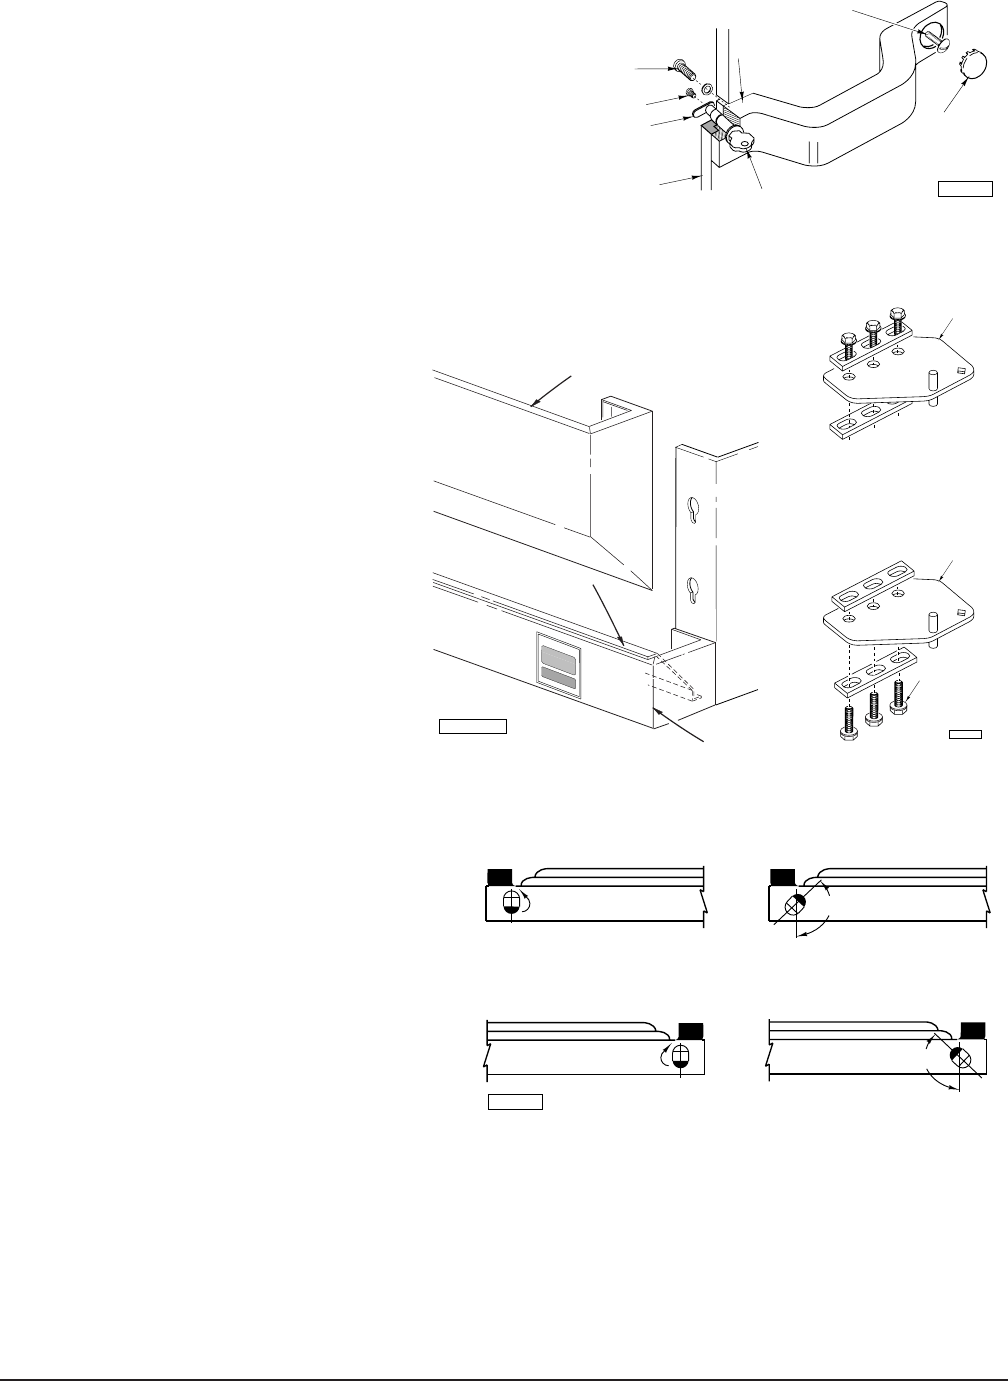
The door handle can be removed as follows:
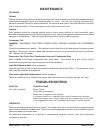
1. Remove the screw and bolt from the tumbler.
2. Remove the two mounting screws and the handle
assembly (Fig. 1)
3. Replace in reverse order of disassembly.
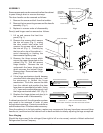
Door(s) and hinges can be removed as follows:
1. Lift up and remove the front trim
panel (Fig. 1).
2. Remove the screws which secure
the trim rail cover (Fig. 1), unplug
the door switch lead wires, and
remove the screws which secure
the trim rail (Fig. 1). Carefully lay
the trim rail on top of the cabinet —
avoid damaging or kinking the
thermometer capillary tube.
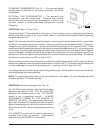
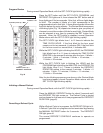
3. Remove the three screws which
secure the upper hinge plate to the
cabinet (Fig. 2). This will remove
hinge tension. Remove the nut
underneath the lower hinge plate
which secures the bottom hinge.
Remove door. Remove lower hinge
plate (Fig. 2).
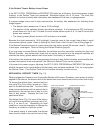
4. If the hinge mechanism should become
uncocked while changing the door, it will
be necessary to recock the hinge
mechanism. To do this, remove the door
from the cabinet and position the door
face down on a workbench or table. Using
a
5
/16" open end or adjustable wrench, turn
the hinge mechanism shaft 135° (Fig. 3).
5. Replace the hinge plates and door(s) in
the reverse order of disassembly.
If cabinets are too tall, the refrigeration system
may need to be removed in order to pass
through short openings. Contact your dealer or
authorized servicer if this becomes necessary.
Once the cabinet is in its final position, replace any components that may have been removed (door
handle, etc.) and then level the cabinet front-to-back and side-to-side by adjusting the legs as required.
Door Hinging
Should the doors need to be rehinged (from right to left or vice versa), contact a Hobart-authorized
Refrigeration Service Company.
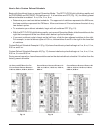
PL-50961
TURN 135º
UNCOCKED POSITION
– POSITION 1 – (LEFT-HAND HINGED DOOR)
COCKED POSITION
135º
TURN 135º
UNCOCKED POSITION COCKED POSITION
135º
– POSITION 2 – (RIGHT-HAND HINGED DOOR)
POSITION DOOR IN ONE OF THE TWO POSITIONS SHOWN.
PL-53617
LOWER
HINGE
SCREWS
(3)
UPPER
HINGE
Fig. 2 Fig. 3
Fig. 4
Fig. 1
PL-50949
DOOR
BOLT
SCREW
ASSEMBLY
MOUNTING
SCREW
HANDLE ASSEMBLY
KEY
MOUNTING SCREW
PLUG
BUTTON
TRIM RAIL
FRONT TRIM PANEL
PL-53615
TRIM RAIL COVER