


28
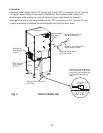
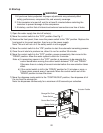
4) Remove the motor bracket thumbscrews, rst from the vertical plane and then from the
horizontal plane. While holding on to the corresponding agitator or auger, move the
agitating motor or the dispensing motor towards you. Remove the agitators and the
dispensing auger from the storage bin. See Fig. 9.
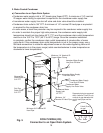
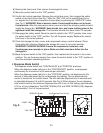
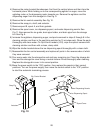
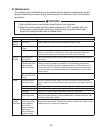
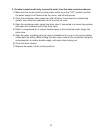
5) Remove the bin control assembly. See Fig. 10.
6) Remove the snap pin, shaft, and actuator.
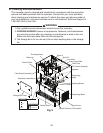
7) Remove spout B, spout A, and their gaskets.
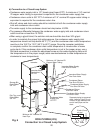
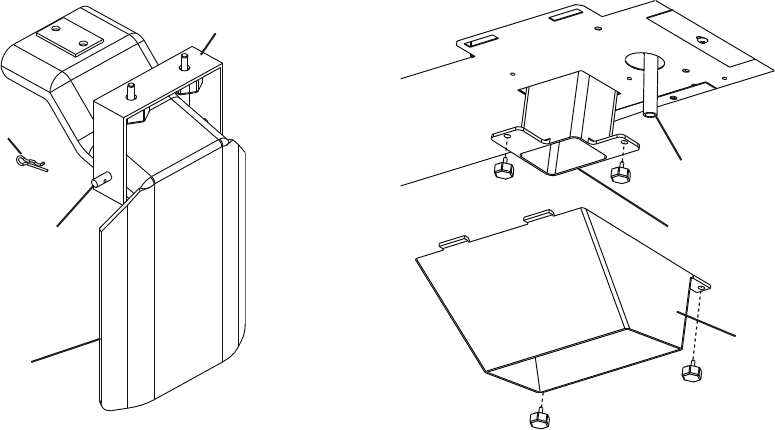
8) Remove the spout cover, ice dispensing spout, and water dispensing nozzle. See
Fig. 11. Also remove the ice guide, drain pipe holder, and drain pipe from the storage
bin. See Fig. 9.
9) Immerse the agitators, dispensing auger, and parts removed in steps 5 through 8 in the
cleaning solution and then in the sanitizing solution for 15 minutes each. Rinse the parts
thoroughly with clean water. On Opti-Serve models (-OS), wipe the optical sensors with
cleaning solution and then with a clean, damp cloth.
10) Wipe the shutter located above the ice dispensing spout thoroughly with a clean cloth.
11) Reassemble the bin control assembly and replace all parts in the reverse order of which
they were removed.
12) Pour warm water into the storage bin and melt any remaining ice. Clean the storage bin
liner and the storage bin cover using a neutral cleaner. Rinse thoroughly after cleaning.
Replace the storage bin cover in its correct position.
13)Movethepowerswitchtothe"ON"position,thenreplacethepanelsintheircorrect
positions.Turnonthepowersupply,thenmovethecontrolswitchtothe"ICE"position
to start the automatic icemaking process.
Fig. 11
Spout Cover
Ice Dispensing Spout
Water Dispensing Nozzle
Fig. 10
Snap Pin
Shaft
Actuator
Bin Control Bracket