


9
V. Removal and Replacement of Components
IMPORTANT
Ensure all components, fasteners and thumbscrews are securely in place after
the equipment is serviced.
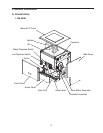
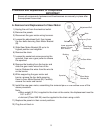
A. Removal and Replacement of Gear Motor
1) Unplug the unit from the electrical outlet.
2) Remove the panels.
3) Disconnect the gear motor wiring harness.
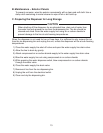
4) Loosen the adjustment bolt, then loosen
the four bolts securing Gear Motor Bracket
(B).
5) Slide Gear Motor Bracket (B) up to its
highest position and retighten.
6) Remove the chain.
7) Loosen the socket set screw securing the
sprocket, then use a gear puller to remove
the sprocket.
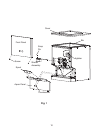
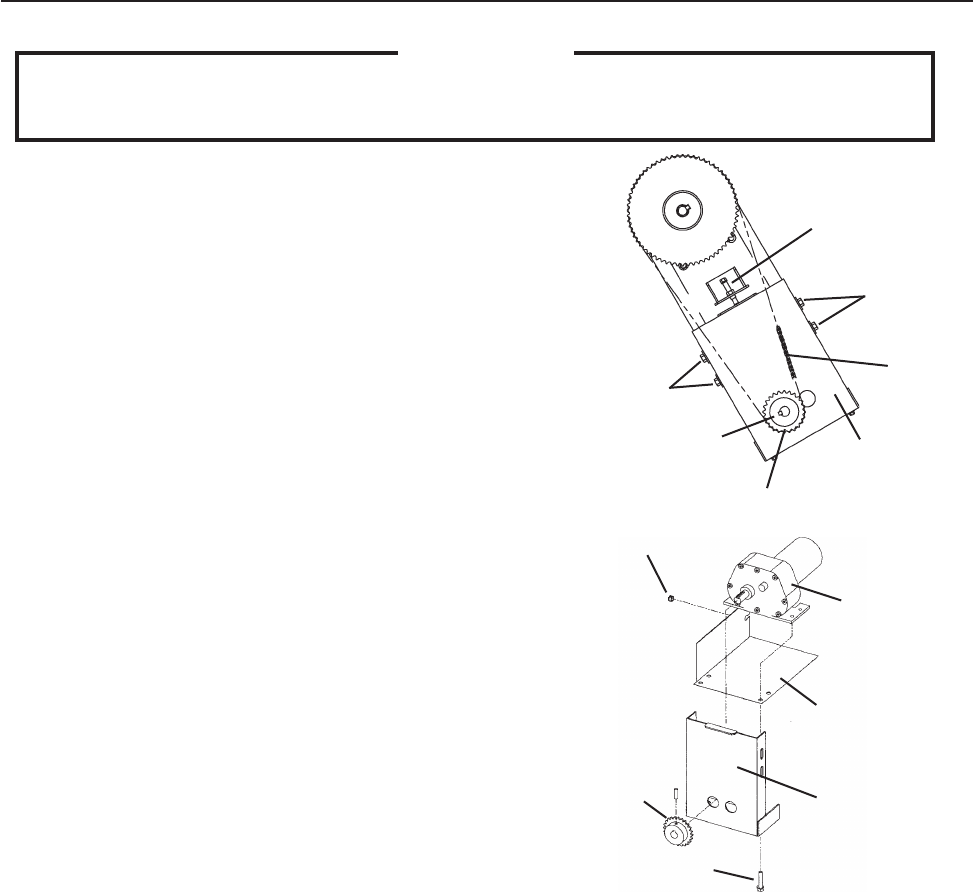
8) Remove the bushing from the barrier and
slide the gear motor wires free of the
barrier. Release the wires from the wire tie
on the barrier.
9) While supporting the gear motor and
barrier, remove the four bolts securing
them to Gear Motor Bracket (B). Carefully
remove the motor and barrier.
10) Install the new gear motor, assembling the removed parts in the reverse order of the
above procedure.
Note:
• When weight (2.2 lb) is applied to the chain at the center, the displacement must be
0.31 to 0.51".
• Lubricant (Class SAE 20) must be applied to the chain using a cloth.
11) Replace the panels in their correct positions.
12) Plug the unit back in.
Gear Motor
Bracket (B)
Adjustment Bolt
Chain
Bolts
Bolts
Sprocket
Lower sprocket
takes a 2.5 mm
allen wrench.
Barrier
Gear Motor
Bracket (B)
Sprocket
Bolt
Gear Motor
Bushing