


4
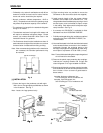
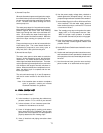
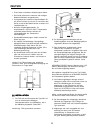
(e) Remove the Bin Control Bracket Extension from
the accessory bag.
(f) Remove the Ice Deflector from the Bin.
(g) Remove the two screws holding the Thermostat
Bulb Attachment to the end of the Thermostat
Bracket.
(h) Use these two screws to attach the Bin Control
Bracket Extension to the Thermostat Bracket.
(i)
Use the two 4 x 10 stainless steel screws in the
accessory bag to attach the Thermostat Bulb
Attachment to the end of the Bin Control Bracket
Extension.
(j)
Reinstall the Ice Deflector in the Bin.
Fig. 3bFig. 3b
Fig. 3bFig. 3b
Fig. 3b
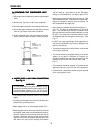
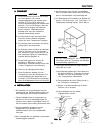
6) Level the icemaker/Storage Bin in both the left-to-
right and front-to-rear directions by turning the bin leg
adjusters with a wrench..
7) Replace the panels in their correct position.
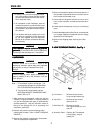
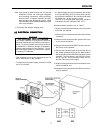
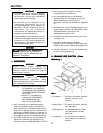
5. STACKING TWO ICEMAKERS5. STACKING TWO ICEMAKERS
5. STACKING TWO ICEMAKERS5. STACKING TWO ICEMAKERS
5. STACKING TWO ICEMAKERS
- See Fig. 4 & 5 - See Fig. 4 & 5
- See Fig. 4 & 5 - See Fig. 4 & 5
- See Fig. 4 & 5
1)
Complete Section 4. “INSTALLATION” for the lower
unit.
2) Remove the Top Panel and the Top Insulation of the
lower unit. The Top Panel and the Top Insulation of
the lower unit are not required when installing the
second icemaker.
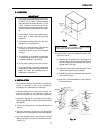
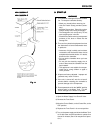
3) Unpack the second icemaker (upper unit), and
remove all shipping cartons, tape(s) and packing.
4) Remove the panels of the second icemaker.
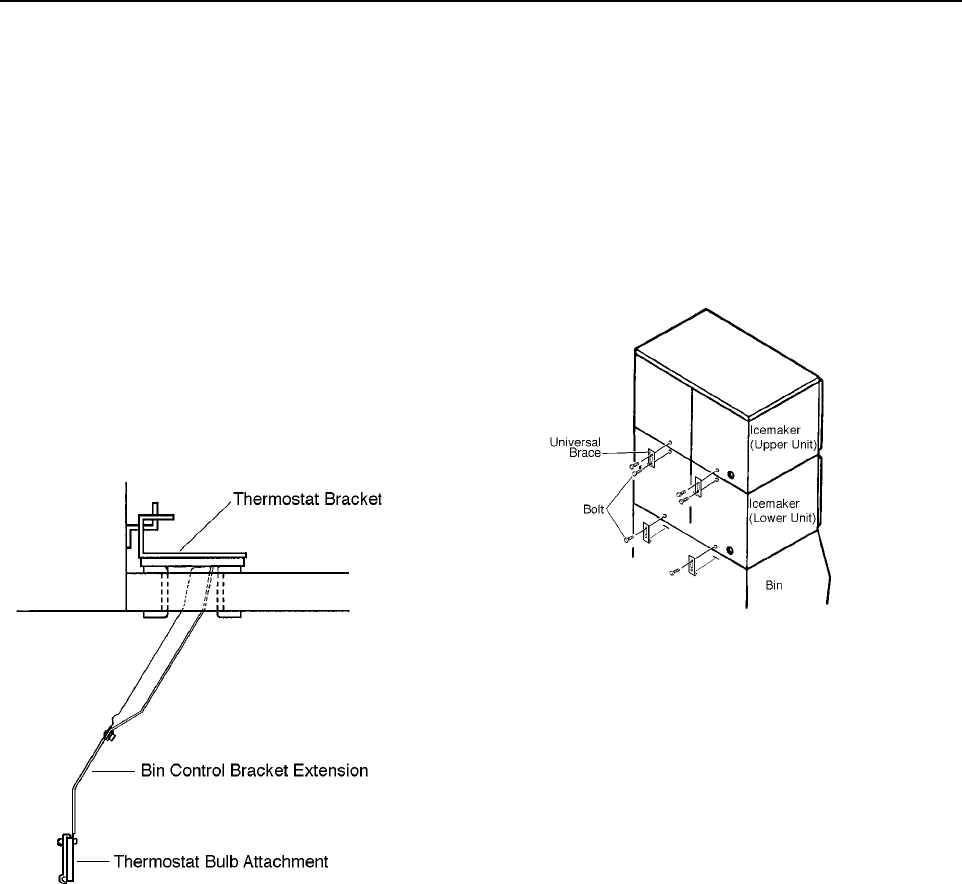
5) Stack the upper unit on the top of the lower unit.
6)
From the accessory pack of the upper unit, locate the
two Universal Braces and four bolts to secure the
upper to the lower unit.
Fig. 4 Fig. 4
Fig. 4 Fig. 4
Fig. 4
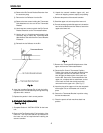
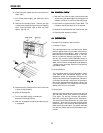
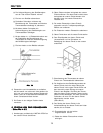
7)
Remove the Thermostat Bulb Attachment of the
upper unit from the Thermostat Bracket.
8) Route the Bin Control Thermostat Capillary
Tubing of the upper unit through the bottom hole
of the upper unit and into the lower unit and
then through the bottom hole of the lower unit
into the Bin. Secure the Thermostat Bulb of the
upper unit, complete with its attachment, to that
of the lower unit with the screws previously
removed from the upper unit. (See Fig. 5.)
9) Insert the plug of the upper unit into the receptacle
of the upper unit on the Bracket until it locks in
place.
10)
Secure the Thermostat Bracket in position using
the two thumbscrews.
11)
Place the panels of both machines back into
position.
ENGLISH