


55
VI. Cleaning and Maintenance
This icemaker must be cleaned and maintained in accordance with the documentation
and labels provided with the icemaker. Consult with your local distributor about cleaning
and maintenance service. To obtain the name and phone number of your local distributor,
contact your nearest Hoshizaki Service office (listed in the Instruction Manual and at
www.hoshizaki.com).
WARNING
1. Except as specied below, only qualied service technicians should attempt
to service this icemaker.
2. CHOKING HAZARD: Ensure all components, fasteners, and thumbscrews
are securely in place after any cleaning or maintenance is done to the unit.
Make sure that none have fallen into the storage bin.
3. This appliance must not be cleaned by use of a water jet.
4. To prevent possible damage, do not clean the plastic parts with water above
104°F (40°C) or in a dishwasher.
5. The storage bin is for ice use only. Do not store anything else in the storage
bin.
A. Cleaning and Sanitizing Instructions
Performed by Qualied Service Technician
Hoshizaki recommends cleaning and sanitizing this unit at least once a year. More
frequent cleaning and sanitizing, however, may be required in some existing water
conditions.
WARNING
1. To prevent injury to individuals and damage to the icemaker, do not use
ammonia type cleaners.
2. Carefully follow any instructions provided with the bottles of cleaning and
sanitizing solution.
3. Always wear liquid-proof gloves and goggles to prevent the cleaning and
sanitizing solutions from coming into contact with skin or eyes.
4. To prevent damage to the water pump seal, do not operate the icemaker with
thecontrolswitchinthe"WASH"positionwhenthewatertankisempty.
1. Cleaning Procedure
1)Dilute27.oz.(800ml)ofHoshizaki"ScaleAway"with5gal.(19l)ofwarmwater.
2) Remove all ice from the evaporator and the storage bin.
Note: To remove cubes on the evaporator, turn off the power supply and turn it back on
after 3 minutes. The harvest cycle starts and the cubes will be removed from the
evaporator.
3) Turn off the power supply.
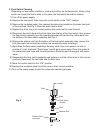
4) Remove the front panel, then remove the insulation panel by rst removing the
thumbscrew, lifting up the panel slightly and pulling it towards you.