


to remove the valve in order to perform this and any further steps.
Be careful not to damage the plumbing assembly. Only use the
pipe wrench enough to where you can spin the valve bonnet off
with your hand.
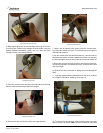
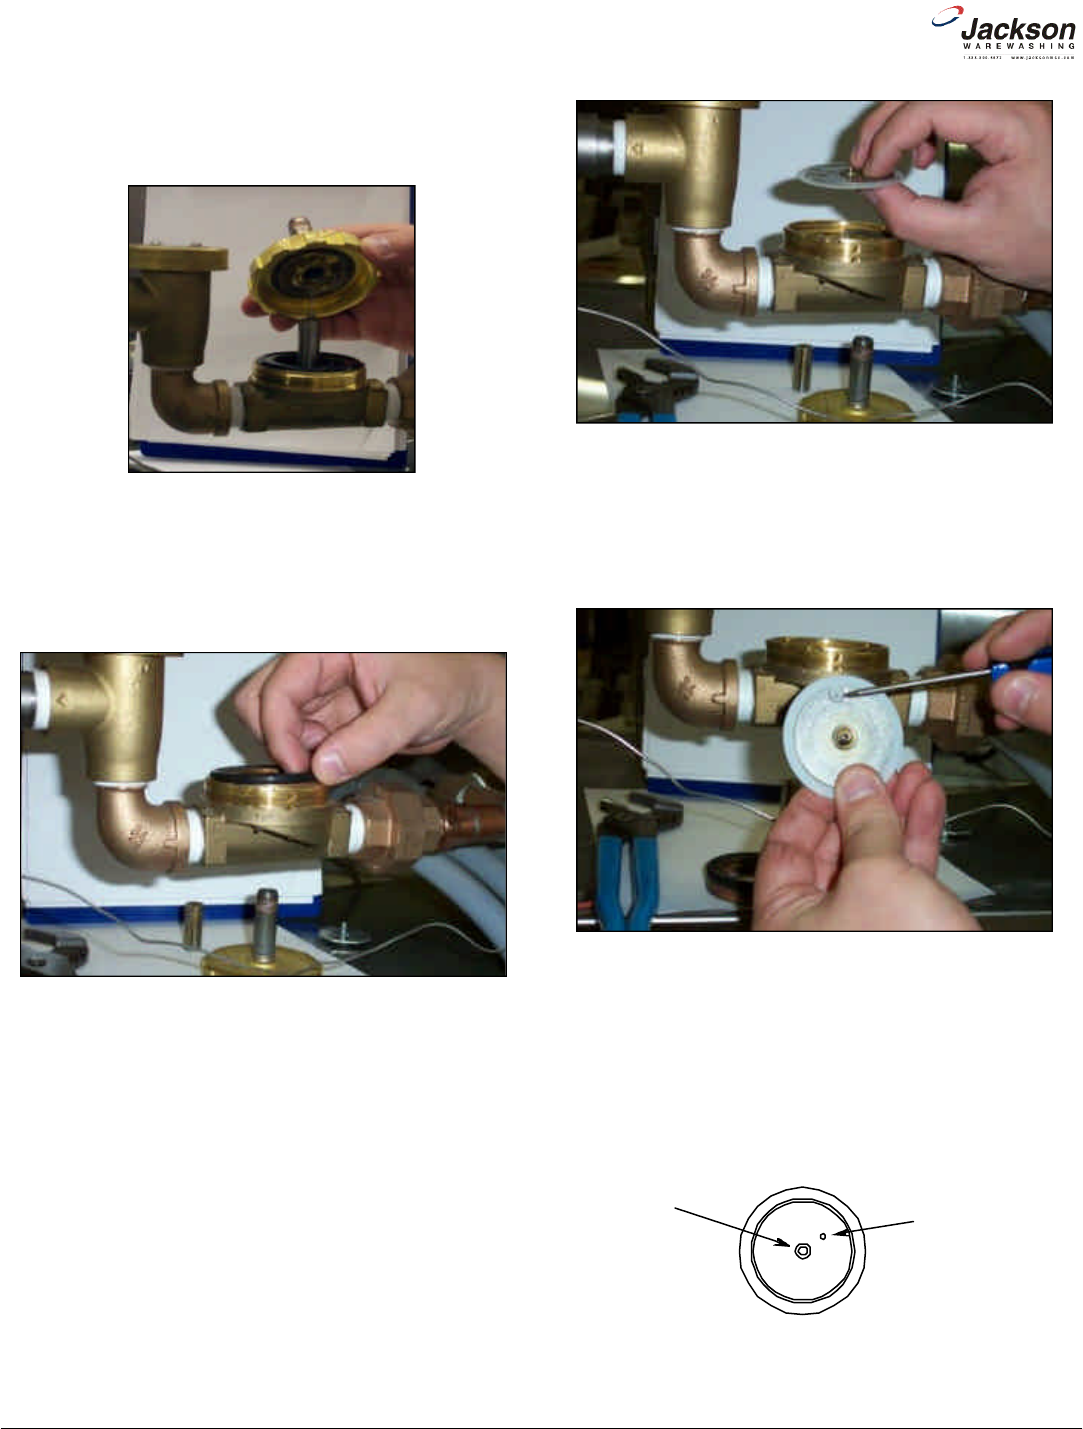
13. Slowly remove the valve bonnet. Note: The spring for the
plunger is located directly under the bonnet and may come free if
you are not careful. Remove the plunger, spring and valve bonnet
and place to the side.
14. Remove the O-ring and inspect it. If it has any tears or cuts or
excessive flat spaces, it should be replaced.
15. Examine the threads for the valve bonnet. Check them for scor-
ing or signs of damage. Take a cloth and clean them out to remove
any foreign particles that might get lodged in the threads and cause
a leak. Severely damage threads should not be repaired; instead it
is recommended that the entire valve should be replaced. These
instructions do not provide information on replacing the solenoid
valve.
16. Note: Even though an O-ring may not appear damaged, it is a
good idea to go ahead and replace it if you have a new one. This
will help ensure that your valve remains leak-free in the future!
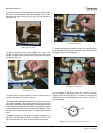
17. Remove the diaphragm retainer and then the diaphragm itself.
Many problems associated with a solenoid valve can be traced to
a clogged pilot port in the diaphragm.
18. As indicated in the photo above, the extension hole can
become clogged. If it is difficult to clean out, you can use a heated
straight pin to push through the hole. The center hole, the pilot port,
must also be clear. If the diaphragm is torn or bent in any way, it
must be replaced.
www.jacksonmsc.com
Parker Style Solenoid Valve Repair Kit Instructions
Revision A (04/15/2005)
4
Removing the valve bonnet
Removing the O-ring
Removing the diaphragm
Pointing out the extension hole
2
1
Diaphragm showing (1) pilot port and (2) extension hole