


8
Oven Windows
To protect the oven door window:
1. Do not use abrasive cleaning agents such as steel wool
scouring pads or powdered cleansers as they may scratch
the glass.
2. Do not hit the glass with pots, pans, furniture, toys, or
other objects.
3. Do not close the oven door until the oven racks are in
place.
Scratching, hitting, jarring or stressing the glass may weaken
its structure causing an increased risk of breakage at a later
date.
Upper and Lower Oven Lights
CAUTION
To assure the proper replacement bulb is used, order bulb from
Jenn-Air. Call 1-800-JENNAIR (1-800-536-6247).
To replace oven light bulbs:
1. Disconnect power to the range.
2. When oven is cool, use fingertips to grasp edge of bulb cover.
Pull out and remove.
3. Carefully remove old bulb by pulling straight out of ceramic
base.
4. To avoid damaging or decreasing the life of the new bulb, do
not touch the bulb with bare hands or fingers. Hold with a
cloth or paper towel. Push new bulb prongs straight into small
holes of ceramic base.
5. Replace bulb cover by snapping into place.
6. Reconnect power to range. Reset clock.
• Disconnect power to oven before replacing light bulb.
• Allow oven to cool before replacing light bulb.
• Make sure bulb cover and bulb are cool before touching.
Removal of Gas Appliance
Gas appliance connectors used to connect this appliance to
the gas supply are not designed for continuous movement.
Once installed, DO NOT repeatedly move this gas appliance
for cleaning or to relocate. If this appliance has to be moved
and/or removed for servicing, follow the procedure described
in the installation instructions. For information, contact
Jenn-Air Customer Service at 1-800-JENNAIR
(1-800-536-6247).
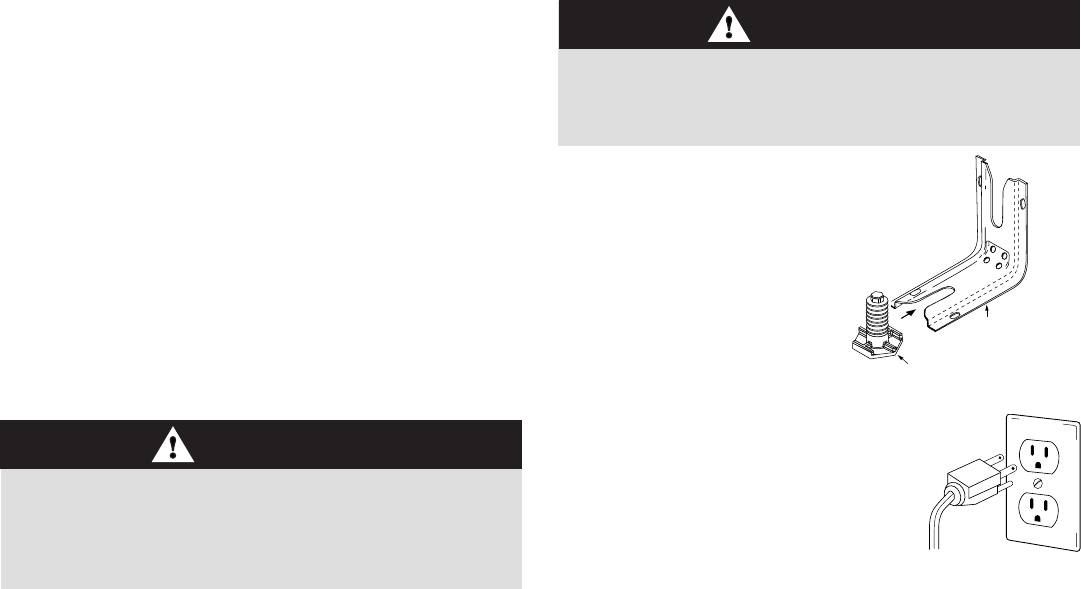
To prevent range from accidentally tipping, range must be
secured to the floor by sliding rear leveling leg into the
anti-tip bracket.
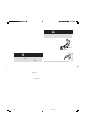
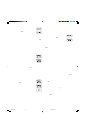
Leveling Legs
ANTI-TIP BRACKET
LEVELING LEG
LEVELING LEG
CAUTION
Be sure the anti-tip bracket secures one of the rear
leveling legs to the floor. This bracket prevents the range
from accidentally tipping.
Be sure the range is leveled when installed. If
the range is not level, turn the leveling legs,
located at each corner of the range, until
range is level.
ANTI-TIP BRACKET
Electrical Connection
Appliances which require electrical power
are equipped with a three-prong
grounding plug which must be plugged
directly into a properly grounded three-
hole 120 volt electrical outlet.
Always disconnect power to appliance before servicing.
The three-prong grounding plug offers protection against
shock hazards. DO NOT CUT OR REMOVE THE THIRD
GROUNDING PRONG FROM THE POWER CORD PLUG.
If an ungrounded, two-hole or other type electrical outlet is
encountered, it is the personal responsibility of the
appliance owner to have the outlet replaced with a
properly grounded three-hole electrical outlet.
8113P620-60 3/22/06, 4:34 PM9