8
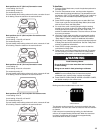
4. Select SAVE. This will return you to the Sound settings menu.
5. From the Sound menu, touch the quickset pad next to Button
Volume.
6. Adjust Button volume by touching the left quickset pad to
decrease the volume and the right quickset pad to increase
the volume. To turn Button Volume off, touch the left quickset
pad until Off is reached.
7. Select SAVE. This will return you to the Sound menu.
8. From the Sound menu, select ON or OFF on Startup/
Shutdown Sounds.
9. Press BACK to return to the Setup menu.
Screen Appearance
1. From the Setup menu, touch the quickset pad next to Screen
Appearance.
2. From the Appearance menu, touch the quickset pad next to
Brightness.
3. Adjust the screen brightness by touching the left quickset
pad to select dimmer and the right quickset pad to select
brighter.
4. Select SAVE. This will return you to the Screen Appearance
settings menu.
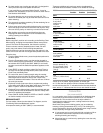
5. From the Screen Appearance menu, select ON or OFF on
Animation. When on, the animation (gradient and heat waves)
are shown while the oven is heating.
6. From the Screen Appearance Menu, touch the quickset pad
next to Theme.
7. Select an appearance to match your oven: Dark/Blue, Light/
Blue, Dark/Orange, Bronze/White.
8. After selecting a theme, a message will show: “You have
selected a new theme. The oven will reset momentarily.
Please wait....” It will take 1 minute to restart with the new
settings set.
Language
1. From the Setup menu, touch the quickset pad next to
Language.
2. From the Language menu, select your language: English or
French. This will return you to the clock display screen.
Temperature Units
1. From the Setup Menu, touch the MORE button until Temp
Units appears.
2. Touch the quickset pad next to Temp Units.
3. From the Temp Units menu, select temperature units:
Fahrenheit or Celsius.
4. Select SAVE. This will return you to the Setup menu.
Service Information
1. From the Setup Menu, touch the MORE button until Service
Info appears.
2. Touch the quickset pad next to Service Info.
3. The JennAir service phone number and website are displayed
in the screen.
4. Depending on the oven model, a Demo Mode is available.
This mode will allow you to make selections with various
options without heating the oven. Select ON/OFF to activate
or deactivate the function. When On, it will be indicated at the
bottom of the screen.
5. See “Assistance or Service” section for additional
information.
6. Select SAVE to exit screen and return to Setup Menu.
Sabbath Mode
The Sabbath Mode sets the oven to remain in a Bake setting until
turned off. A timed Sabbath Mode can also be set to keep the
oven on for only part of the Sabbath. When the Sabbath Mode is
set, only the number and Start keys will function, no tones will
sound, and the displays will not show messages or temperature
changes.
When the oven door is opened or closed, the oven light will not
turn on or off, and the heating elements will not turn on or off
immediately.
If a power failure occurs when the Sabbath Mode is set, the
oven(s) will remain in Sabbath Mode but will no longer be actively
cooking. When power returns, the display will initially show the
Jenn-Air start-up screen. After a short delay, the display will
return to the Sabbath Mode enable screen. Touch the quickset
pad next to “On” to return to the Sabbath Mode setup screen or
touch the quickset pad next to “Off” to disable Sabbath Mode
and return to the clock display screen.
To Use Sabbath Mode:
1. From the Select mode screen, touch the MORE button until
the Setup Menu appears.
2. From the Setup Menu, touch the MORE button until Sabbath
Mode appears. Press the quickset pad next to Sabbath
Mode.
3. From the Sabbath Mode menu, read the instructions on the
screen and press the quickset pad next to On to turn Sabbath
Mode on.
NOTE: Sabbath Mode disables the 12-hour shutoff. All lights
and displays are disabled, so that no visible activity takes
place when the oven door is opened.
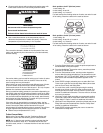
4. On double ovens, select the cavity to set up by pressing the
quickset pad next to Upper or Lower.
5. Select Oven Temperature. Use the numbered keypad to enter
a desired cooking temperature. The temperature must be
between 170°F (77°C) and 550°F (288°C) or the default
temperature appears on the screen.
6. Select Next by pressing the quickset pad next to it.
7. If a programmed Cook Time is desired, enter a Cook Time by
using the number keypad. The time length may not exceed
12:00:00. When the timer ends, the oven cavity will stop
heating.
8. Select Next by pressing the quickset pad next to it.
9. On double ovens, repeat steps 1-8 to set the second cavity, if
desired.
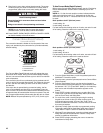
10. To set a Delayed Start, press the quickset pad next to Delay
Start. See the “Delay Start” section for additional information.
11. Press START to begin heating the oven.
12. Press CANCEL OVEN (CANCEL UPPER or CANCEL LOWER
on double oven models) to turn off the oven.
WARNING
Food Poisoning Hazard
Do not let food sit in oven more than one hour before
or after cooking.
Doing so can result in food poisoning or sickness.


