


10
Connect Vent System
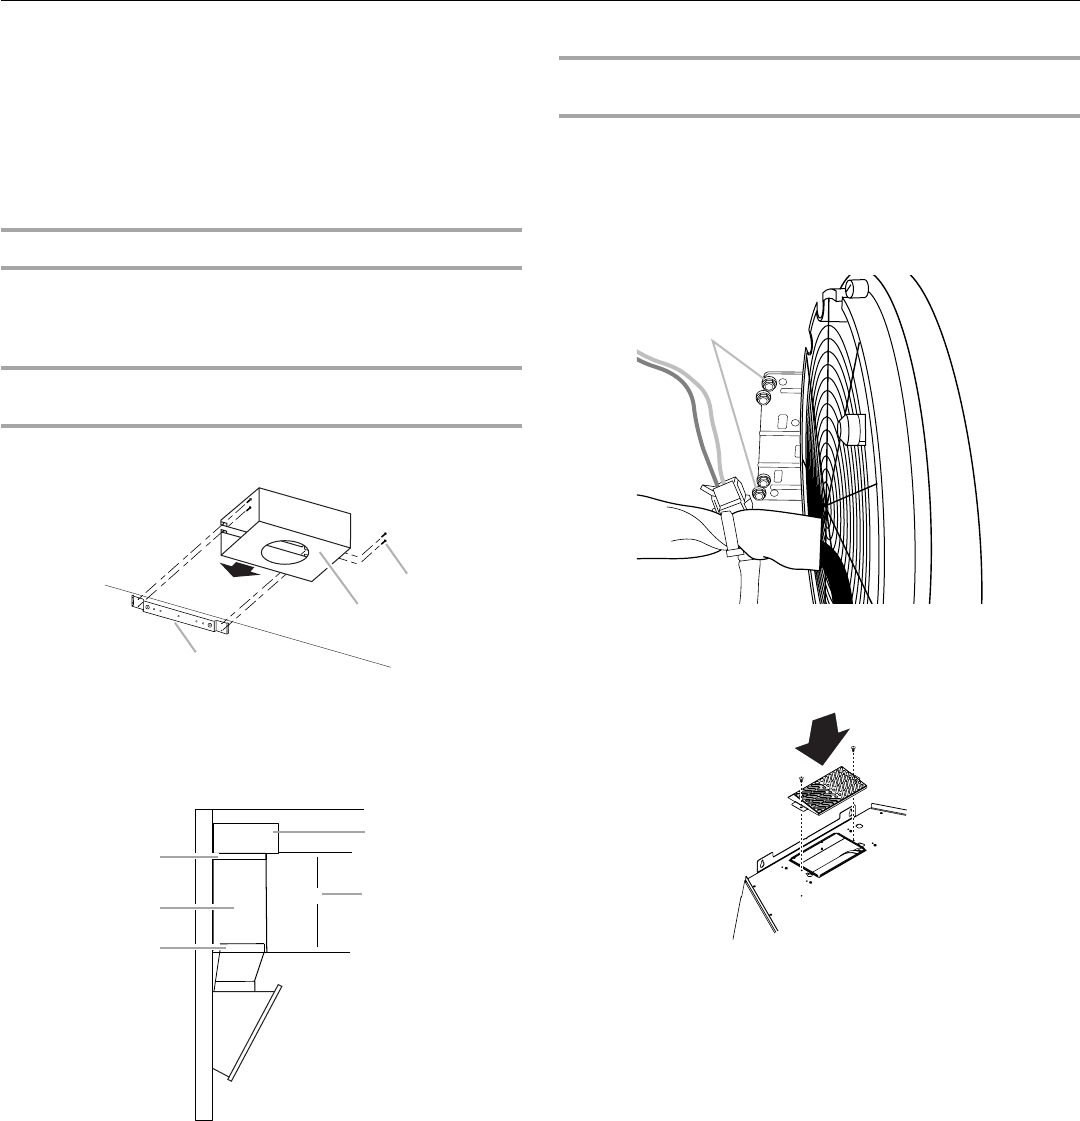
This range hood is factory set for 8" (20.3 cm) round venting
through the roof or wall. An 8" (20.3 cm) round vent system is
needed for installation (not included). To vent through the wall, a
90° elbow is needed.
This range hood can also be set for rear venting using the
3¼" x 10" (8.3 x 25.4 cm) rectangular damper (supplied). See the
“Connect Vent System - For Rear Venting Installation Only”
section.
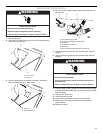
For vented installations only:
1. Fit vent system over transition piece.
2. Seal connection with clamps.
3. Check that backdraft dampers work properly.
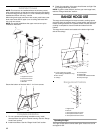
For non-vented (recirculating) installation with vent
cover only:
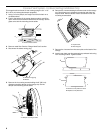
1. Assemble the air deflector with the duct cover bracket with
4 - assembly screws provided with the Recirculation Kit.
2. Measure from the bottom of the air deflector to the bottom of
the hood exhaust outlet.
3. Cut the duct to the measured size (X).
4. Remove the air deflector.
5. Slide the duct onto the bottom of the air deflector.
6. Place the assembled air deflector and duct over the exhaust
outlet from the hood.
7. Reassemble the air deflector to the duct cover bracket with
4 assembly screws.
8. Seal connections with vent clamps.
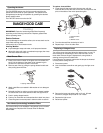
For non-vented (recirculating) installation without vent
cover only:
1. Push in the bottom of the center glass to unlatch, and lift to
open.
2. Remove metal filter. See the “Range Hood Care” section.
3. Remove the 4 mounting screws holding the 8" (20.3 cm)
diameter transition damper to the canopy top. Set the
damper and mounting screws aside.
4. Install the top grille cap using the mounting screws included
in the Recirculation Kit.
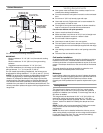
A. Assembly screws
B. Air deflector
C. Duct cover bracket
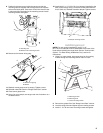
A. Air deflector
B. Vent clamp
C. X = length to cut vent duct
D. 8" (20.3 cm) dia. round vent duct
E. Hood exhaust outlet
A
B
C
X
A
C
D
B
E
A. Damper mounting screws
A