


9
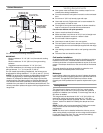
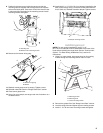
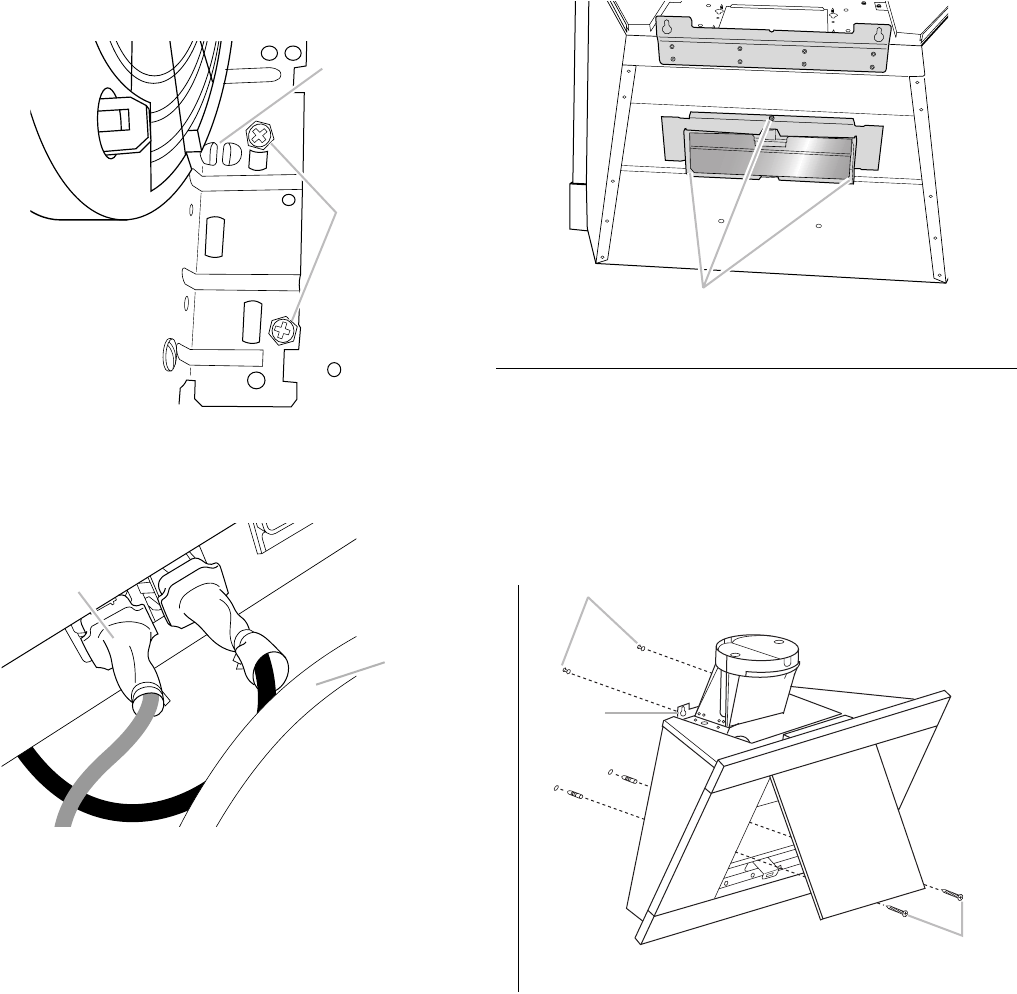
9. Position the blower motor inside the canopy so that the
mounting tabs are aligned with the large end of the keyhole
slots on the back panel. Push down to lock the blower motor
in place and align the holes for the mounting screws. Install
mounting screws and tighten.
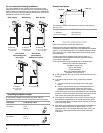
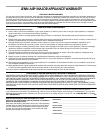
10. Reconnect the blower wiring plug.
11. Reattach center glass cover to canopy. Tighten screws.
12. Reinstall metal filter. See the “Range Hood Care” section.
13. Close center glass cover.
14. Using 2 or more people, set range hood onto its bottom on a
covered surface.
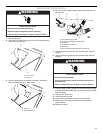
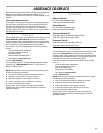
15. Install the 3¼" x 10" (8.3 x 25.4 cm) damper (supplied) to the
back of the canopy using 3 of the the screws removed from
the 8" (20.3 cm) diameter transition damper. Tighten screws.
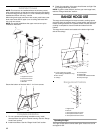
Install Range Hood
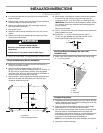
NOTE: For rear venting installations, the 3¼" x 10"
(8.3 x 25.4 cm) damper must be assembled to the back of the
hood before installing the range hood. See the “Connect Vent
System - For Rear Venting Installations Only” section for
instructions.
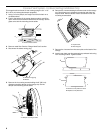
1. Using 2 or more people, hang range hood on 2 mounting
screws through the mounting slots on back of hood.
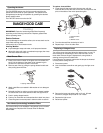
2. Remove the grease filter. See “Range Hood Care” section.
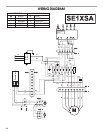
3. Level the range hood and tighten upper mounting screws.
4. Install 2 - 5 x 45 mm lower mounting screws and tighten.
A. Mounting tab
B. Blower motor mounting screws
A. Blower wiring plug
B. Blower
A
B
A
B
A. Damper mounting screws
A. Mounting screws
B. Mounting slots
C. Lower mounting screws
A
A
B
C