


19
Metal marks from aluminum and copper
■ Cooktop Cleaner:
Clean as soon as cooktop has cooled down. Rub creme into
surface with a damp paper towel or soft cloth. Continue
rubbing until white film disappears. The marks will not totally
disappear, but after many cleanings they will become less
noticeable.
Tiny scratches and abrasions
■ Cooktop Cleaner:
Rub creme into surface with a damp paper towel or soft
cloth. Continue rubbing until white film disappears. Scratches
and abrasions do not affect cooking performance, and after
many cleanings they will become less noticeable.
To avoid damage to the cooktop, do not use steel wool, abrasive
powder cleansers, chlorine bleach, rust remover or ammonia.
COOKTOP CONTROLS
To avoid damage to the cooktop controls, do not use steel wool,
abrasive cleansers or oven cleaner.
To avoid damage, do not soak knobs.
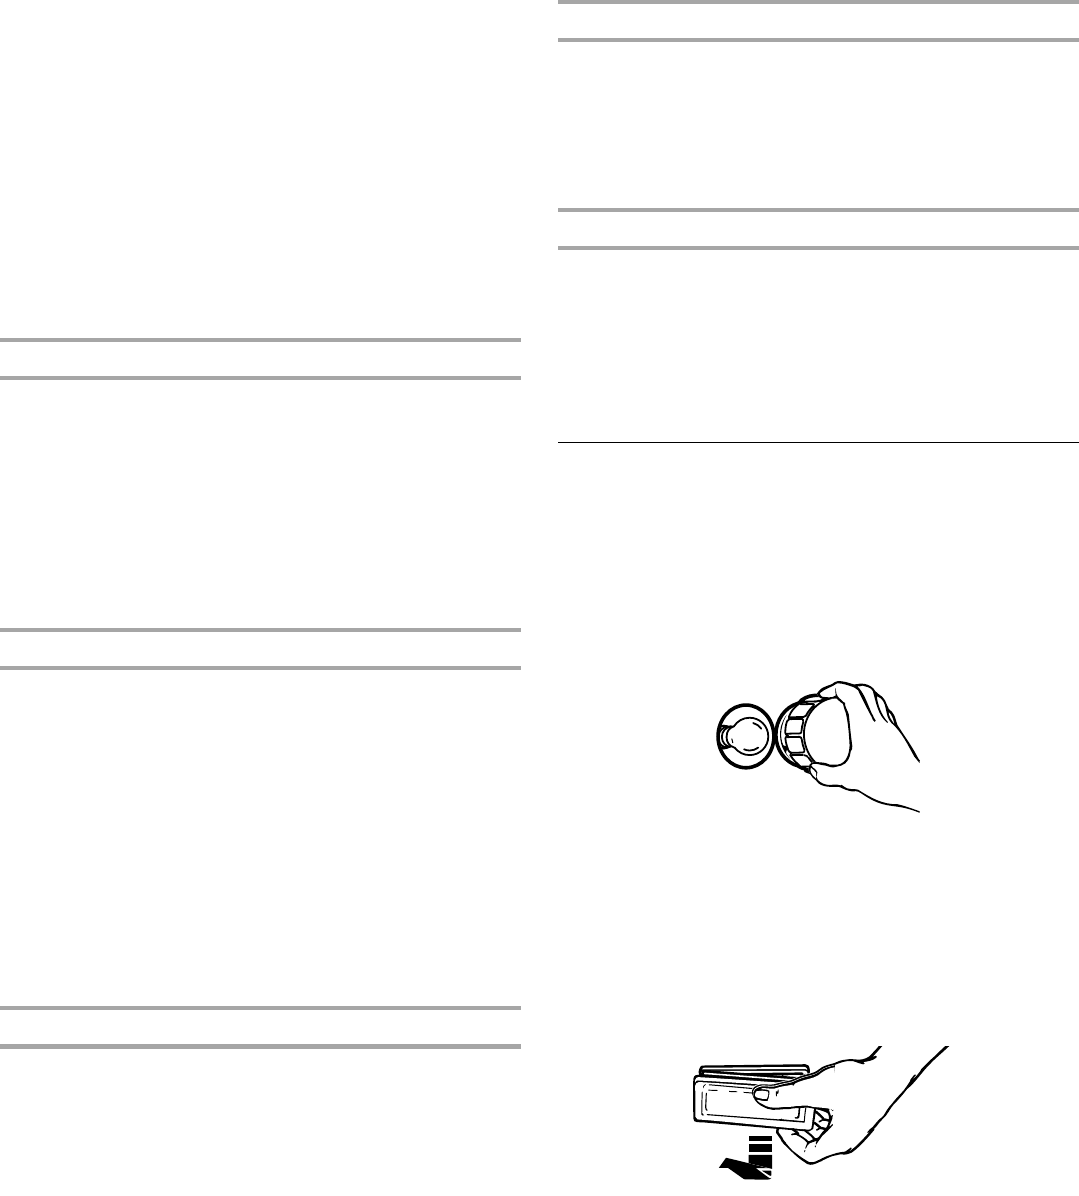
When removing or replacing knobs, make sure knobs are in the
Off position.
Do not remove seals under knobs, if present.
Cleaning Method:
■ Soap and water or dishwasher:
Pull knobs straight away from control panel to remove.
CONTROL PANEL
To avoid damage to the control panel, do not use abrasive
cleaners, steel-wool pads, gritty washcloths or abrasive paper
towels.
To avoid turning the controls on while cleaning, you may activate
the Control Lock feature (on some models). See “Control Lock”
section.
Cleaning Method:
■ Glass cleaner and soft cloth or sponge:
Apply glass cleaner to soft cloth or sponge, not directly on
panel.
■ All-Purpose Appliance Cleaner Part Number 31682 (not
included):
See “Assistance or Service” section to order.
OVEN DOOR EXTERIOR
Cleaning Method:
■ Glass cleaner and paper towels or nonabrasive plastic
scrubbing pad: Apply glass cleaner to soft cloth or sponge,
not directly on panel.
■ All-Purpose Appliance Cleaner Part Number 31682 (not
included):
See “Assistance or Service” section to order.
OVEN CAVITY
Do not use oven cleaners.
Food spills should be cleaned when oven cools. At high
temperatures, foods react with porcelain and staining, etching,
pitting or faint white spots can result.
Cleaning Method:
■ Self-Cleaning cycle: See “Self-Cleaning Cycle” first.
OVEN RACKS
Cleaning Method:
■ Self-Cleaning cycle:
See “Self-Cleaning Cycle” first. Remove racks, or they will
discolor and become harder to slide. If this happens, a light
coating of vegetable oil applied to the rack guides will help
them slide.
■ Steel-wool pad
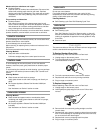
Oven Lights
The ovens use either a 120-volt, 20-watt maximum halogen bulb
and/or a standard 40-watt appliance bulb.
To Replace Standard Oven Light:
Before replacing, make sure the oven is off and cool.
1. Unplug range or disconnect power.
2. Turn the glass bulb cover in the back of the oven
counterclockwise to remove.
3. Turn bulb counterclockwise to remove from socket.
4. Replace bulb and bulb cover by turning clockwise.
5. Plug in range or reconnect power.
To Replace Halogen Light:
Before replacing, make sure the oven is off and cool.
1. Unplug range or disconnect power.
2. Use fingertips to grasp edge of bulb cover. Pull out and
remove.
3. Remove bulb from socket by pulling straight out of the
ceramic base.
4. Replace bulb, using tissue or wearing cotton gloves to handle
bulb. To avoid damage or decreasing the life of the new bulb,
do not touch bulb with bare fingers.
5. Replace bulb cover by snapping back into place.
6. Plug in range or reconnect power.