


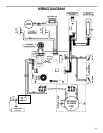
14
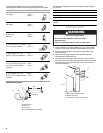
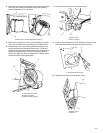
5. Install cooktop according to manufacturer’s instructions.
Check that rear of cooktop overlaps edge of retractable
downdraft vent by ³⁄₈" (9.5 mm). See “Countertop Cutout
Dimensions” in the “Location Requirements” section.
NOTE: To get the most efficient use from your new retractable
downdraft vent, read the “Vent System Use” section.
VENT SYSTEM USE
The retractable downdraft vent system is designed to remove
smoke, cooking vapors and odors from the cooktop area.
■ For best results, the vent should be operating before cooking
is started.
■ If you use large or tall utensils, place them on the large rear
element or burner surface.
■ A higher heat setting than normally used may be needed
when the downdraft vent is operating.
■ This fan is suitable for use with solid-state speed controls.
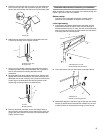
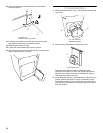
Operating Downdraft Vent
To Use:
1. Push and hold the button on top of downdraft vent for a few
seconds. (This slight delay helps avoid inadvertent raising of
the vent during cleaning of the cooktop area.) Retractable
section of downdraft vent will rise. Blower will begin to vent
immediately if blower control knob slider is set to an “On”
position.
2. Slide the control slider on the right-hand side of the
downdraft vent to adjust the blower motor speed.
When cooking is complete:
1. Push the button on top of the retractable downdraft vent. The
blower will turn off, and the retractable section of the vent will
return to the closed position.
If a spill occurs on the cooktop that allows liquids to seep inside
the downdraft, you must turn the downdraft off immediately. It is
possible to cause damage to the downdraft if water is allowed
inside the downdraft while it is operating.
1. Immediately turn off the downdraft at the speed control
located on the right-hand side of the downdraft.
2. Turn off the power supply to the downdraft at the circuit
breaker box or fuse box.
3. Allow plenty of time for the downdraft to dry naturally. Do not
open the downdraft to remove the water.
VENT SYSTEM CARE
Surface of Downdraft Vent
To avoid damaging the finish, clean downdraft vent with soap
and water. Do not use scouring powder or abrasive solutions.
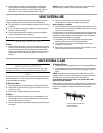
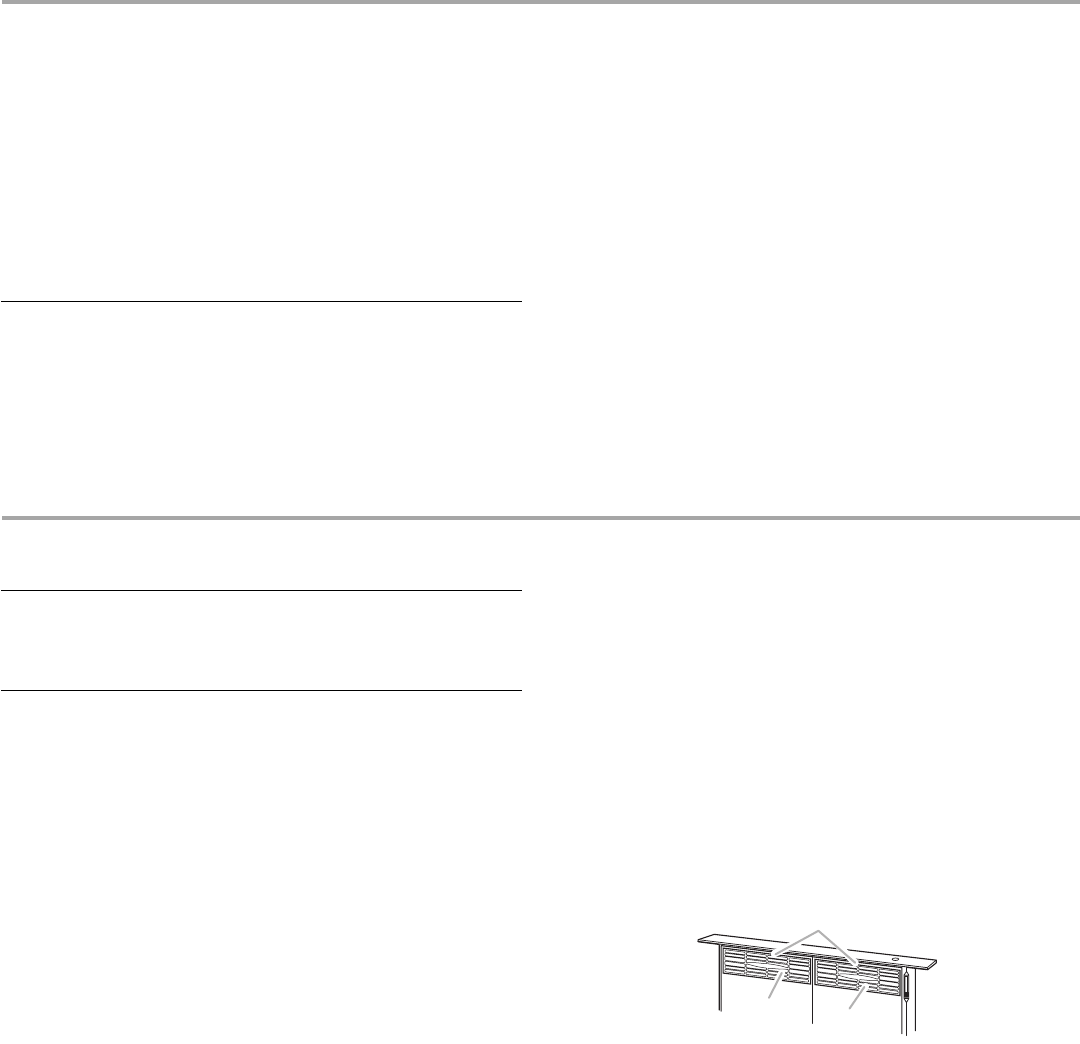
Filters
Frequently remove and clean the filter(s) in the retractable section
of the downdraft vent. This will improve the operating efficiency
of the downdraft vent system.
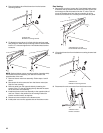
To Remove Filters:
1. Place fingertips in the embossment at the top for the filters.
2. Press down on the filters far enough for the tab at the top of
the filters to clear.
3. Pull forward to release the filter from its groove.
To Clean:
1. Remove the filter(s) and clean them in a dishwasher or in a
hot detergent solution. The downdraft vent will not operate
when the filters are not in place.
2. Dry the clean filter(s) and reinstall, making sure that they lock
into place.
To Replace Filters:
1. Place filters into the retractable section of the downdraft vent.
2. Place fingertips into the embossment at the top of the filters
and push down and back to allow the top tabs to snap into
place.
NOTE: Downdraft will not operate if the filters are not in their
proper position. If the filters’ top tabs are not locked behind the
top flange, the vent may retract but not raise back up.
If retractable downdraft vent does not operate after clean
filters have been installed:
Push the filter in as far as it will go. When the filter is removed, the
microswitch behind the filter is inactivated. This feature will not
allow the vent system to operate until the filter is properly
installed.
A. Filter removal embossment
B. Left metal filter
C. Right metal filter
C
A
B