9
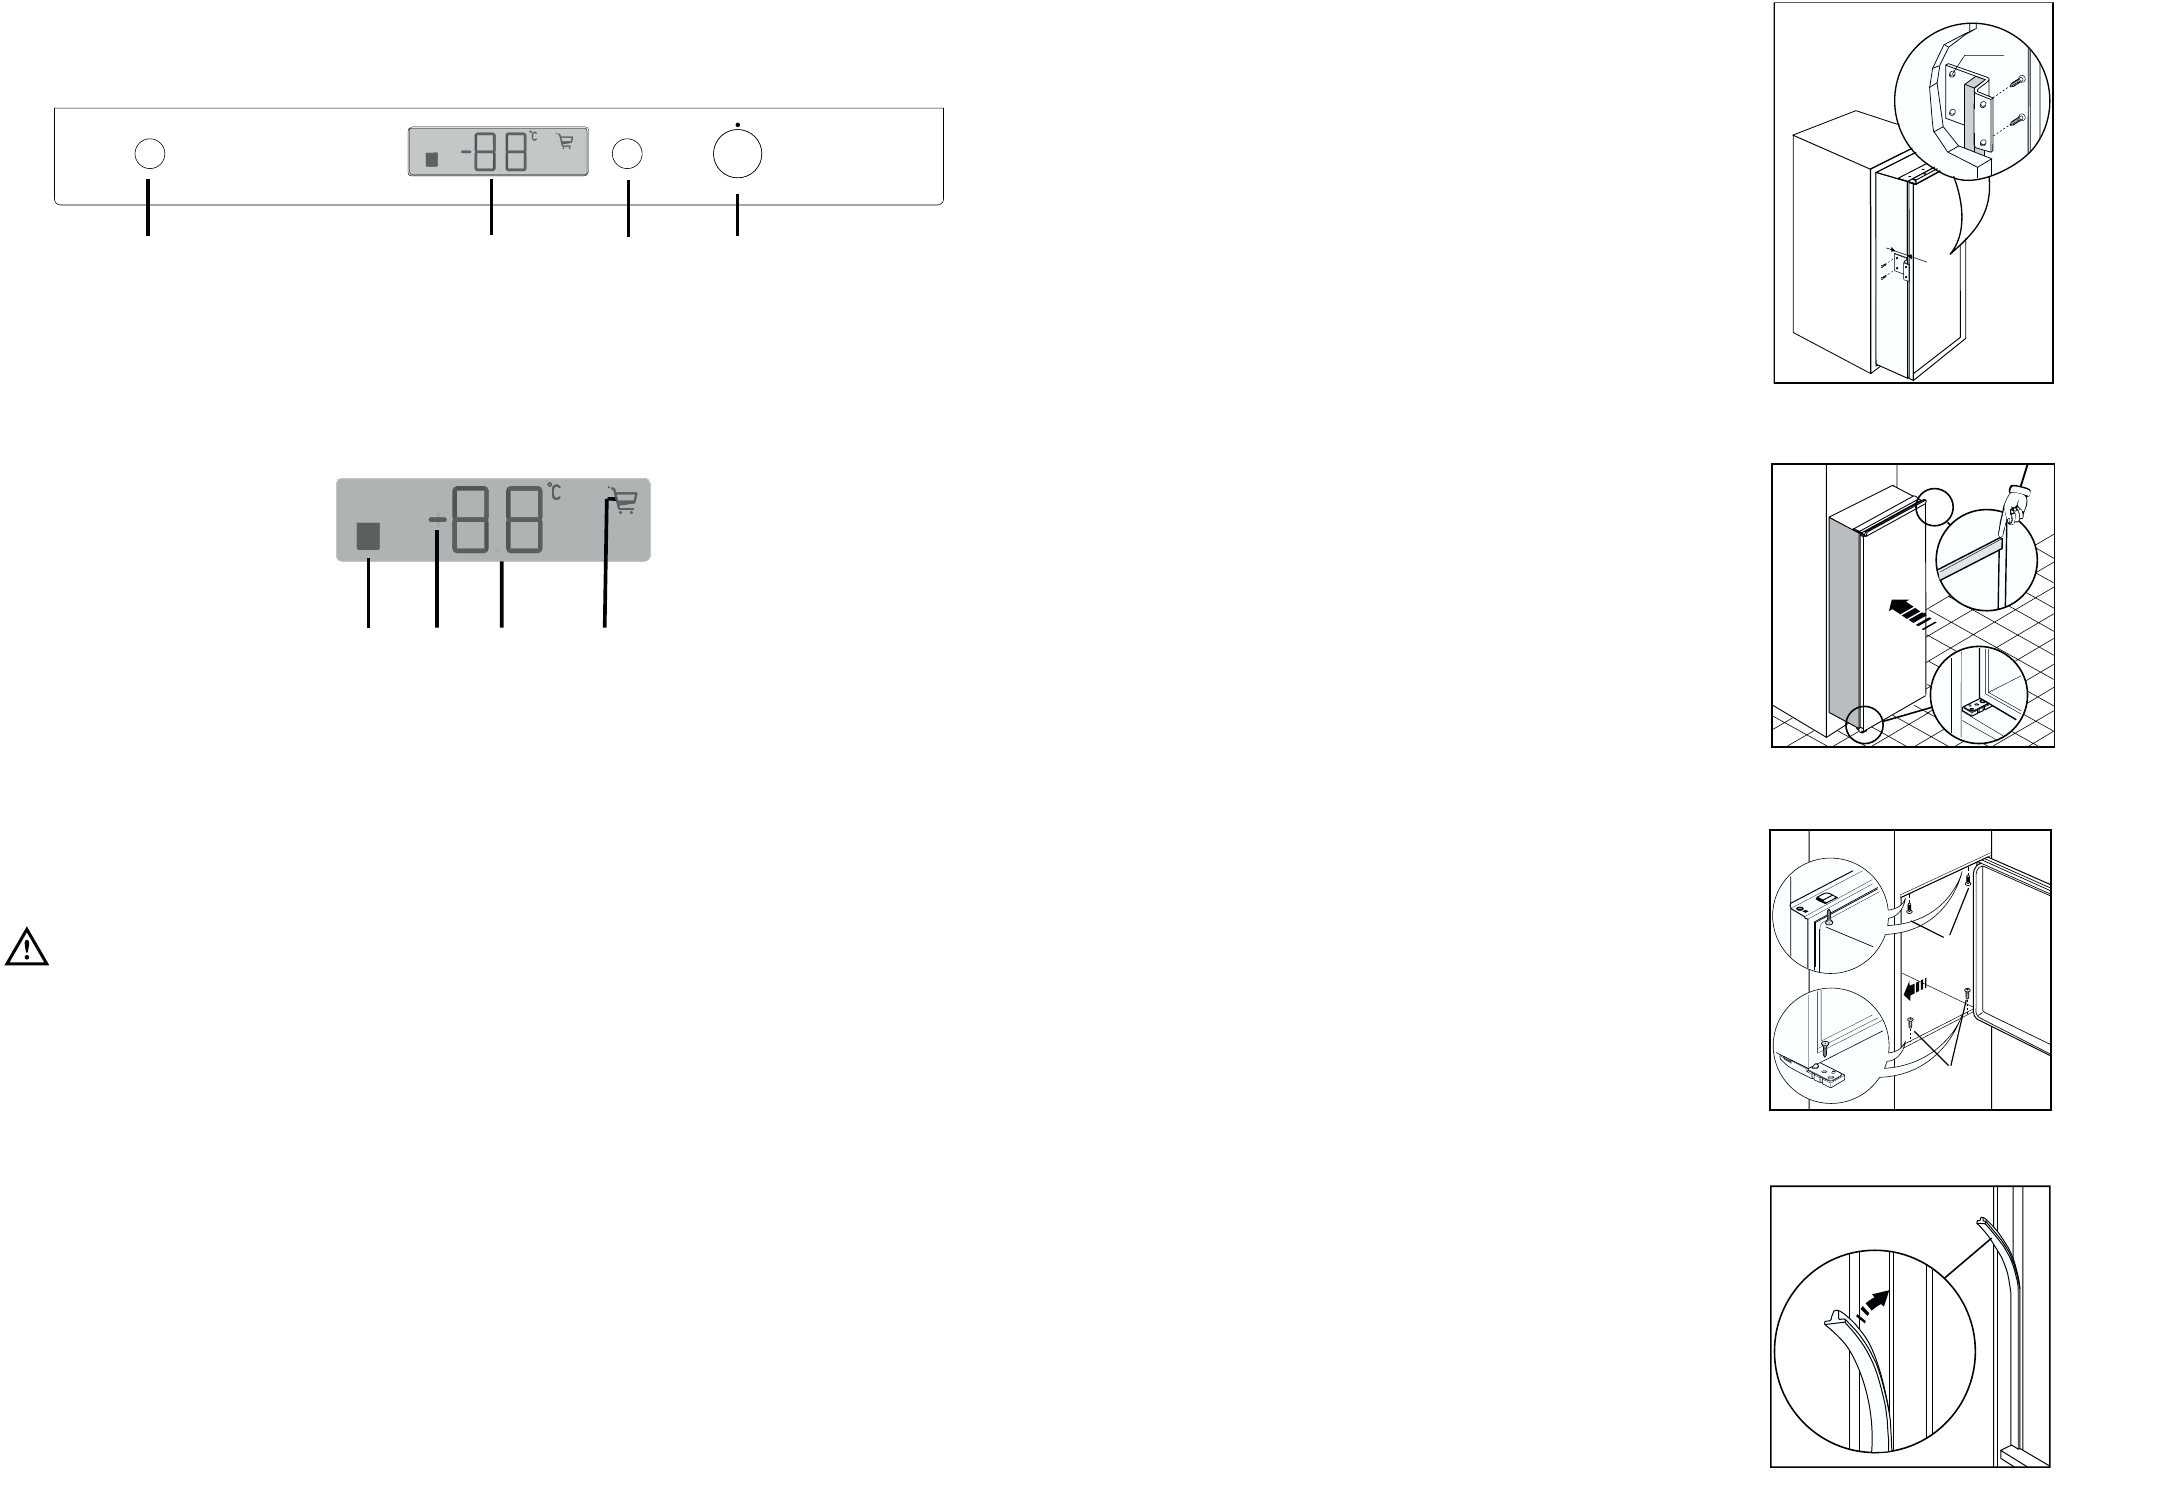
Fit the appliance in the niche by making sure that it
stands against the interior surface of the unit on the
side where the door hinges of the appliances are
fitted. Insert the appliance until the upper strip butts
up against the unit (1) and make sure that the lower
hinge is in line with the surface of the unit (2).
D724
Apply the sealing strip pushing it between the
refrigerator and the adjacent cabinet.
I
P
Fasten the appliance with 4 screws provided in the
kit included with the appliance.
(I = short) (P = long)
13mm
D740
Ø 2,5
Drill the unit using a Ø 2.5 mm drill (10 mm max.
penetration);
Fix the square fitting to the appliance.
D022
1
2
12
Push button
A - Appliance button ON/OFF
B - Temperature and function indicator
The Control Panel
3
4
1
5
2
A
B
C
D
OffOn/
Mode
DISPLAY
1
2
3
4
1. Door open alarm indicator
2. Positive or negative Temperature indicator
Switching off
The appliance is shut off by holding in button (A) for
more than 1 second.After this, a countdown of the
temperature from -3 -2 -1 will be shown.
When the appliance is shut off, display (B) also goes
off.
Activation of functions
Each time button C is pressed, the following functions
are activated in a clockwise direction:
Symbol 4 : shopping function.
No Symbol: Normal operation
When the Fridge is first
installed
Warning
Allow the appliance to stand for 2 hours after
installation.
Insert the plug into the wall socket.
After plugging the plug into the power outlet, if the
display is not illuminated, press key (A), appliance on.
As soon as the appliance is turned on, the following
signals will appear on the control panel:
• symbol (2) will be positive, indicating that the
temperature is positive.
Place the refrigerator adjustment knob (D) in a middle
position, and the appliance will be set up to provide
the following temperature:
roughly +5°C in the refrigerator.
C - Function button
D - Thermostat control knob
3. Temperature indicator
4. Illuminated when the shopping function is on


