• Place a cup underneath the frother (Fig. 15) and push the Hot
Water Button.
SYSTEM FILLING The machine will pump some
water through the frother and stop automatically.
YOUR MACHINE IS HEATING PRESS MAINT.
• Move the cup underneath the coffee spout (Fig. 14) and press
the Rinse Button (Fig. 3b).
MACHINE RINSING. The machine
will pump hot water through the coffee spout and stop auto-
matically: SELECT PRODUCT. The display will illuminate the
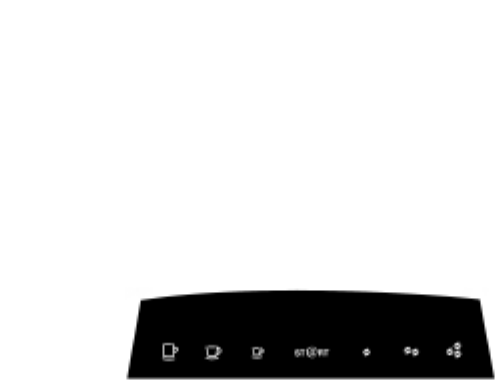
cup and strength selection as shown below:
In this setting the machine is ready to brew coffee.
• Open the bean container lid and fill with some beans (Fig. 6).
• Place an empty cup (at least 8 oz.) under the coffee spouts.
• Touch and hold your finger on the
ST@RT symbol until the
machine starts grinding. Initially, the grinding chamber may not
fill properly with ground coffee. The machine will start brewing,
then interrupt and the display will show
FILL BEANS.
• Touch and hold ST@RT again. This time the machine will grind
and brew and stop by itself. Discard this first cup of coffee.
Your next cup will be perfect (chapter 10a explains the use of
the sensor touch symbols).
Please note: If coffee only comes out of one spout, move the
spout up and down a few times to clear the internal flow.
You are now ready to make coffee.
7. ADDING COFFEE BEANS
• Open the bean container lid (Fig. 1.9), fill with beans (Fig. 6).
The container holds approx. 220 grams (8 oz.). Close the lid.
Frozen Beans: Let them thaw for 3 to 4 hours before adding
into the bean container. This will prevent moisture from seeping
into the grinder.
Sugar Coated Beans: DO NOT fill sugar coated beans into the
grinding chamber. The sugars will stick to the burrs and clog the
flow of ground coffee. Have your local coffee emporium grind
the sugar coated beans for you and use as described in chapter 11.
Using Oily Beans:
Beans with an oily surface tend to stick together. This may
prevent a continuous flow of beans from the bean container into
the burrs. As a result the grinder does not grind enough coffee
and you might get weak or no coffee at all. Stir the beans in the
bean container just before grinding. Alternatively, you can also
pour the beans in an open bowl and let them sit for about 5
hours. The oils will evaporate (this will not change the taste of
your coffee). Then fill the beans into the bean grinder. Now
beans will feed into the burrs more easily.
8. ADJUSTING THE GRINDER
You can adjust the grinder to the roast of your coffee.
We recommend the following:
Light roast: use a finer adjustment.
Dark roast: use a coarser adjustment.
• Open the lid of the bean container (Fig. 1.9).
• To adjust grinding turn the selector switch to the desired
position (Fig. 7).
The smaller the dots, the finer the grind. The bigger the dots, the
coarser the grind.
SELECT PRODUCT
12.


