5
SERVICE (continued)
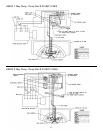
D. HEATER ELEMENT(S)
Removal:
1. Disconnect filter from electrical power source.
NOTE: Remove all oil from filter vessel. Filter must
be positioned on its end to access heater
element(s).
2. Raise front (power cord) end of filter and rest filter on
oil absorbing rags on its back end.
3. Remove bottom cover attaching screws; remove
bottom cover.
4. Remove electrical leads from defective heater
element(s). Tag leads as they are disconnected to
assure, during replacement, they are reconnected to
the proper terminals.
5. Loosen heater element(s) cover attaching nuts
sufficiently to release defective heater element(s).
Carefully remove heater element(s) being careful not
to dislodge cover insulator(s).
Replacement:
1. Carefully position replacement heater element(s)
between filter vessel and cover insulator(s).
2. Tighten loosened heater elements cover attaching
nuts to secure heater element(s) in position against
filter vessel.
3. Connect tagged electrical leads to heater element(s).
4. Secure bottom cover with removed attaching screws.
5. Position filter right-side-up and clean up oil absorbing
rags.
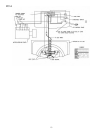
E. PUMP AND MOTOR
Removal:
1. Disconnect filter from electrical power source.
NOTE: Remove all oil from filter vessel. Filter must
be positioned on its end to access pump and
motor.
2. Disconnect hand hose assembly from quick
disconnect on discharge port on defective pump and
motor.
3. Raise front (power cord) end of filter and rest filter on
oil absorbing rags on its back end. Remove bottom
cover.
4. Remove attaching screws securing front panel. Tilt
back front panel to expose pump and motor.
5. Remove motor junction box cover and remove
electrical leads from motor terminals. Tag leads as
they are disconnected to assure, during replacement,
they are reconnected to proper terminals.
6. Unscrew coupling nut securing suction tube under
filter vessel from plumbing connected to pump and
motor suction port. Oil absorbing rags should be
available as some oil spillage should be expected.
7. While supporting pump and motor, remove attaching
nuts, flat washers and screws; remove pump and
motor. Note orientation of plumbing elbows at pump
suction port and then unscrew these parts.
8. Remove motor junction box cover and disconnect
electrical leads from motor terminals. Tag leads as
they are disconnected to assure, during replacement,
they are reconnected to the proper terminals.
Replacement:
1. Install removed plumbing parts into replacement
pump and motor suction port in same orientation
noted at removal using teflon tape or a good food
grade pipe joint compound on male threads only of
disassembled plumbing parts.
2. Position pump and motor onto its base and secure
loosely with removed screws, flat washers and nuts.
3. Connect tagged electrical leads to motor terminals.
Install motor junction box cover.
4. Tighten suction tube coupling nut onto mating pump
suction port fitting. Then fully tighten pump and motor
mounting hardware.
5. Position front panel onto frame and secure in position.
Install bottom cover.
6. Position filter right-side-up and clean up oil absorbing
rags.
7. Connect hand hose assembly to quick disconnect on
discharge port.


