


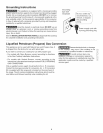
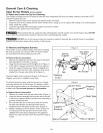


Grounding instructions
This appliance is equipped with a 3-prong grounding
plug for your protection against shock hazard and should be plugged
directly into a properly grounded receptacle. DO NOT cut or remove
the grounding prong from this plug. If a 2-prong wall receptacle is the
only available outlet, it is the personal responsibility of the consumer
to have it replaced with a properly grounded 3-prong wall receptacle
installed by a qualified electrician.
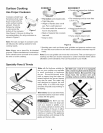
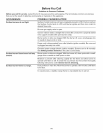
Grounding
type wall
receptacle
Do not, under any
circumstances, cut,
remove, or bypass
the grounding
prong.
Avoid fire hazard or electrical shock. DO NOT use an
adapter plug, an extension cord, or remove grounding prong from
electrical power cord. Failure to follow this warning can cause serious
injury, fire or death.
See the INSTALLATION INSTRUCTIONS packaged with this cooktop
for complete installation and grounding instructions.
Power supply cord with
3-prong grounding plug
Liquefied Petroleum
This appliance can be used with Natural Gas and Propane Gas. It
is shipped from the factory for use with natural gas.
If you wish to convert your cooktop for use with propane gas:
For models with Open Burners, convert according to directions
in the Gas Cooktop Installation Instructions.
For models with Sealed Burners, convert according to the
instructions in the attached envelope marked FOR LP/PROPAN E
GAS CONVERSION.
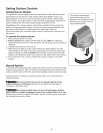
(Propane) Gas Conversion
Severe electrical shock, or damage
to the cooktop, may occur if the cooktop is not
converted by a qualified installer or electrician.
To avoid serious injury, any
additions, changes or conversions required in
order for this appliance to satisfactorily meet the
application needs must be made by a qualified
service agent.
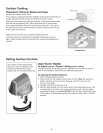
Only a qualified service agent should perform the L. R conversion.
Contact the local gas provider for conversion. An L. R Conversion
Kit is supplied with this range and is located on the main back of
the range. The kit contains installation instructions which must be
read before and followed carefully when installing the kit.
!iI...................
...........ii.......